Automatically create images with Make (ex Integromat)
In this tutorial, our goal will be to automate image creation thanks to Abyssale & Integromat. This will allow you to save time if you create social media content on a regular basis
Recruiting new talents requires a time investment, of course. Promoting a new job offer available on social media also requires time, even though we are aware it radically increases the chances of finding the right profile. This is why several HR solutions and tools have appeared on the market, stemming from a real need. With these it is possible to automate certain tasks and thus reduce the investment in time. In this article we are interested in the promotion part of job ads, to see how it is possible to automate image creation for job posting on LinkedIn.
To give you a better outlook , we’ll use the following exemple:
Let’s say we are a recruitment agency called Bodesk, specialized in executive positions, that is actively looking for talents every day. The “hunt” of new talent to fill the numerous propositions we have for our clients, is really time consuming. We have a large number of different job offers, and want to create attractive visuals to promote them.
The goal here is to automate this image creation task using Abyssale, to post images on Linkedin for each new job offer we have.
We create our abyssale template to define how our visuals should look like. For this, we go to our dashboard and click on Create new template > Browse template. Then, we choose one from the Public Template library in the HR section.
First of all as it is for a Linkedin communication, we’ll choose the LinkedIn-square format for our template. Then we design the image element by element & layer by layer.
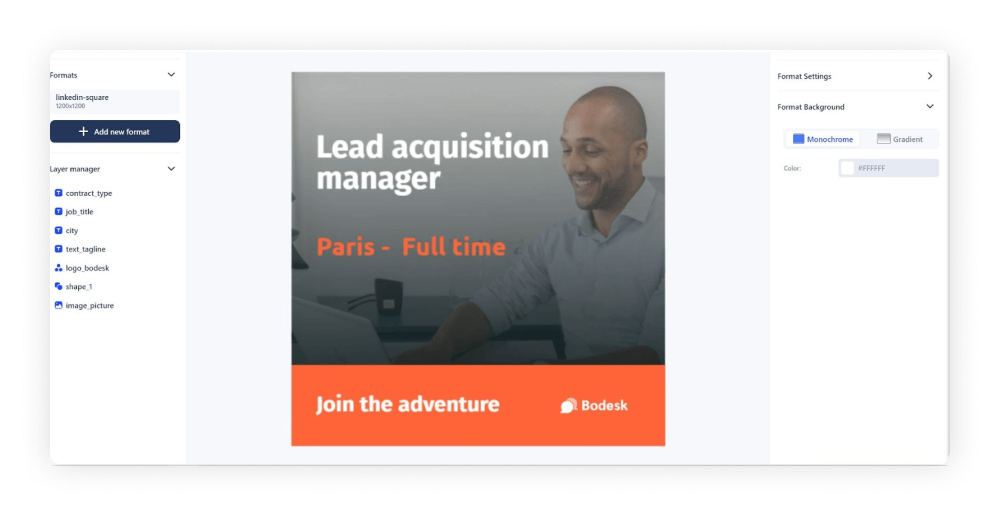
And we name our layers, especially the ones that will be changing according to the different job offers.
To rename a layer we just click on an element, and change the name in the settings section of the right side bar then click on Rename
To that we add our tagline & logo in an orange band at the bottom of our visual (logo, shape_1 and text_tagline)
Then it is time to define our visual variation, with just a simple Google Sheet.
We create a column for each one of our changing layer (job_title, city, contract-type, image_picture) and we fill in the different variations :
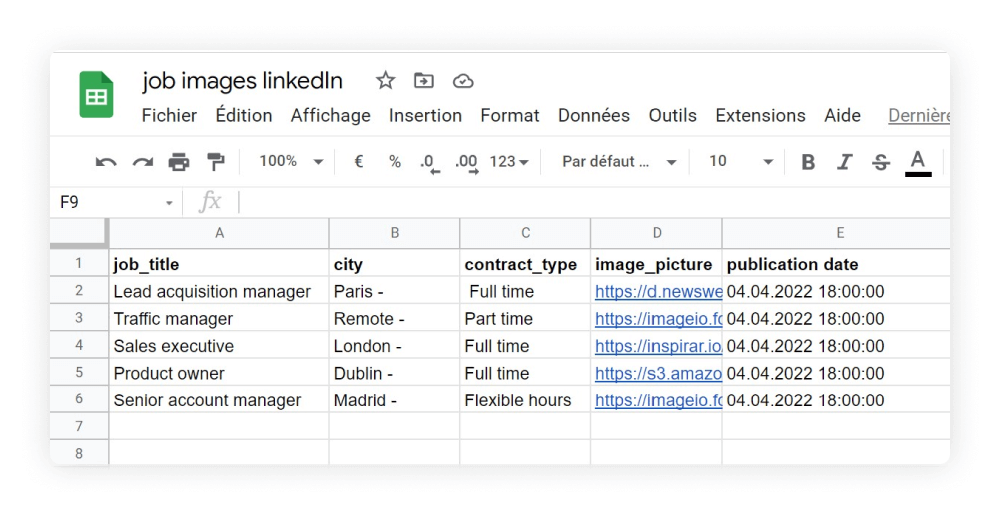
Important : You have to pay attention to the url formats of your picture and to the size of your text. As you designed text zones in Abyssale , your different titles have to fit these text zones.
If you want to post your visuals on different days, do not forget to add a “publication date” column. For demonstration purposes, we created one here with all the same publication date.
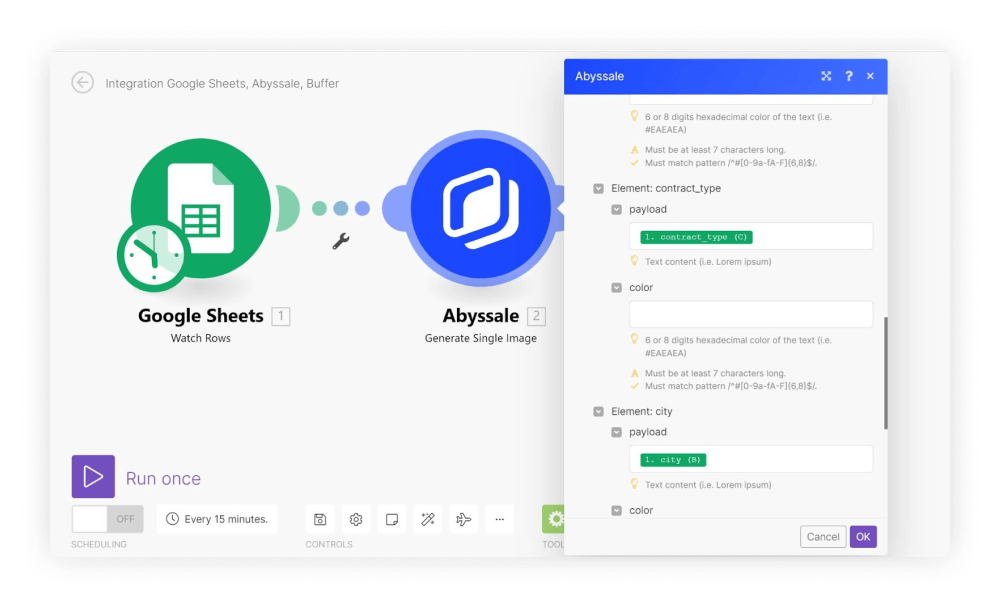
Now that we have designed our template and filled our data, it is time to create a scenario to auto post on Linkedin. With make (ex Integromat), we want to fetch the data in our GSheet, then use them in our Abyssale template and put it on Buffer to schedule our different publications. This will thus, give us 3 modules , Sheets, Abyssale, Buffer (we use buffer to schedule our social media posts).
We first create a Watch Rows Google Sheet module.
We connect our account, our Sheet and set the limit
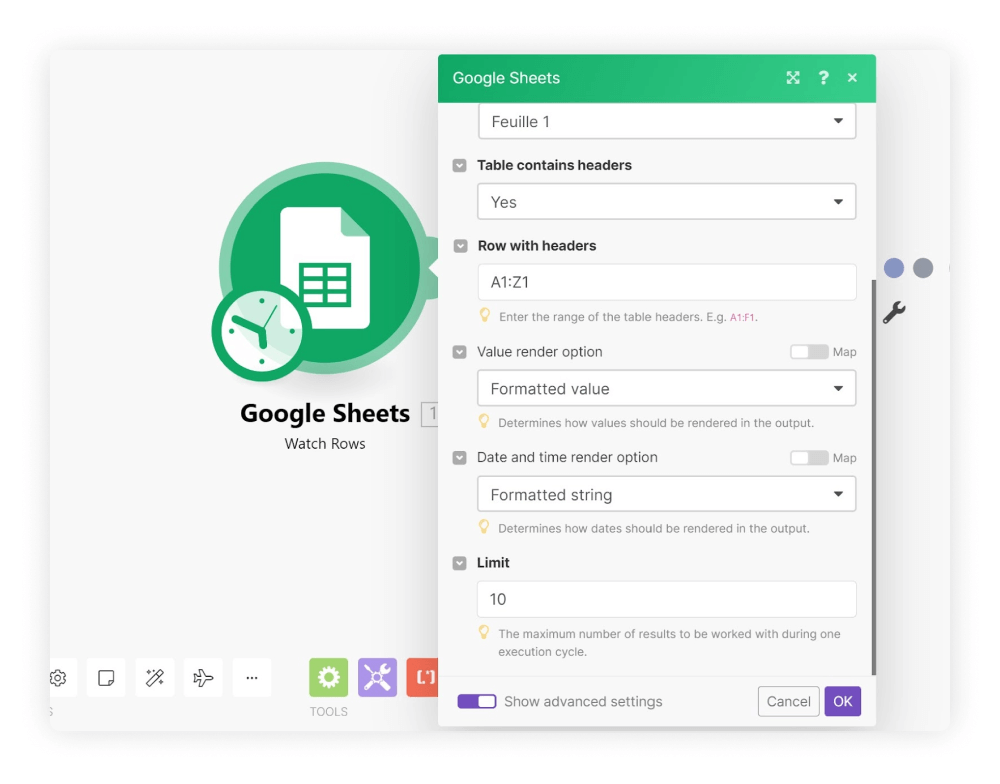
Note : We choose “Watch rows” as it will watch for every new row created on our Gsheet. This way if a new job offer comes in, it will automatically create a new visual and post it on LinkedIn as long as we insert a date & time in our publication date column.
To that we add a second module :
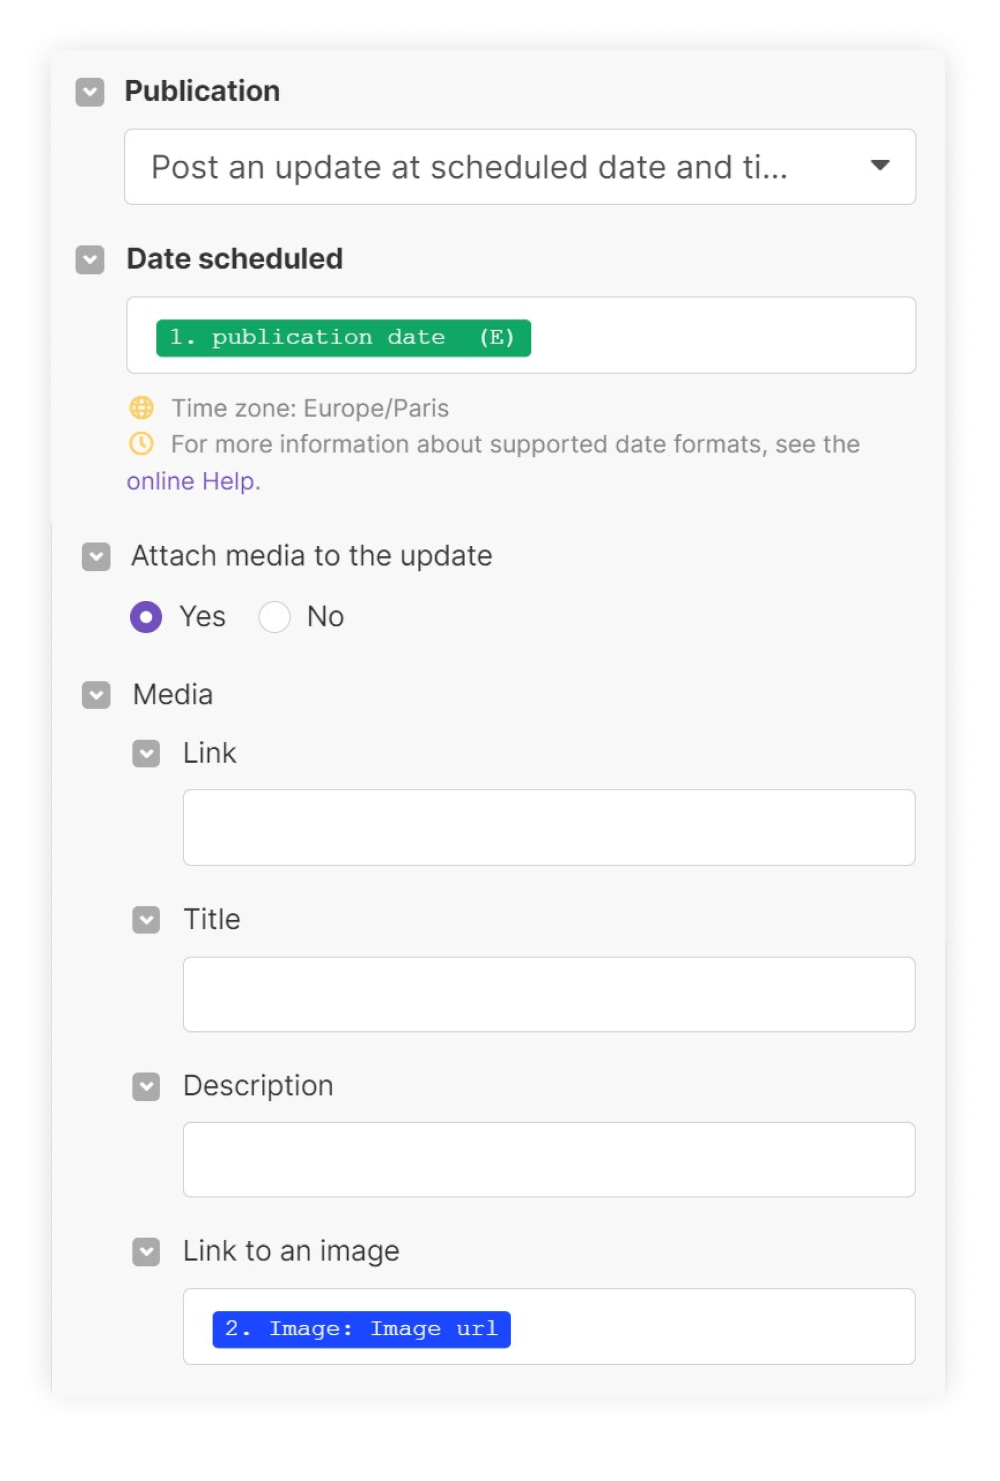
Finally we create a “Create a status update” Buffer module. After connecting our account and choosing the right page to post, we define our text.
In the Publication section, we choose “Post an update at a scheduled date and time” and this is where we’ll use our Gsheet publication date column.
Warning it is important to check that the publication date & time is set for a time in the future
Then, for “Attach media to the update” we choose “Yes”, so that we can match our Abyssale image URL to “Link to an image”
To check if it all works you can click on “Run once”
When done correctly you should see your scheduled publications in your Buffer account:

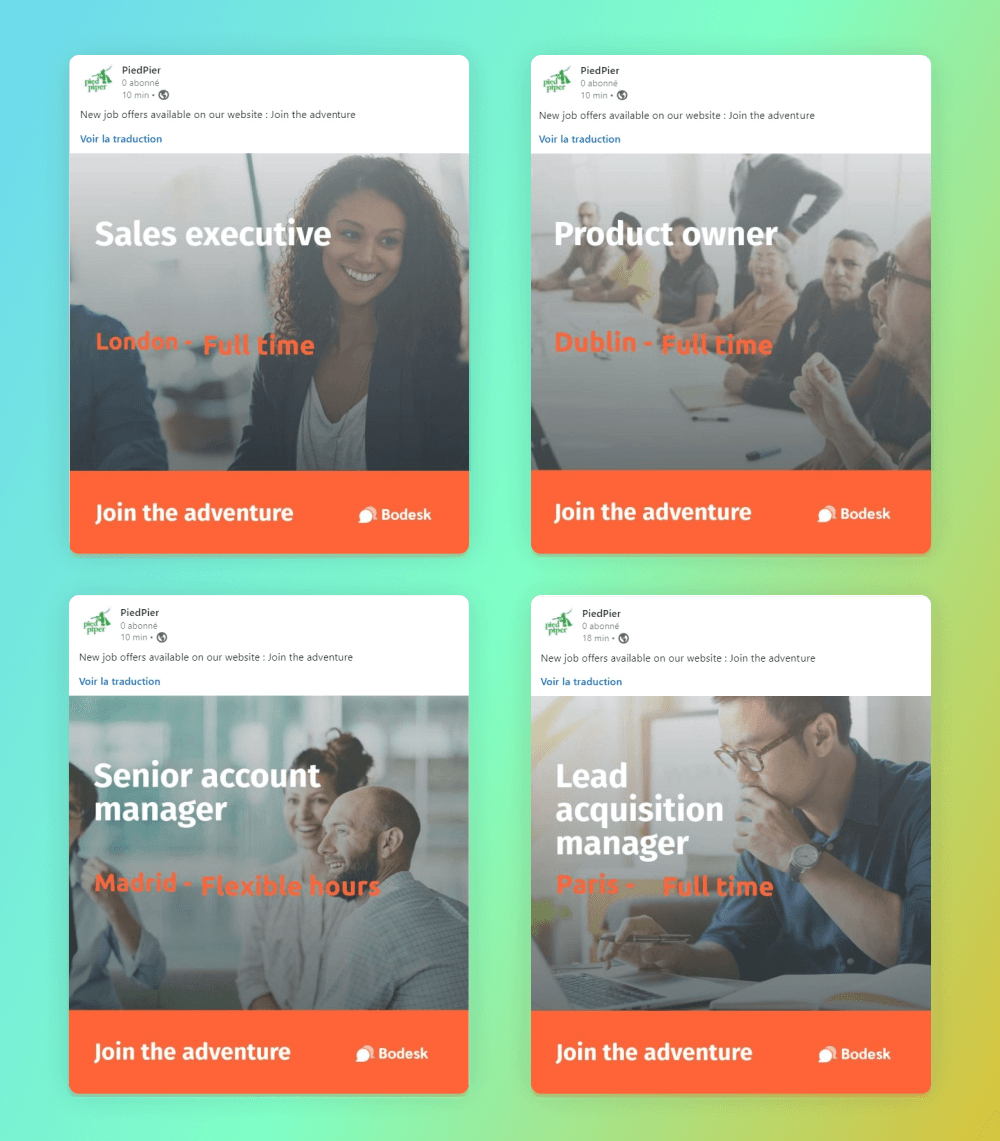
The day of the publication (or if you’ve chosen to post immediately) you can see the result on your LinkedIn page :
Explore our guides and tutorials to unlock the full potential of Abyssale's spreadsheet feature for scaled content production.