Send personalized images in Mailchimp emails
Hyper personalize your emailing campaigns using Mailchimp dynamic images! Add your merge tags to a simple dynamic image URL and let Abyssale do the rest.
On top of that, more and more companies rely on cold outreach to generate leads. For that, you can use a variety of cold email tools. But something still remains neglected, it's personalization!
Whether it is to speak to your clients in a fun way, to further personalize your next cold emailing campaign, to promote a new product or even to launch your promotion campaign, personalized images can make the difference and make you stand out from the flow of daily outreach emails we receive.
But creating images usually takes time and are quite rigid and difficult to personalize.
Today, we’ll show you how to send personalized images with Woodpecker, using the Dynamic image feature of Abyssale.
Let's say you are a textile supplier who sells fabrics online. Your two biggest target customers are the garment industry and the furniture industry. You have decided to run a new cold email campaign, in which you will offer a coupon code. Each one of your 2 targets will have different promotions, but for the same collection. Your goal is to set up an automated cold email campaign to offer both of them their own discount and to add a personal touch by sending them personalized images into your cold emails.
The first thing you need to do is create your Abyssale template. When logging into your account, go to your Dashboard and click on "Create New template".
When designing our template, we keep in mind the part that we want to personalize.
For us , the Industry will be changing as it is a campaign for both the garment and furniture industry.
Not only the industry we address but also the % of discount we offer. Our first offer for the garment industry will include a 50% discount and the second one for the furniture industry, a 40% discount.

This is why our layer naming is also really important. For the title of our visual, we divided it into 3 different text zones (and layers).
The “SPECIAL” is generic and will not change, we named this layer title_1
The “ SHOES'' is a personalized area and will change according to the industries we address. We named this layer contact_industry.
And the INDUSTRY is also generic and is just ending a sentence. We named this layer title_2
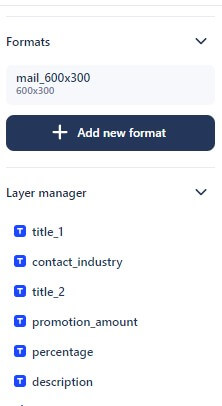
Now for the “50%” we also divided it in two layers, one for the amount (promotion_amount, the “50”) and the other for the percentage symbol (percentage). Only the promotion_amount will change.
Finally, we choose the right format for us. ( mail)
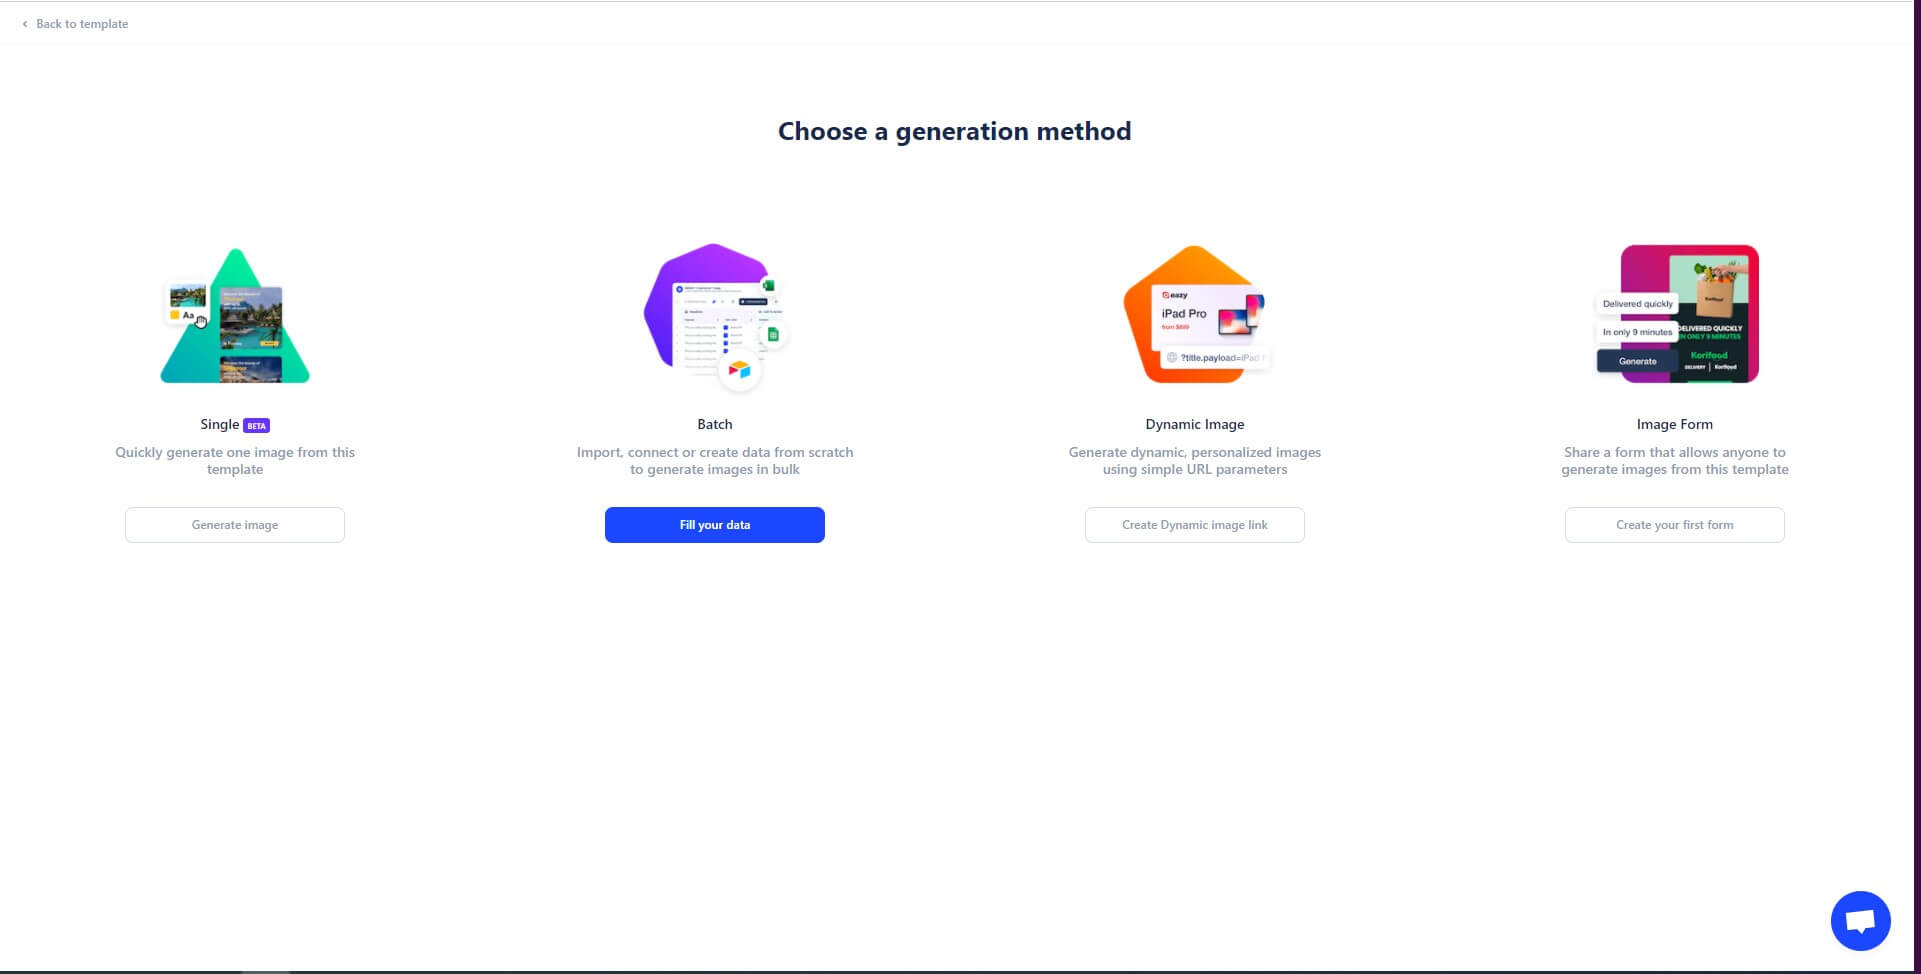
Now that we have designed our image. It is time to create the dynamic image link. When saving your template you’ll have several options to generate your image. Choose Create Dynamic image link .
Then, after naming your dynamic image, you’ll have to build your link.
It is a custom link that we’re creating here, which means that we can choose to add every layer we want to personalize further.
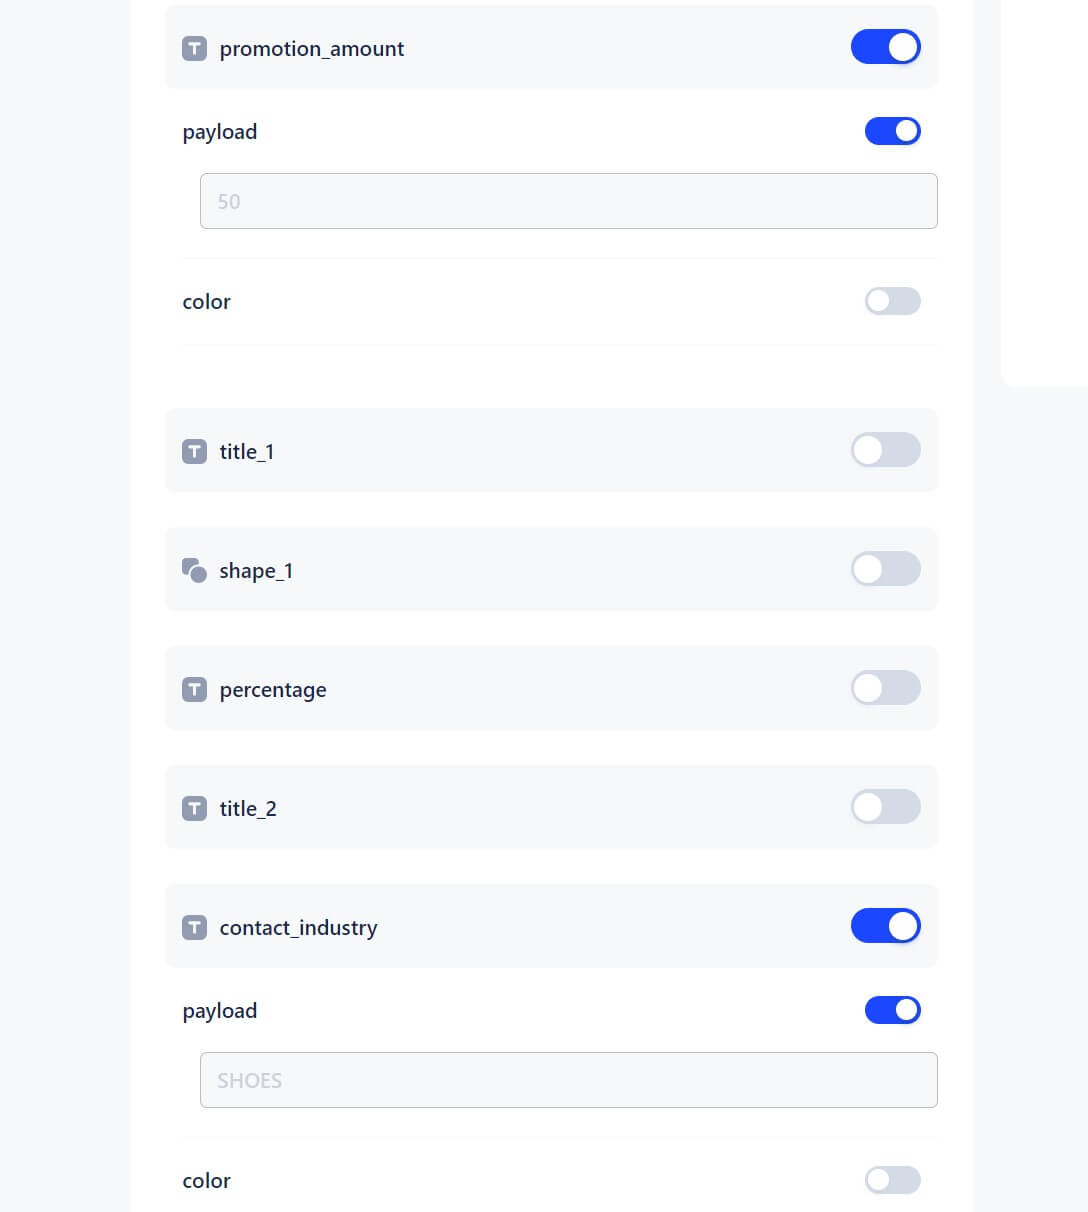
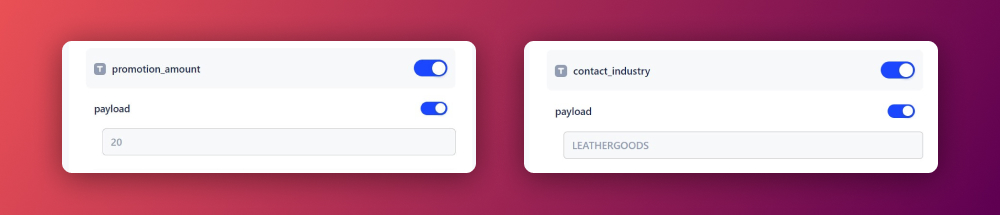
For example here we are switching on the :
As it is that information that we want to personalize on our image.
When switching them on, we can see in the preview window link that our URL is changing.
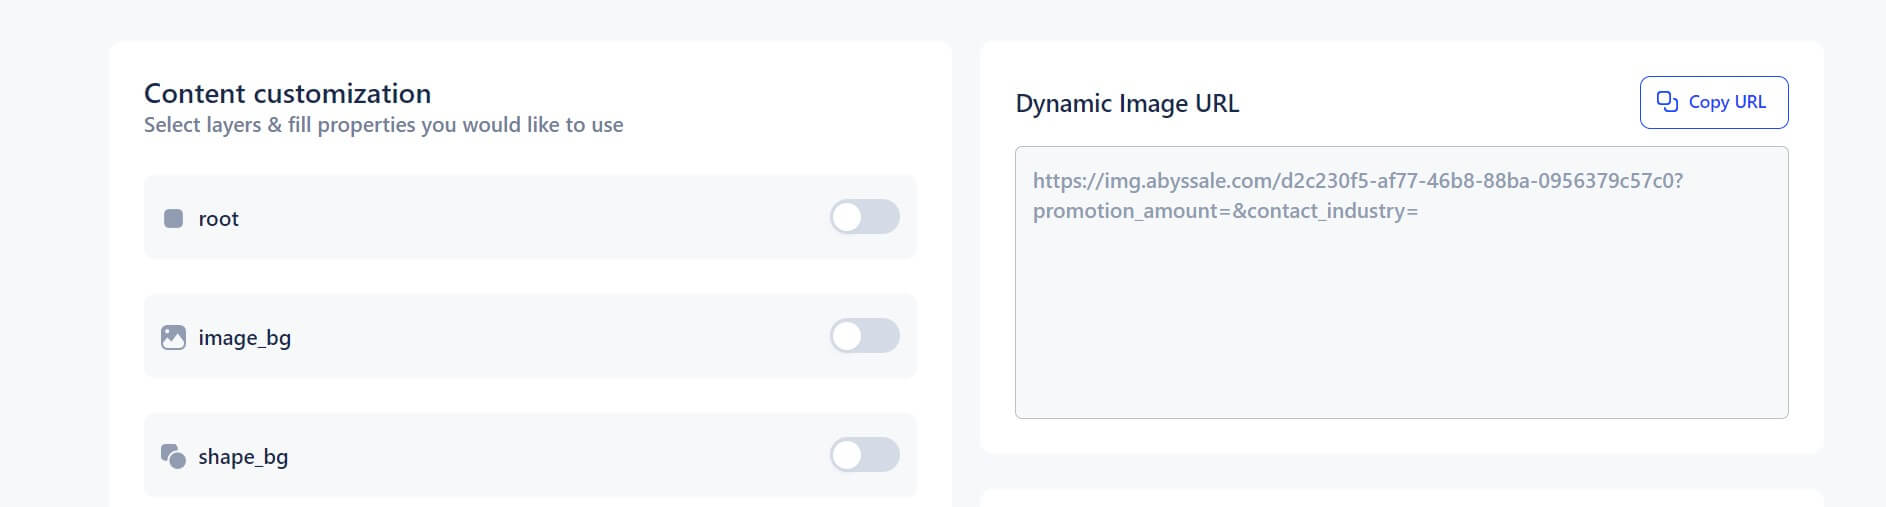
And so we have our 2 personalized layers at the end of our URL (here in blue the amount of the discount we want to apply for each one of our targets, and in pink the industry they belong to)
If you want to know what your image will look like you can have a preview just below the link preview window.
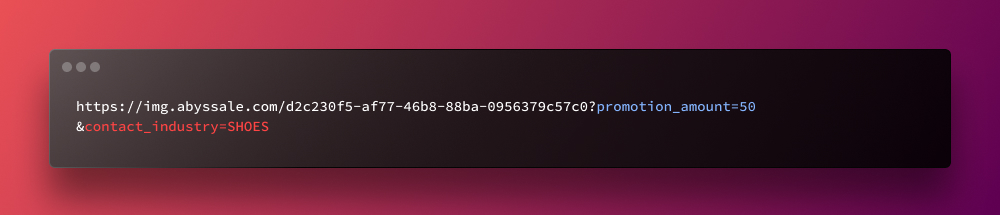
For example, here if we want to know what it would look like if we did a campaign for our clients in the leather goods industry and offer them a 20% discount : We change the payload promotion_amount and contact_industry.
Then we click on preview image :
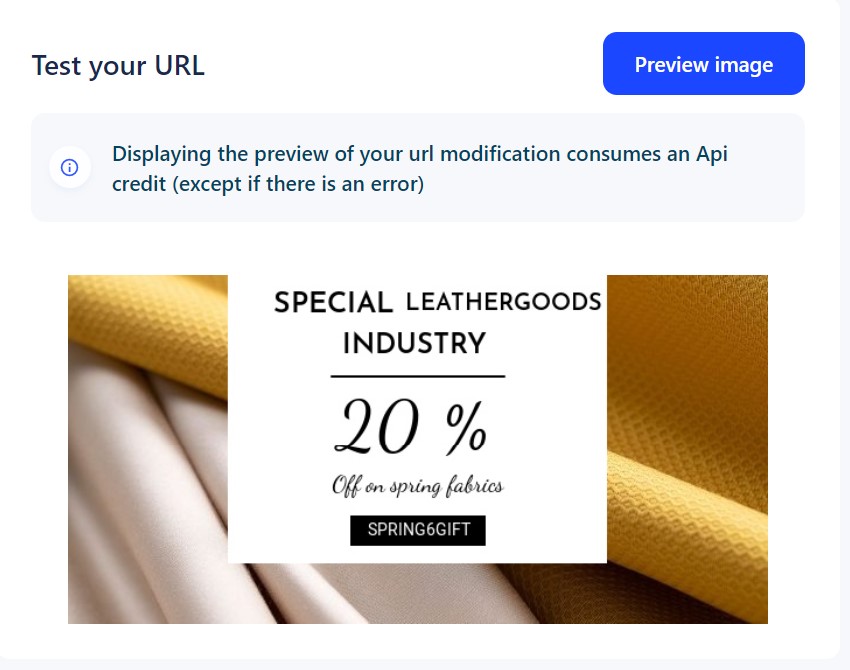
Here we go ! Previewing my image according to our different variations is really useful to see if the design still works, or if we need to change my template, in order to make it work for every variation. Here it is clear that the leather goods industry is too long for my title design.
Now in Woodpecker , we create a new campaign, that we named : Woodpecker & Abyssale : Spring fabrics promotion
Then we write our cold email :
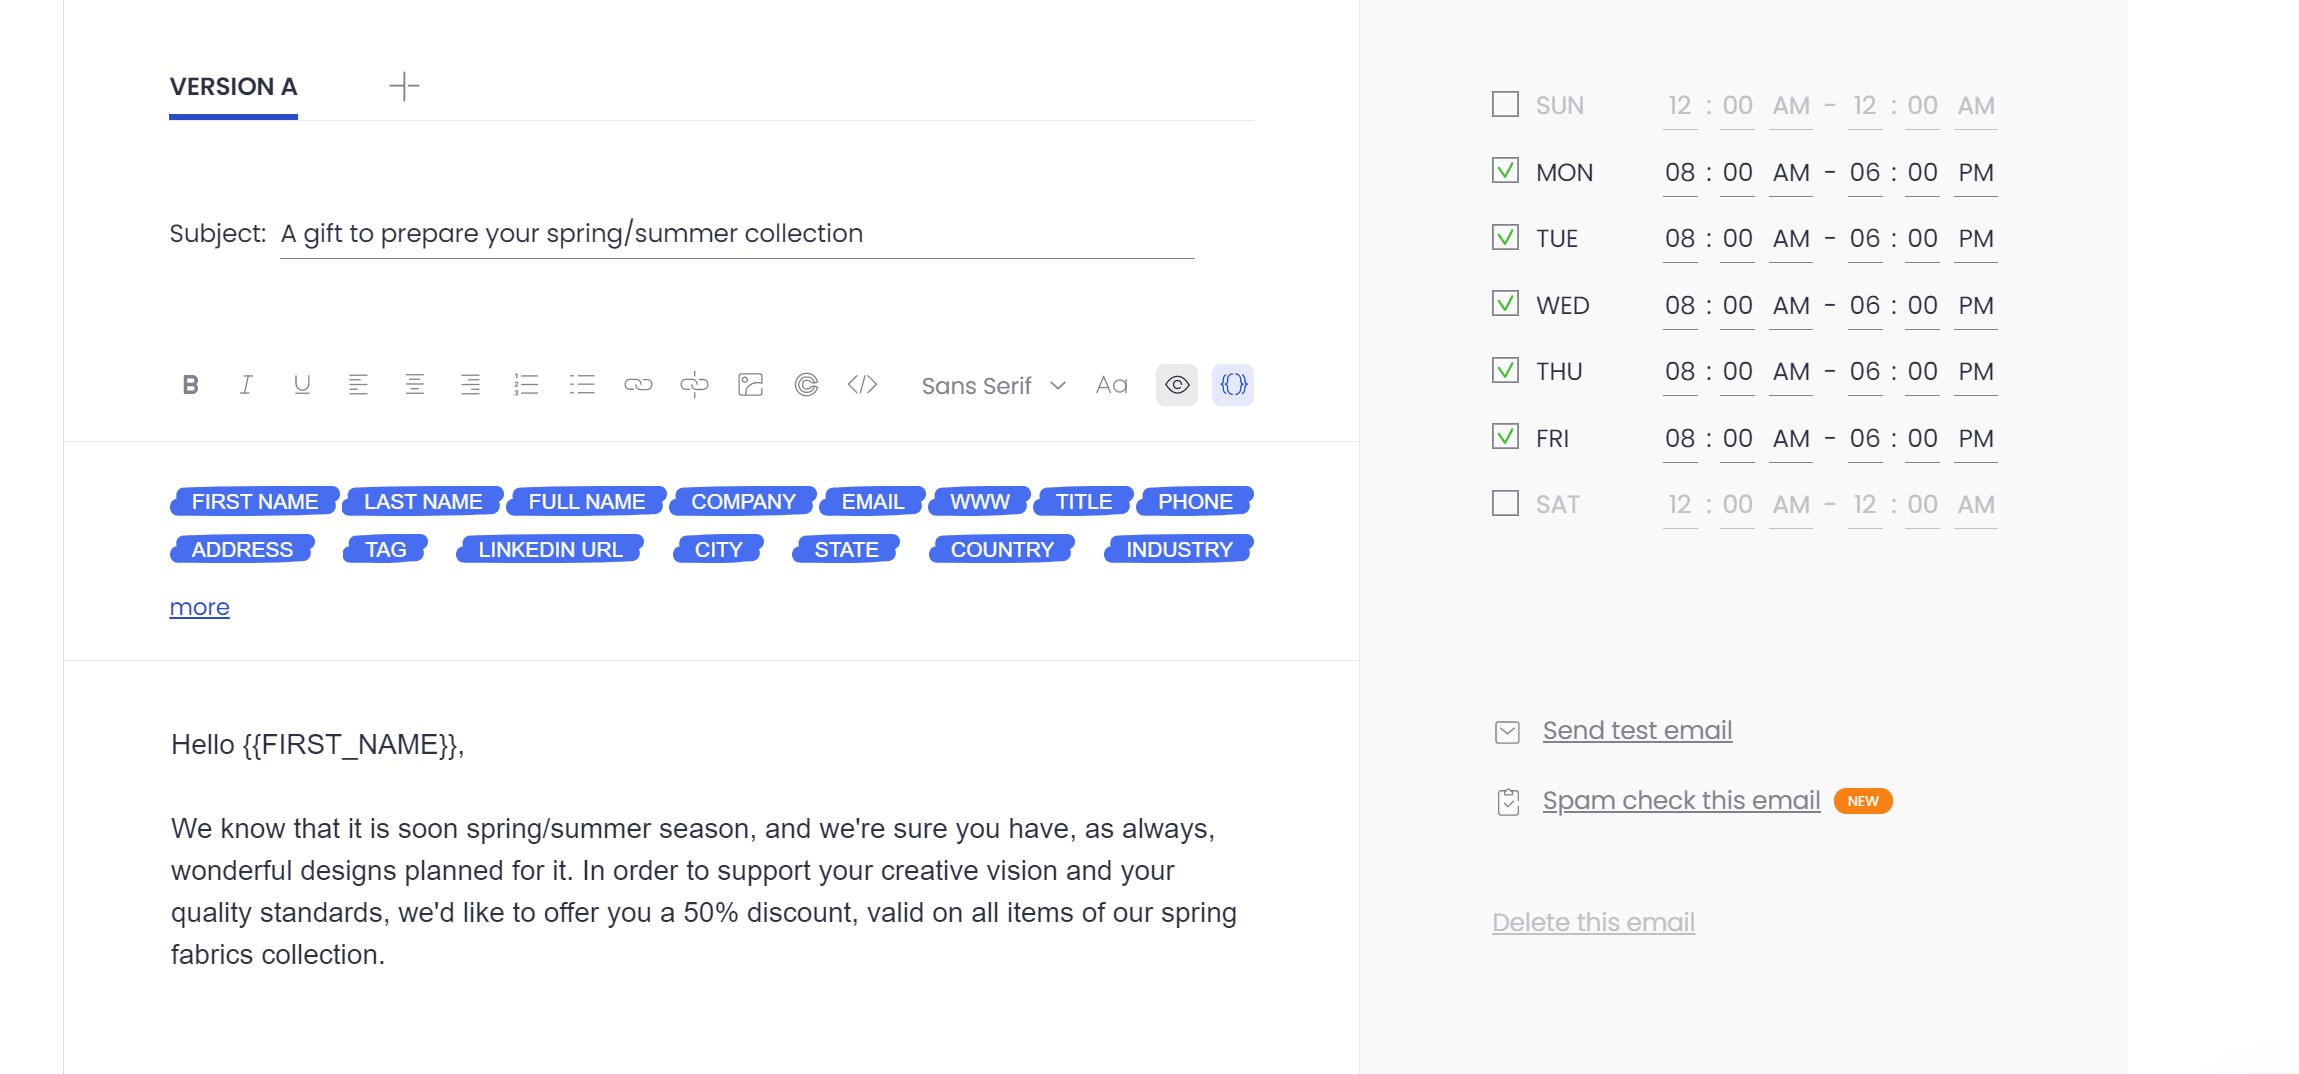
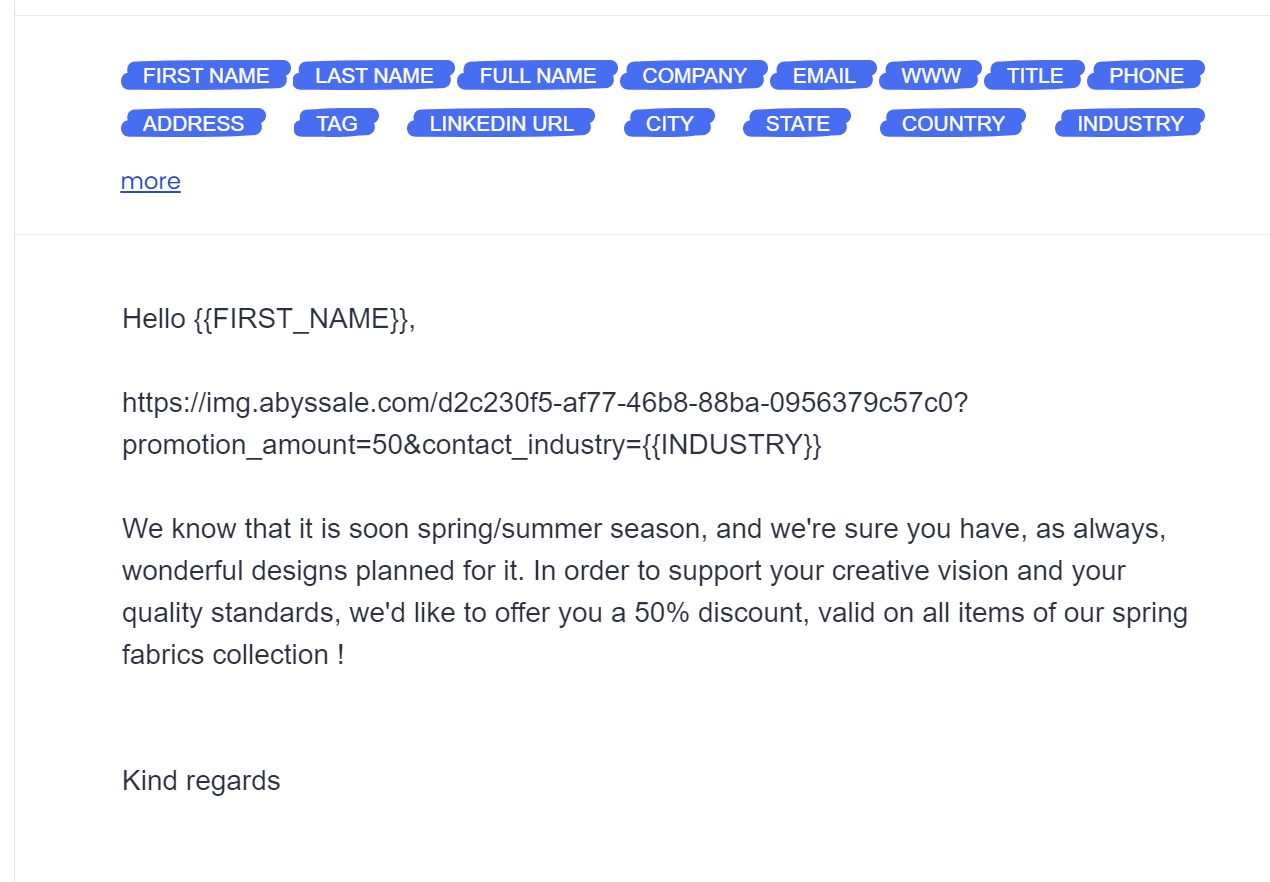
Now we insert our personalized image link. Before or after our text. Here, next to contact_industry, we use the snippet {{INDUSTRY}} .
To personalize the promotion_amount layer, we have 2 choices :
When writing your personalized cold email, you can create several versions according to your different contact segments, by clicking on + next to “version A” .

This will allow us here to have a version A for our Garment industry prospects for which we offer 50 % discount (just by adding 50 in our personalized image link, right after promotion_amount)
And a version B for our furniture industry prospects to which we offer a 40% discount, (same thing here, we are adding a 40 right after the promotion_amount of our link)
In your contacts on Woodpecker, you can add a lot of information for each prospect. Their industry, their name , address, phone number …etc. And you can also add snippet to each of them (from 1 to 15 snippets available)
These snippets are here for you to customize the information you need on each prospect. Here we can use the snippet 1 , to fill the promotion amount applied for each one of our contacts.
→ This way all we have to do in our campaign, is to write one email, and when inserting the personalized image url , we add : {{SNIPPET 1 }} next to promotion _amount
For us, there is no need to write 2 different versions of a message to be relevant and speak directly to our target , as our personalized image & woodpecker snippets will do just that, and help us with our cold emailing personalization.
Now you just have to review your contacts and send your personalized cold emailing campaign to your different contact lists!
Here is our 2 different personalized images that our prospects will see on top of the email.
Remember this use case was just an example. The only limit to cold email personalized images is the data you can collect on your prospects. You can basically personalize anything based on any data so let your imagination run free! As i'm sure you know, the key to great cold email campaigns is continuous iteration. So try new visuals and test & learn to always improve your reply rates and convert more prospects.
Explore our guides and tutorials to unlock the full potential of Abyssale's spreadsheet feature for scaled content production.