.jpeg)
How to generate a custom shipping label for your Shopify store
Abyssale makes unboxing memorable for your customers. Learn how to automatically generate shipping labels for your Shopify store.

zIn this day and age, hyper personalization became quite essential for businesses that sells any kind of product or services online.
Abyssale includes an awesome feature allowing you to dynamically generate an image by updating its URL 😎. This feature is simply called "Dynamic image"
The range of use-cases for dynamic images can be extremely wide. Ranging from custom gift-cards to celebrate your user's birthdays, to cold emails that includes personalized image for each recipients.
This article focuses on SendinBlue (now called Brevo) dynamic images but it also applies to Mailchimp dynamic images. The process is more or less the same.
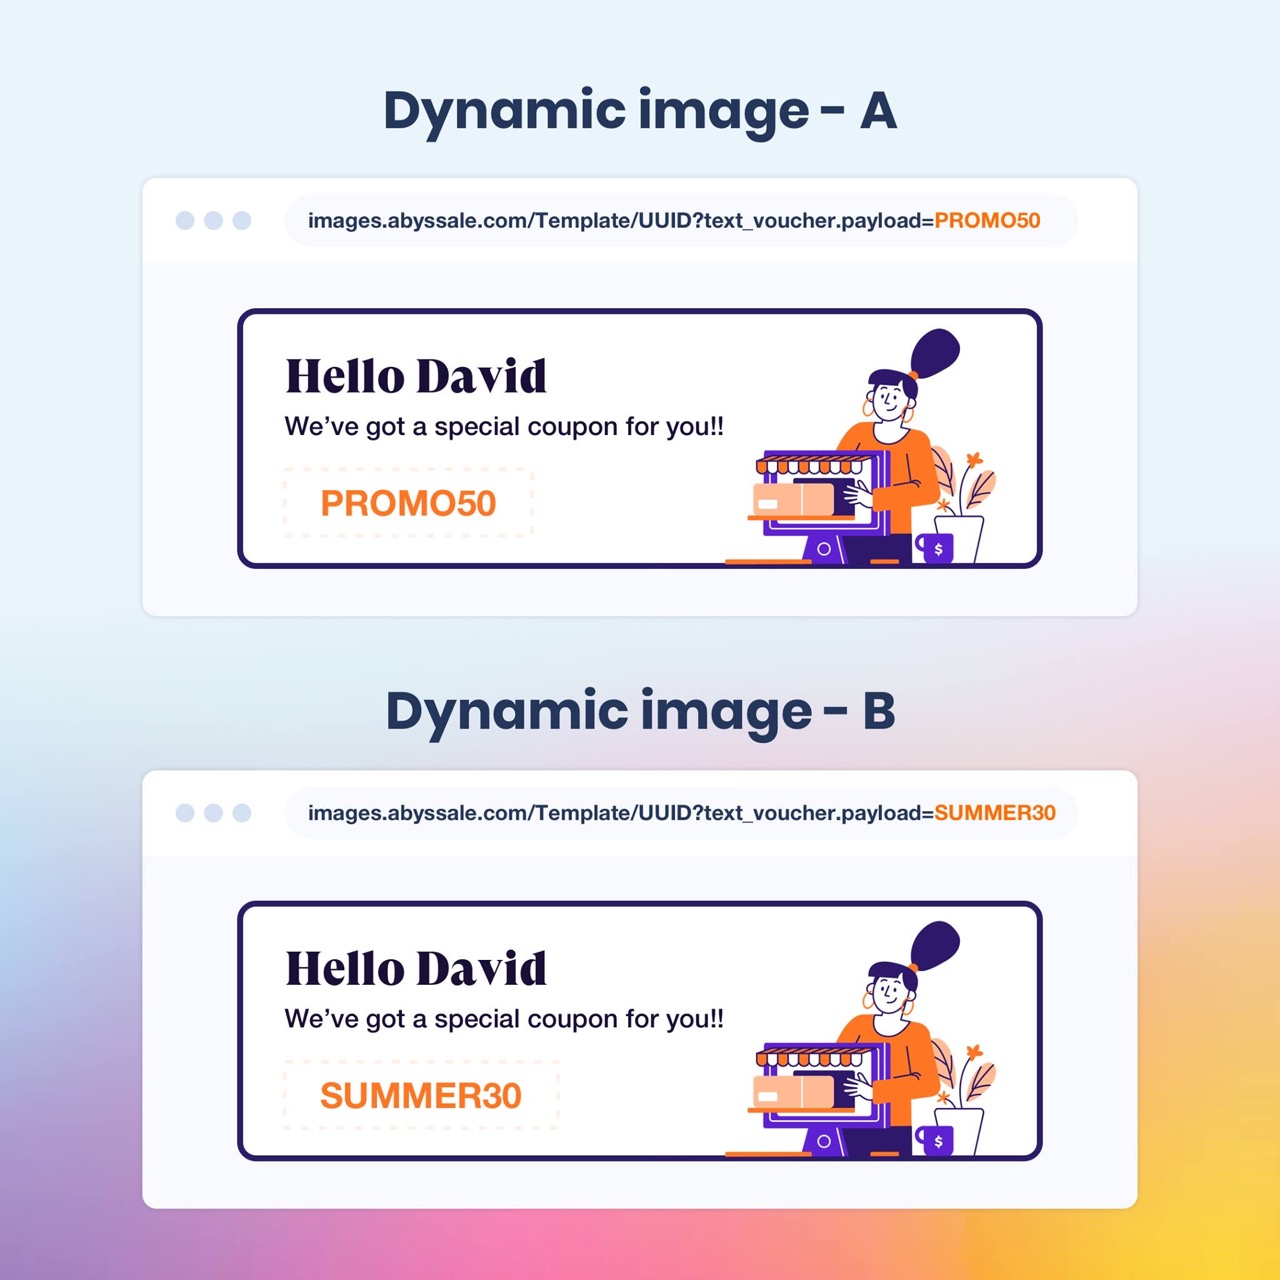
In the exemple below you can see 2 different images generated using this feature.
If you've created an account on Abyssale, you should have seen this feature in action directly in our Welcome email.
In this tutorial we will discover how to setup and use Abyssale's dynamic image feature on a simple use case:
A personalized "welcome email" using Abyssale + Sendinblue.
If you're looking for help to setup dynamic images on your workflow please contact us via our chatbot or Twitter. In the meantime you can find more information on our developer portal.
First things first, go to your Dashboard and click on "Create New Template".
Then, you can select one from our public library bu clicking on "Browse templates" or create a new one from scratch.
Dynamic images can be generated using any kind of template previously created on Abyssale.

For the sake of this tutorial, we're using a template from our public library that you can find under the HR category.
Once you've selected the template you'd like to use, you can edit it using our template builder. When you're happy with your design, click on "Save & Exit".
Then, scroll down to see the"Generation methods" section.

Click on "Create new dynamic image".
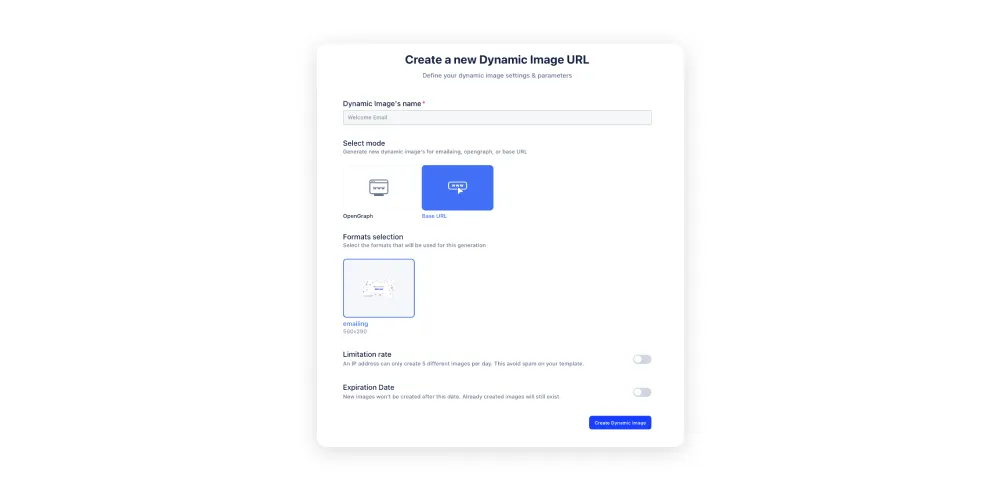
Then, you'll have to give your dynamic image a name, select the Base URL mode and click on "Create Dynamic Image"
Next, you'll have access to this page where you can build your URL.
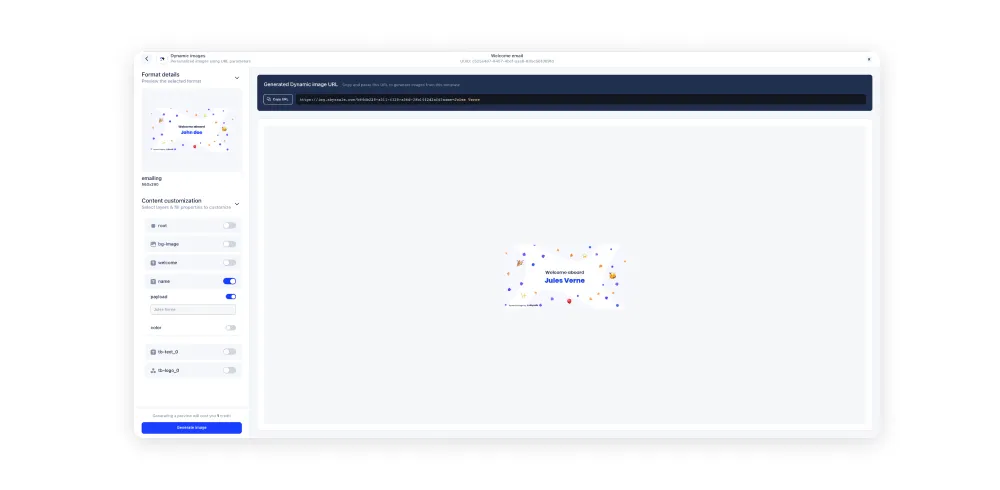
Here is the dynamic image URL we've created from that template:
https://img.abyssale.com/b64db228-a511-4128-a56d-38b1442d2afd?
To update the image content's you'll need to use layers which basically is any URL parameters displayed after the question mark ?. ie:
https://img.abyssale.com/b64db228-a511-4128-a56d-38b1442d2afd?name=Jules+Verne
As you can see, the name has been updated to "Jules Verne" because we've updated the URL parameters and modified the "name" layer.

You need to url encode each property in order to make it work. Most emailing tools like Sendinblue have a function that does this.
You can also use this tool to test your URL encoding.
Please refer to the developer's guide for a complete explanation about the dynamic image feature.
You need to create your automation workflow for your Welcome email. A lot of tutorials can be found for your favorite emailing tool.
We've gathered a list for you:
Once done you need to know which kind of information you are retrieving in your contact list. In our Sendinblue mailing list we retrieve information such as "firstname" and "lastname". We will use these information to customize our welcome banner.
You can integrate the dynamic image as follow if you are doing html:
<img src="https://images.abyssale.com/dynamic-image/5e7c5fba-04c0-4be5-95e2-56aca9e5b7f3?name.payload={{ contact.FIRSTNAME|default:'John'|urlencode }}%20{{ contact.LASTNAME|default:'Doe'|urlencode }}" />
Or use Sendinblue's editor, define an image, and click on image source from URL. Don't forget to change the following with your own URL, and keep the part after the question mark ?:
https://images.abyssale.com/dynamic-image/5e7c5fba-04c0-4be5-95e2-56aca9e5b7f3?name.payload={{ contact.FIRSTNAME|default:"John"|urlencode }}%20{{ contact.LASTNAME|default:"Doe"|urlencode }}
Don't forget to change the URL with the one you've previously created!
6. Save and test your template. If you are happy about the result you can activate the Sendinblue automation Workflow.
7. 🎉 Kudos! 🎉 Now every user added to the contact list will receive a fully customized mail.
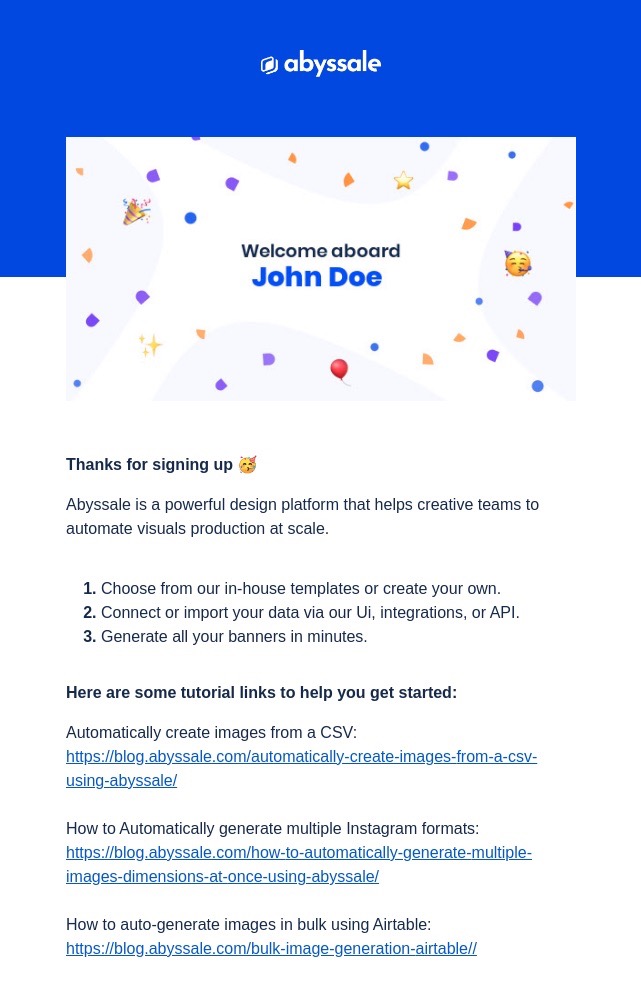
Here is what our welcome email looks like once integrated:
In this tutorial we've showcased all the necessary steps to create and setup a welcome email using Abyssale's dynamic images!
Keep in mind that dynamic images can be used in a wide range of use cases. We can't wait to see what you'll build 😉
If you have any issue or if you'd like to share with us how you are using dynamic images please reach out to us on LinkedIn or on our chatbot over Abyssale.com
Explore our guides and tutorials to unlock the full potential of Abyssale's spreadsheet feature for scaled content production.
.webp)