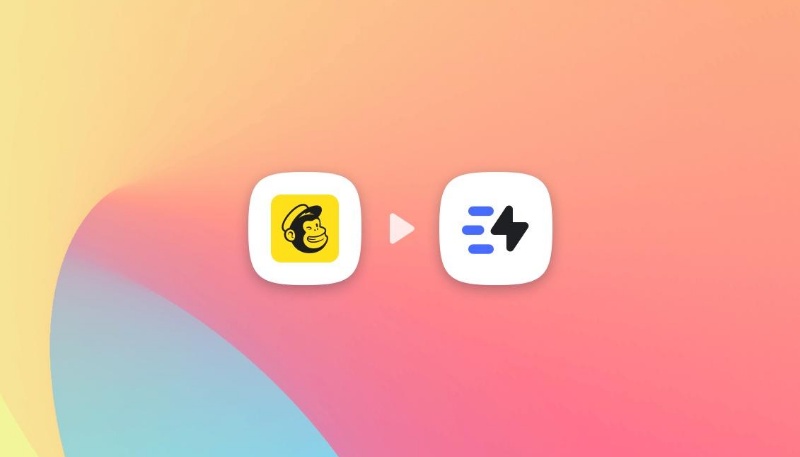
Send personalized images in Mailchimp emails
Hyper personalize your emailing campaigns using Mailchimp dynamic images! Add your merge tags to a simple dynamic image URL and let Abyssale do the rest.
Any business that wants to be sustainable must focus on building maximum customer loyalty. Among all the marketing practices that exist to avoid churn, some companies have opted for a strategy of gamifying their users' experience.
In this tutorial, we'll explain step by step how to gamify your users' experience with Abyssale and automate every step.
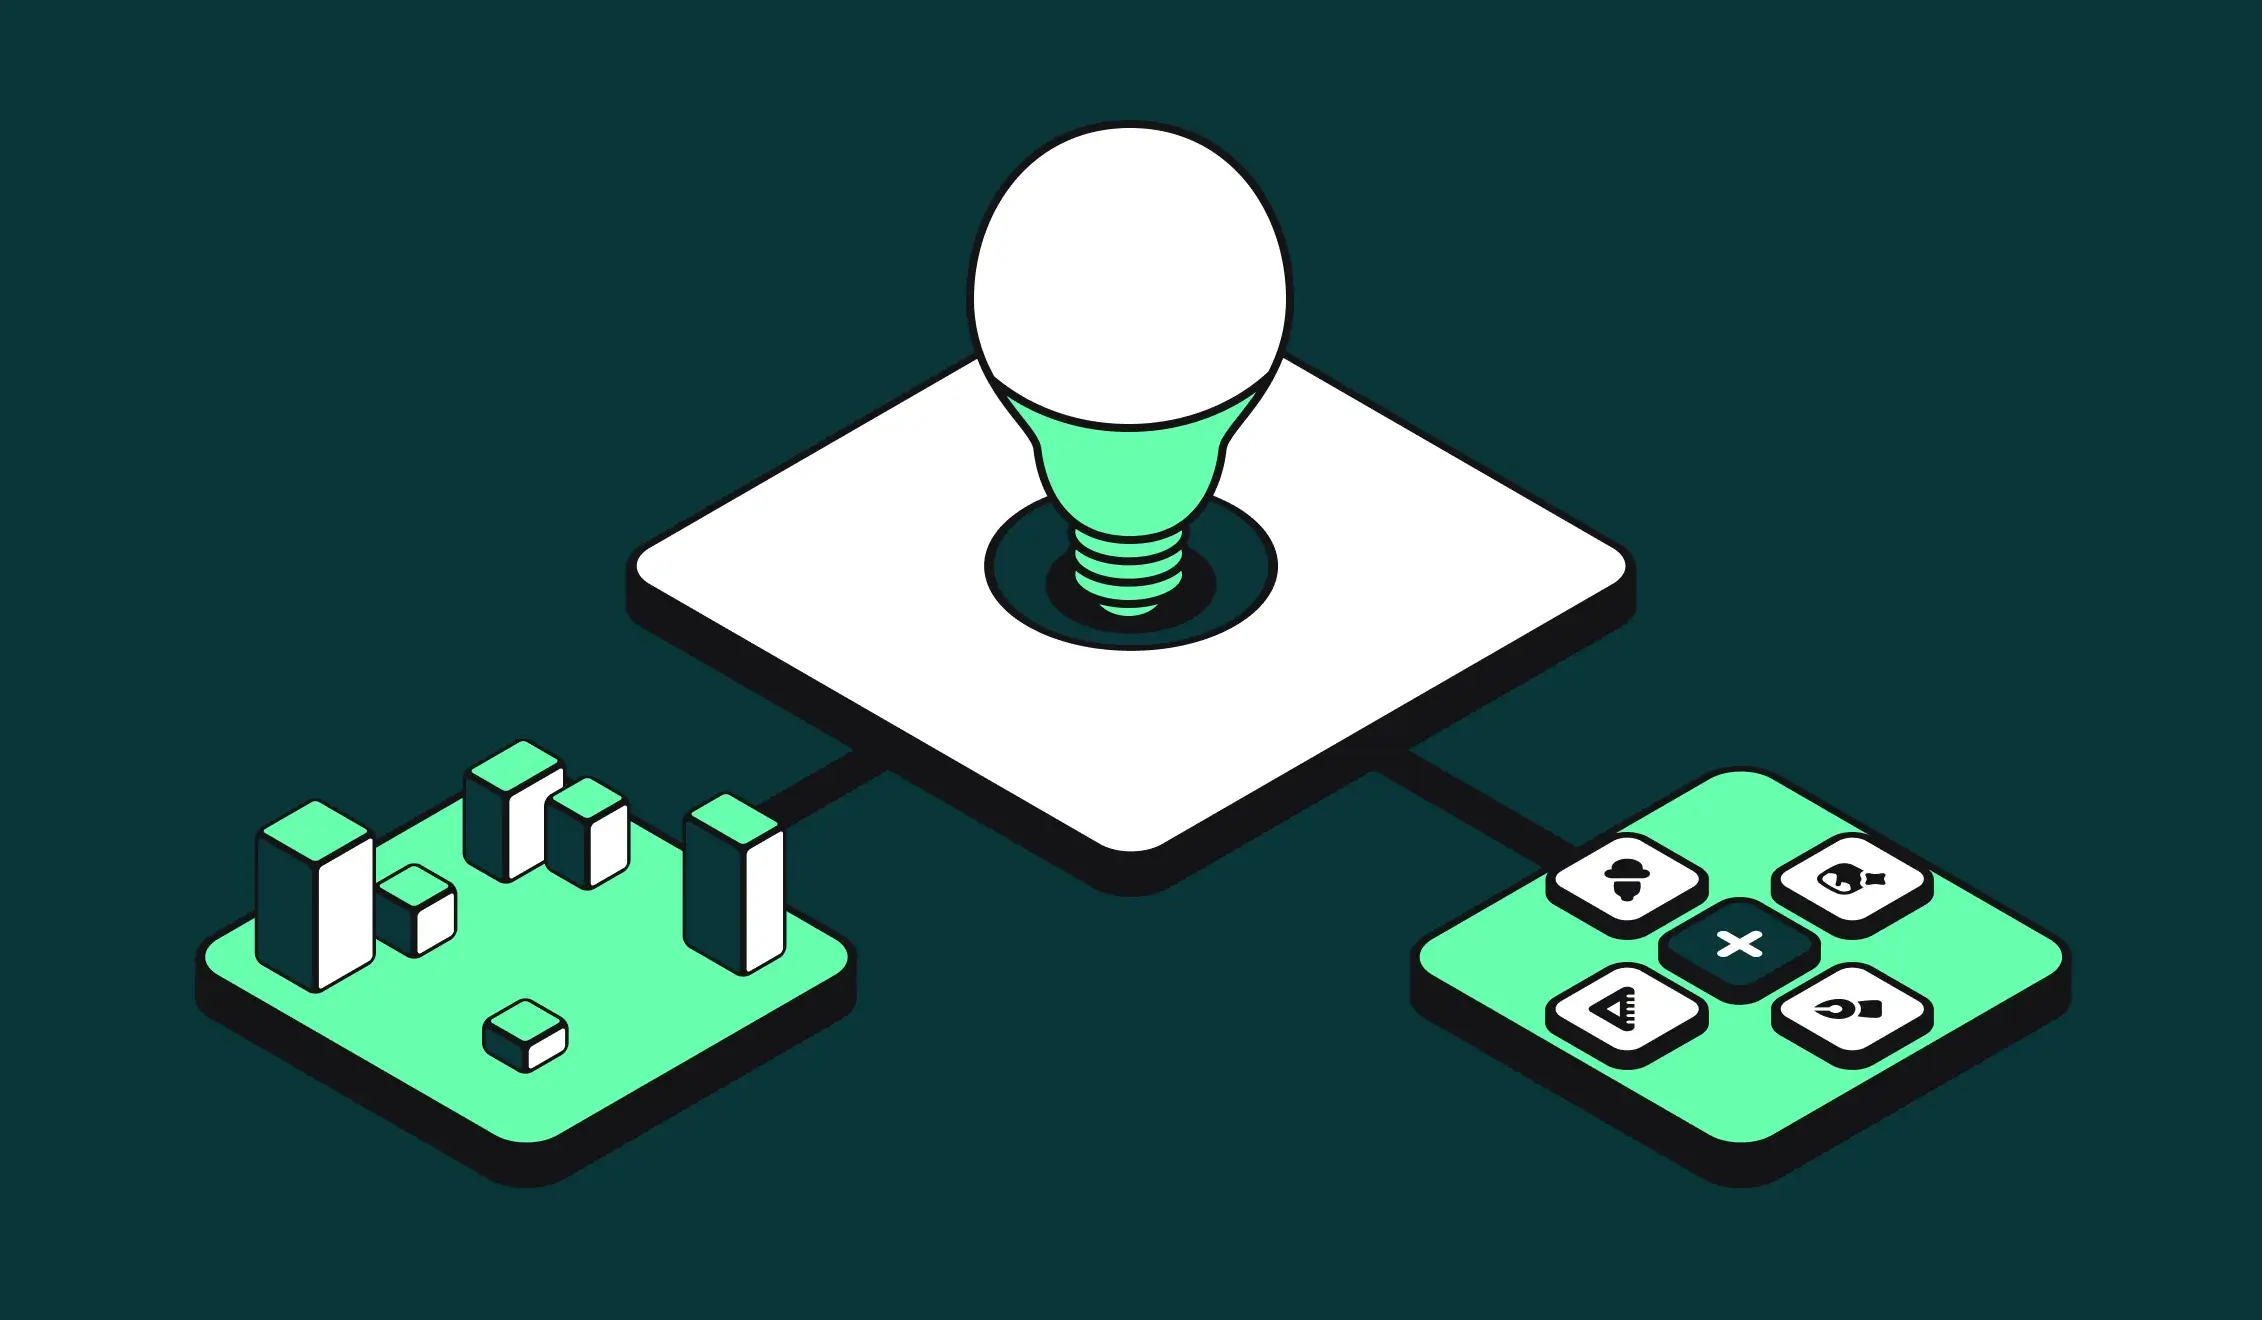
User experience gamification is the process of integrating game elements into an application or product to make the experience more engaging and fun for users. It can take many forms: Sending badges, rewards or a better place in a ranking as the user evolves.
Gamification allows you to encourage users to interact more with your application or product. In addition, it strengthens their sense of ownership with regular, personalized updates on their progress.
As we explained above, gamification can take many forms. Nevertheless, in this tutorial, we will explain how to gamify your users' experience with email images.
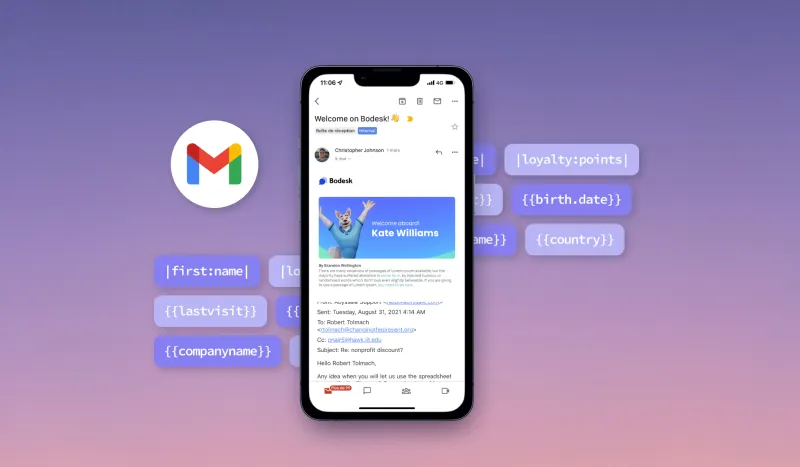
To illustrate our instructions, we'll imagine that we belong to the marketing team of a mobile application that tracks our running performance. In order to make the user experience more fun and to motivate the user in his progress, we want to send an image by email at the end of each month. This email should contain a custom image recapping to the user the number of miles they have run that month with the app.
Before anything else, you need to create the template that will host your image.
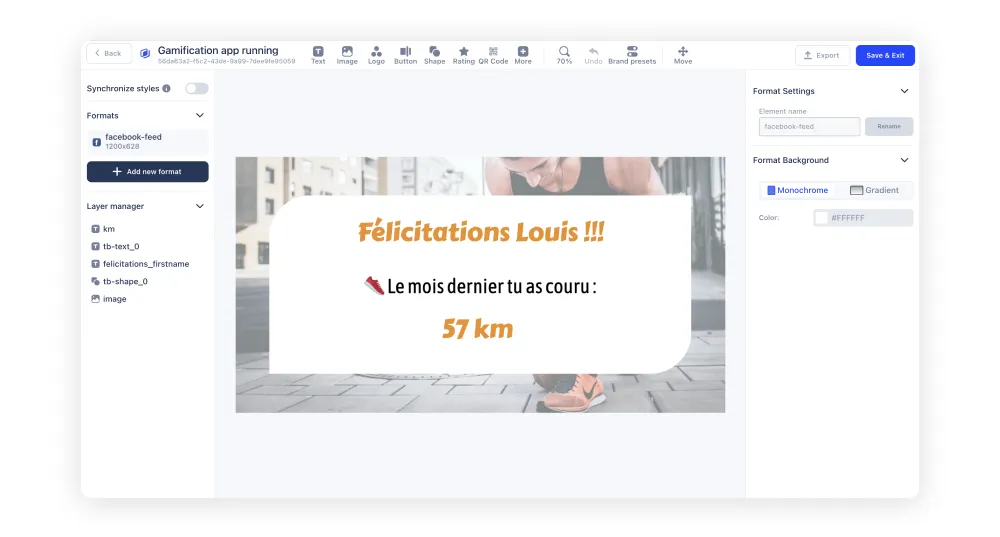
To do this, go to your Abyssale dashboard, and create a new template by choosing the desired format(s).
For our example, we'll choose the format 1200x628px - facebook-feed.
Add the text and image elements you want and name at least those you want to be able to modify.
Our template will contain text elements in order to integrate the variables concerning :
Your template is ready. Click on "Save & exit."
This Google Sheets document will serve as a database for an image displaying recent data each month. Later, you will connect it to your email manager.
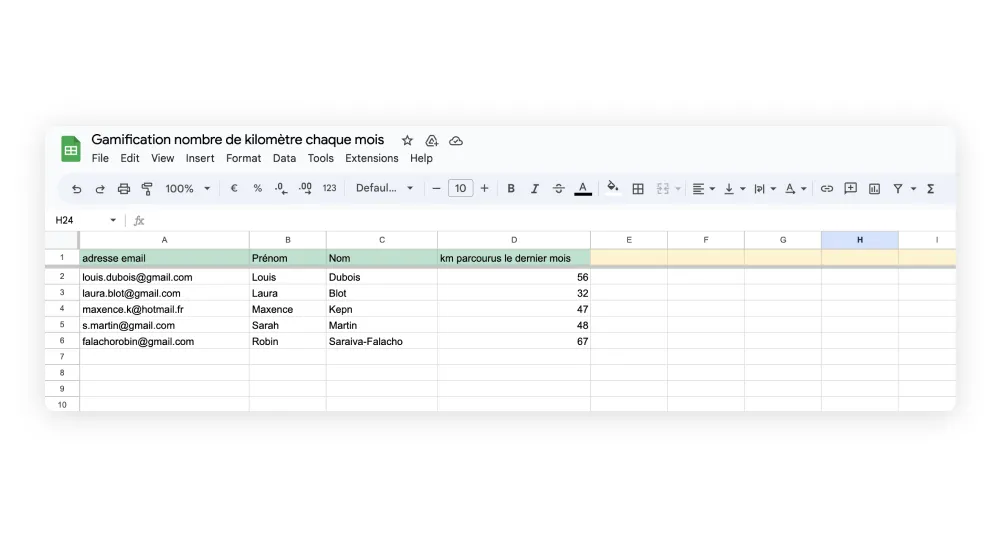
For our example, the Google Sheets document must contain at least 3 columns:
You can have more columns for your use case. It all depends on the characteristics of your gamification.
Now that you have a database, we'll connect it with your email manager.
In our example, we will use Sendinblue as our email manager. But, the principle remains the same for other tools like Woodpecker, Lemlist, Mailchimp, etc.
First of all, make sure you add one or more attributes to all your contacts from your email manager. These attributes correspond to the variable data of your template.
In our example, we will add an attribute to collect the number of kilometers traveled in the last month by each of the contacts. We name it "KMS_LAST_MONTH".
Now go to Make and create a new scenario.
Create a first Google Sheets module "Watch Changes".
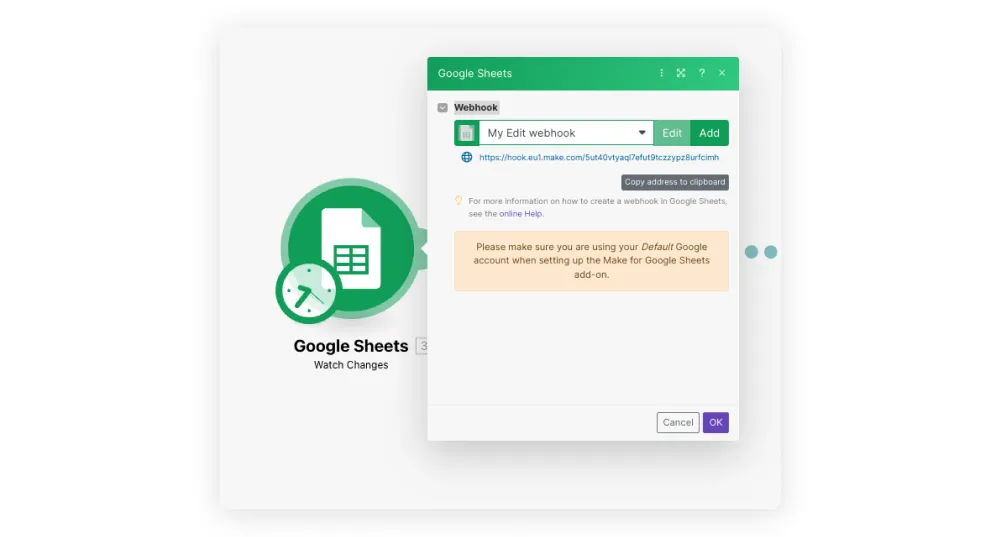
Edit a new webhook. Copy the address of this webhook, then go back to your Google Sheets document.
Click on the Extensions > Make for Google Sheets > Settings tab. (Be careful, you have to install the "Make For Google Sheets" extension first. On this link, you will discover how to do it).
In the first line "Webhook URL", copy the address of your Webhook.
Go back to your Make scenario.
For the scenario execution timing, adapt it to your gamification strategy. In our example, we will choose every 1st of each month at 9am. We consider that an automation exists to update the column "km traveled last month" on the Google Sheets every 1st of the month at 8 am.
Next, add a new module in the name of your email manager. For our example, we will choose the "Update a contact" module from Sendinblue.
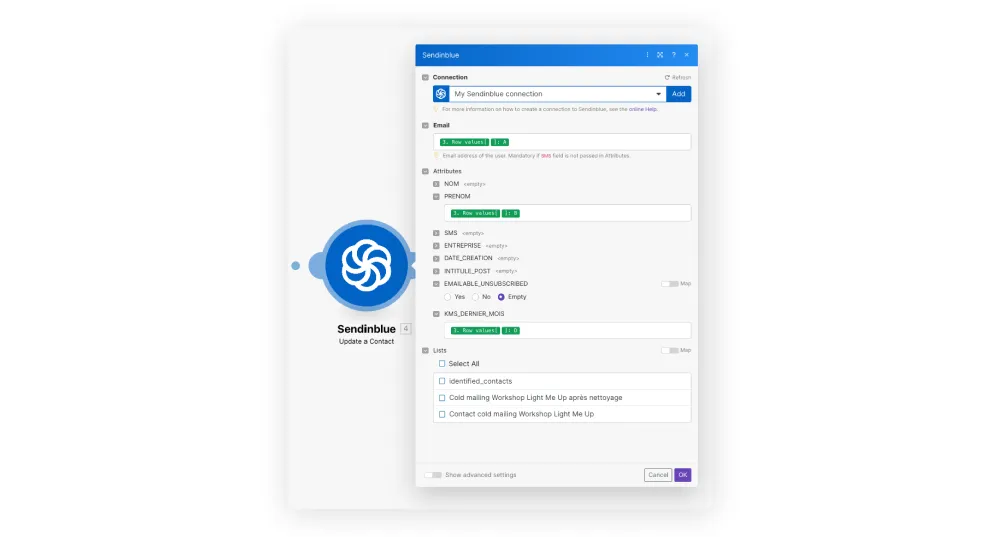
Then, connect each attribute variable to the corresponding column in the Google Sheet.
For our example:
The important information for our visual will be updated every 1st of the month at 9am.
All we have to do now is automate the sending of the email containing the image.
Before we schedule the email to be sent, we need to create a link from Dynamic Image.
To do this, head back to Abyssale. From the template you created earlier, select "Create a new Dynamic Image". Name your Dynamic Image, select the Base URL mode and click on "Create Dynamic Image".
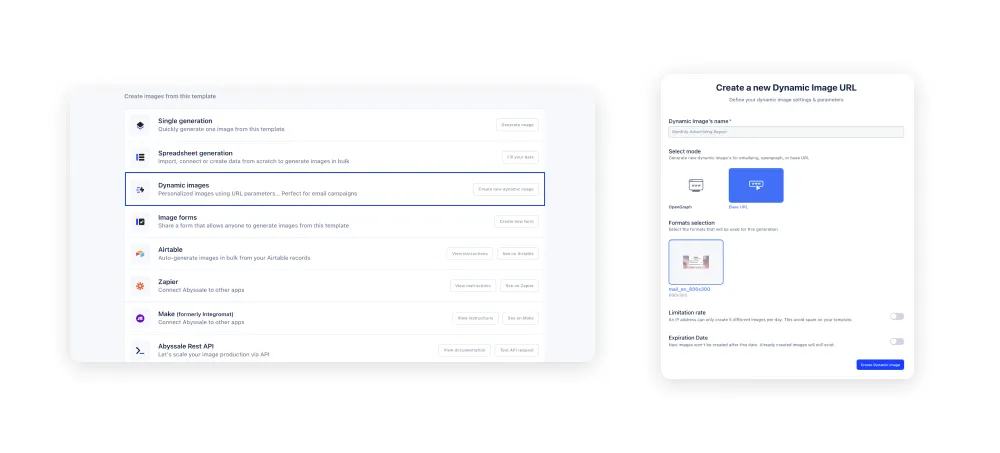
Then check the layers you want to be able to modify. In our example, we'll check "felicitations_firstname" and "km".
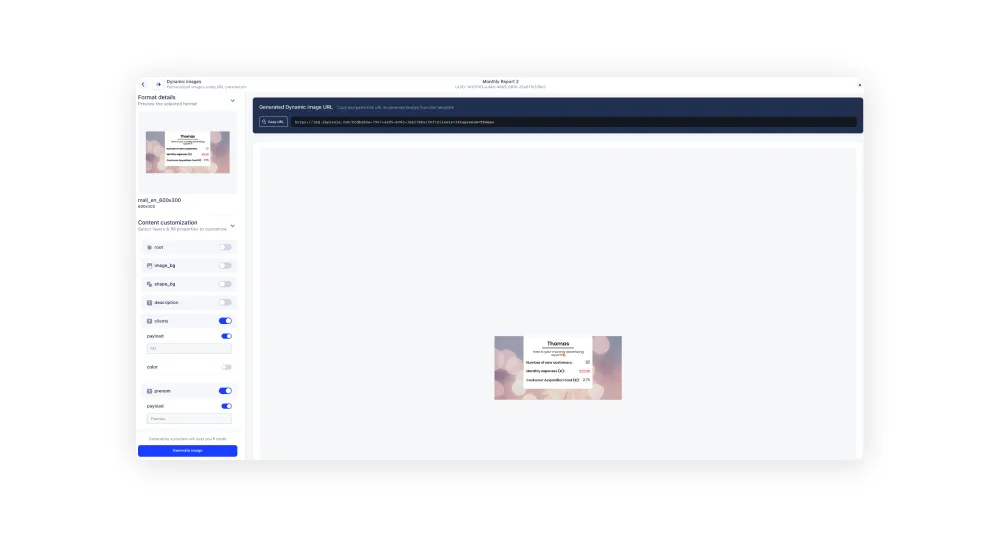
You can modify them by entering new data.
For our example, we will arbitrarily choose :
As you change this data, the URL on top of the screen will also change.
Here is the link we generated in our example: https://img.abyssale.com/5a2b601c-d983-495e-af59-8a5978376e63?felicitations_firstname=F%C3%A9licitations+L%C3%A9a%21&km=54+km
We find each element of text modified in this URL. We are almost done, there is one last step to send this image to a large list of contacts with variable data.
If you insert the URL as it is presented during generation with Dynamic Image, the data present in this image will not change to coincide with the contact data.
You must therefore modify the URL to insert the variables according to the standards of your email management tool.
⚠️ Please note that each variable corresponding to a data item must be filled in for each of the contacts targeted by your email.
In our example, our contact management tool absolutely must know the variables:
We will modify the starting URL so that it looks like this: https://img.abyssale.com/5a2b601c-d983-495e-af59-8a5978376e63?felicitations_firstname=Félicitations+{{ contact.PRENOM }}+%21%21%21&km={{ contact.KMS_DERNIER_MOIS }}+km
⚠️ Be careful, from one email management tool to another, the appearance of the variables may vary. Make sure to check which ones correspond to each of them in YOUR email management tool before modifying your URL.
All you have to do is insert an HTML image tag into your email and schedule it to be sent.
In our example, the email should be scheduled every 1st of the month after 9am, the time when the contact data is updated on Sendinblue.
Here is what our HTML tag looks like in our example:<img src="https://img.abyssale.com/5a2b601c-d983-495e-af59-8a5978376e63?felicitations_firstname=Félicitations+{{contact.FIRSTNAME }}+%21%21%21&km={{contact.KMS_LAST_MONTH }}+km" alt="Dynamic image">
Your image is ready to be sent to your user list! Make sure to check it with a test email intended for you and don't wait any longer to click on "send".
If you have any questions or comments, please let us know!
To keep up with the latest updates and news about Abyssale, join our LinkedIn community!
Explore our guides and tutorials to unlock the full potential of Abyssale's spreadsheet feature for scaled content production.