The 10 Best Social Media Automation Tools in 2025
Discover the 10 best social media automation tools for 2025. Streamline your social media management, boost efficiency, and enhance your online presence with expert insights.
More and more subtitled videos can be found on the networks. Subtitles make it easier to capture users' attention and help them remember information.
However, subtitling videos is a time-consuming process. Automatic subtitling software does exist, but it's either expensive or not superbly developed. What's more, they don't always allow much freedom in terms of subtitle customization (size, color, style and position of characters).
FFmpeg is one of the most suitable free and open-source options for unlimited subtitling of videos. It adapts to a wide range of video formats, offers efficient conversion and lets you automate the subtitling process from scripts or programs.
In this tutorial, we'll take you through the various steps involved in simply subtitling a video with FFmpeg.
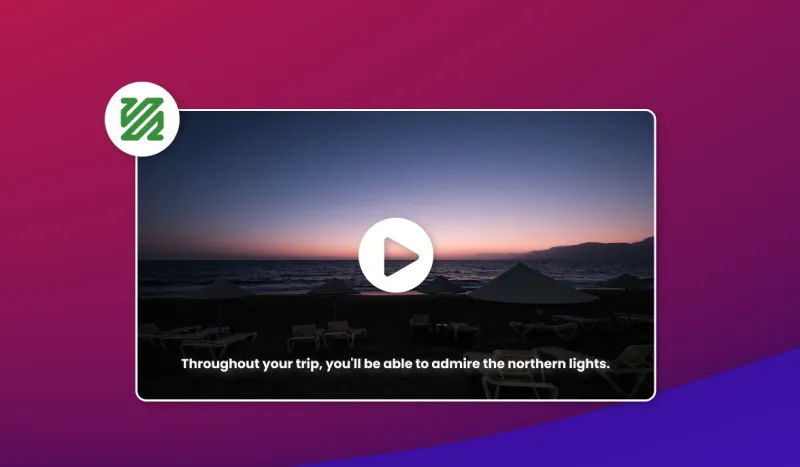
Here's the video on which we're going to add subtitles:
To start with, we need to create a text file listing all the details about subtitles in terms of time and content.
Open your notepad and start writing as follows:
On the first line, write the number 1.
Return to the line and add the timestamp for your subtitle. Start by indicating the video time at which your subtitle line should appear. It should be in the following format: 00:00:00,00 (HH:MM:SS,MS). Add the --> symbol and specify the time at which this first subtitle line should disappear.
Skip a new line and add the content of your subtitle line. Be careful not to make your lines too long. It's better to split a sentence into several lines for the comfort of users.
For each new subtitle line, repeat the operation until the end of the video.
This is what it looks like for our example:
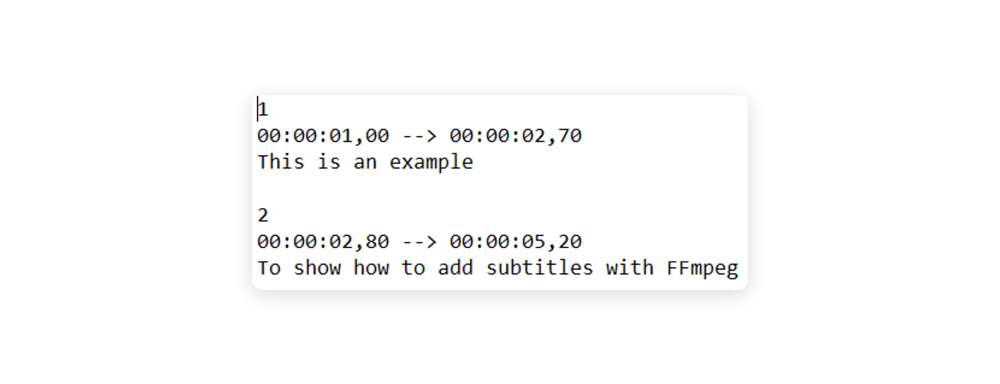
Once your text file is ready, save it in txt format. Place it in a new folder created for the occasion. In our example, we name the text file Subtitles_FFmpeg.txt and place it in a folder called "Subtitles". In this same folder, we'll also add the video without subtitles. We'll name it without_subtitles.mp4.
With your text file complete and tidy, we can invoke FFmpeg to ask it to add these subtitles to the video. You'll need to install it first. You can do this from http://www.ffmpeg.org.
To get started, open a command prompt. (Under Windows, click on "Windows "+"R". Search for "cmd" and press Enter).
In the command window, access the directory where your video file and subtitle text file are located using the "cd" command. In our case, we'll enter: cd C:\Users\User\Documents\Subtitles
Make sure to replace "User" with your real username.
Once you're in the directory containing the video and subtitle files, you can use the FFmpeg command to add subtitles to the video. Here's the command you can use:
ffmpeg -i yourvideo.mp4 -vf "subtitles=yoursubtitledocument.txt:force_style='Fontsize=20'" -c:a copy -c:v libx264 -crf 23 -preset veryfast nameoftheoutputvideo.mp4
In this codec, you must replace:
Here's what it looks like for our example
ffmpeg -i without_subtitles.mp4 -vf "subtitles=Subtitle_FFmpeg.txt:force_style='Fontsize=20'" -c:a copy -c:v libx264 -crf 23 -preset veryfast with_subtitles.mp4
If you want to play with certain parameters, here are the details of this codec:
After executing the command, FFmpeg will start processing the video and adding the subtitles. This may take some time, depending on the length of the video and the power of your computer.
Once FFmpeg has finished adding the subtitles, you'll find the video with the subtitles in the same folder as the original files.
In our case, we find a file named "with_subtitles.mp4" in "C:\Users\Utilisateur\Documents\Subtitles".
Here's the final file:
Now you know how to easily add subtitles to your videos using FFmpeg. However, if this still seems too complicated, you can always use a video generation API like Abyssale to set up the process.
From now on, no more excuses for publishing videos without subtitles 😉
Explore our guides and tutorials to unlock the full potential of Abyssale's spreadsheet feature for scaled content production.