The 10 Best Social Media Automation Tools in 2025
Discover the 10 best social media automation tools for 2025. Streamline your social media management, boost efficiency, and enhance your online presence with expert insights.
If you have a Shopify website, in which you sell products, you certainly know all about the large amount of work and time we can spend promoting each new product.
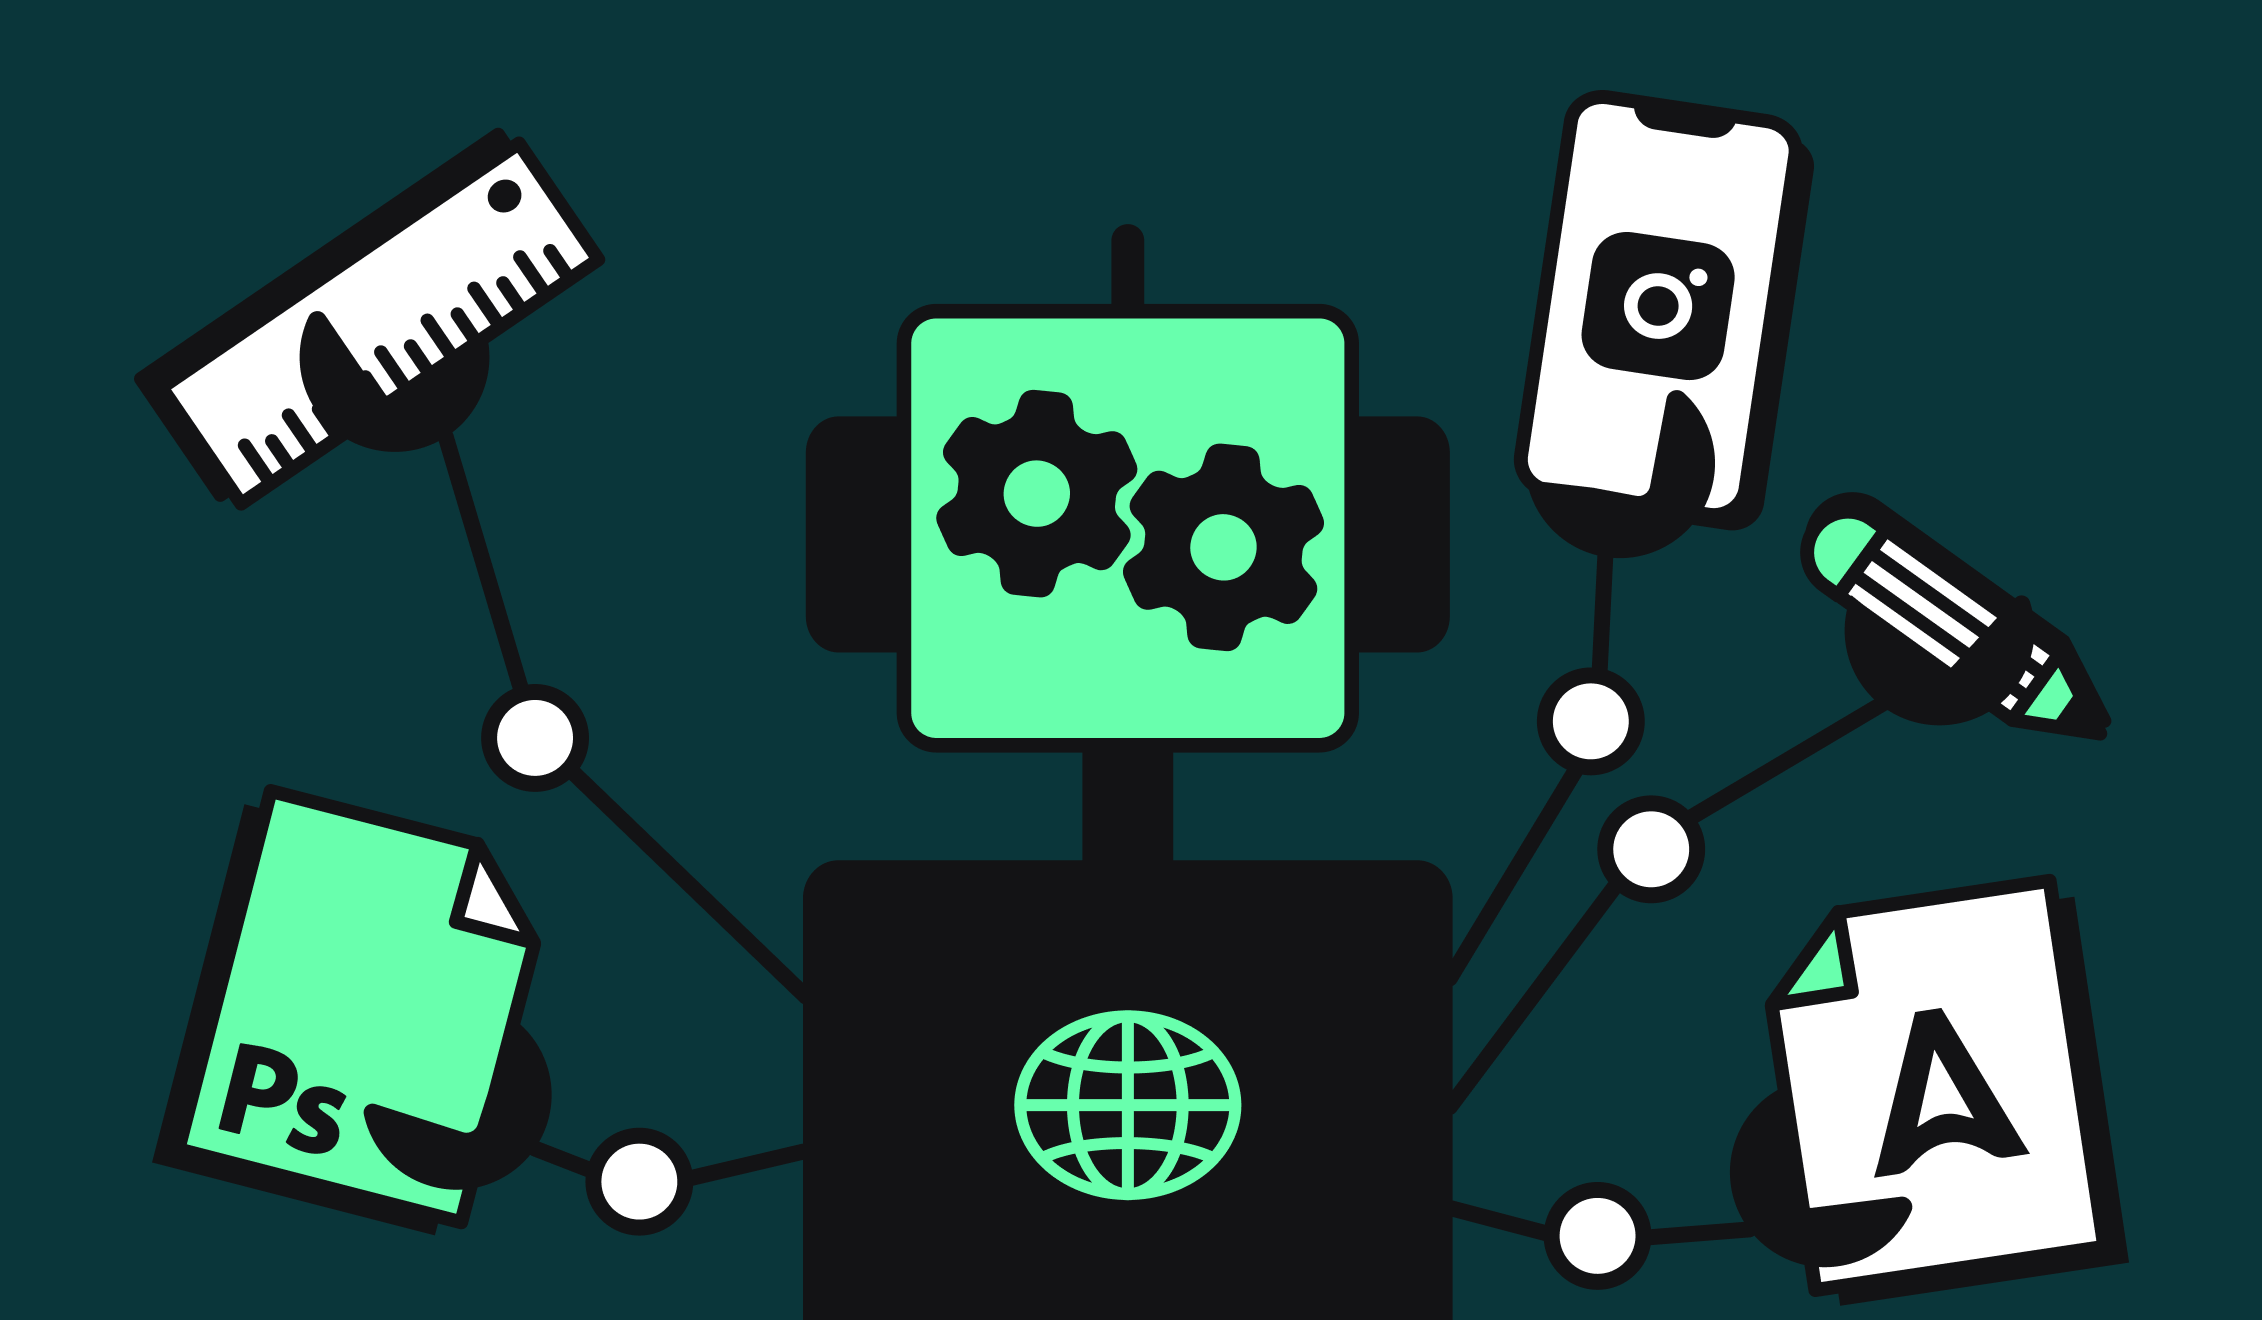
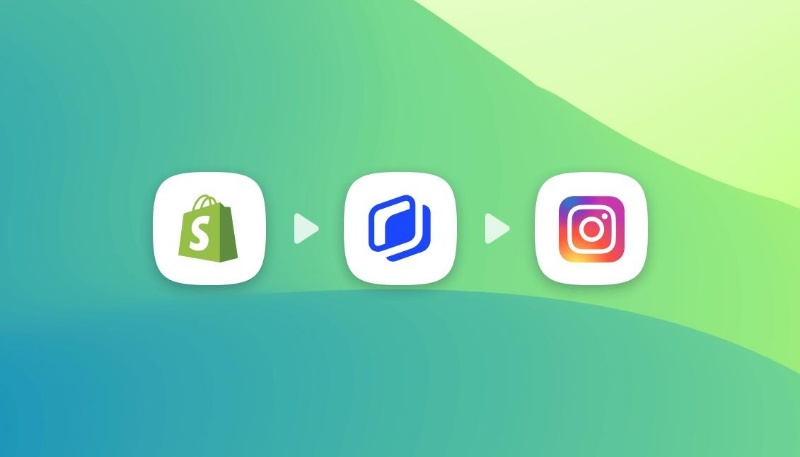
In this tutorial, we will show you how to reduce the amount of time spent for generating product promotion visuals on social media, and for this, we will use :
Thanks to this image automation trick, you will be able to :
To make it more relatable for you, we chose to take a concrete example :
Let's say you work in a catering company that sells and delivers healthy meals with fresh products. This company proposes new meals every day on their website. Your goal today is to set up a system that will automatically create several visuals to promote each new product available on your Shopify, thanks to an Instagram post.
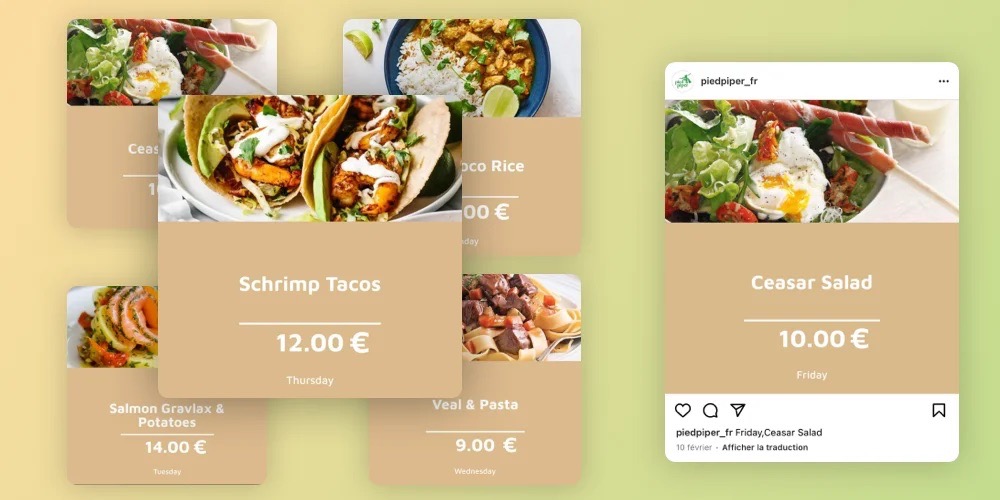
Your chef decides the menu every week, which means that each Monday you have 5 visuals to create so that the potential customers can see what’s on the menu on their Instagram feed.
Our first step is to create and design our template on Abyssale. In our example, our goal is to produce a visual to present the meals of the week, in this sense our visual needs to include: the price of the meal, the day of the week it will be available, the name of the meal, and a photo of it:
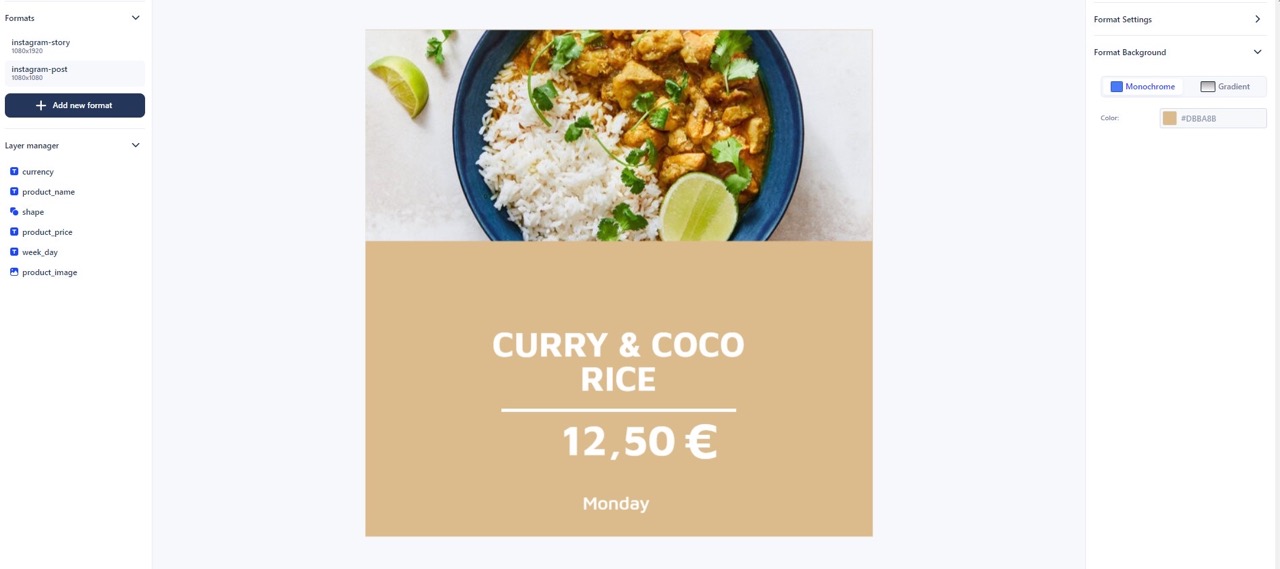
We chose an Instagram post format and we also renamed our layers, in order to facilitate the shopify social media automation. Here is what it looks like
We also have a currency layer for the € sign and of course our 2 background elements. For each day of the week, only the 4 first layers will change, we choose to keep the same design elements for the rest of the template, but you can, of course, change them if you want.
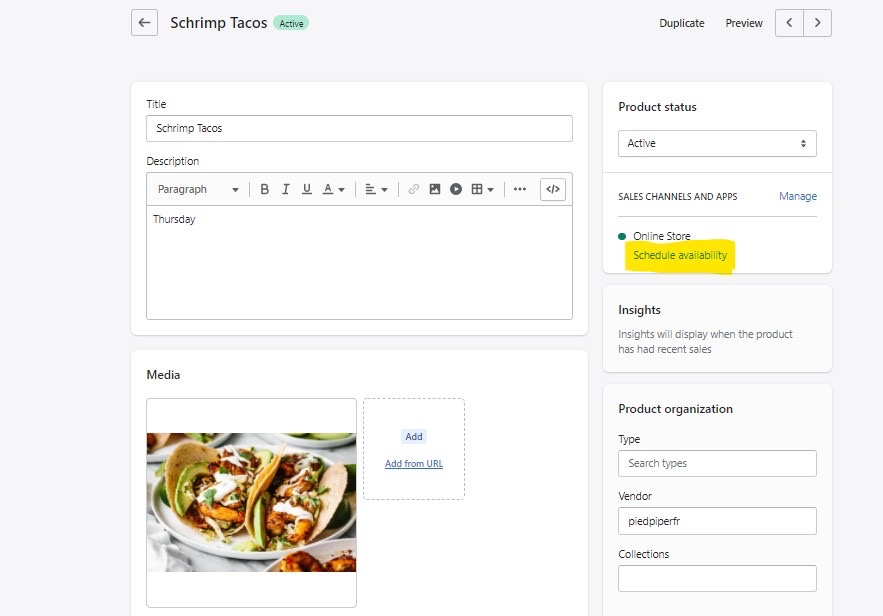
The next step is to go on our Shopify account and make sure all our products for this week's posts are active and online.
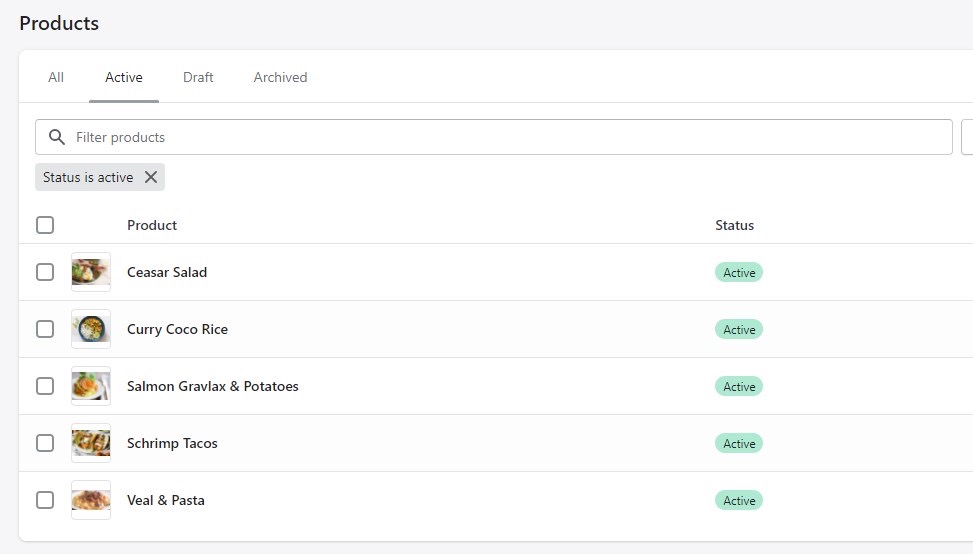
We can see here our menu, so on Monday we’ll have the curry coco rice, on Tuesday the Salmon gravlax & potatoes, on Wednesday veal & pasta, on Thursday the Shrimp Tacos and finally on Friday the Caesar Salad.
For each one of these products we made sure we have a price, a title, a description, and an image URL filled in the product information :
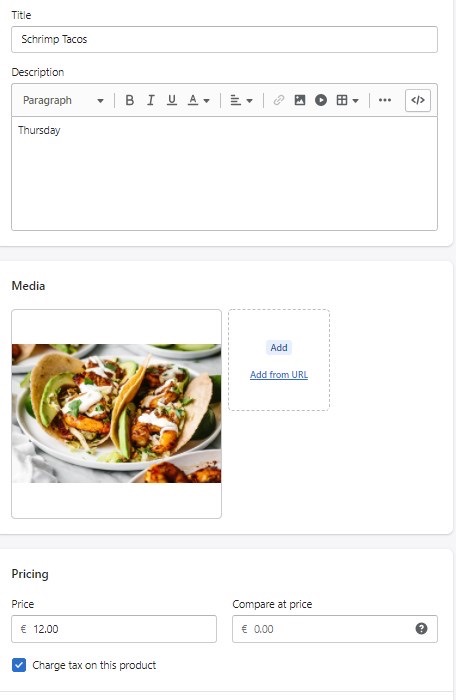
This is an important step because this information will act as a spreadsheet for your abyssale template during automation, and it is this information that will change according to each meal published on our Instagram posts.
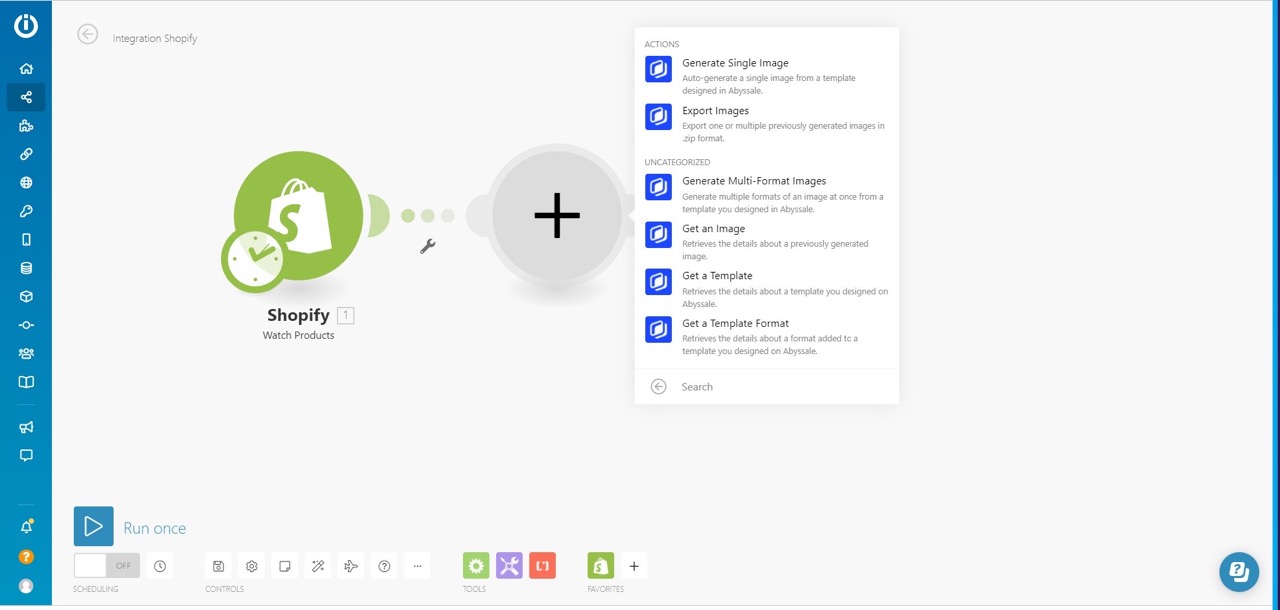
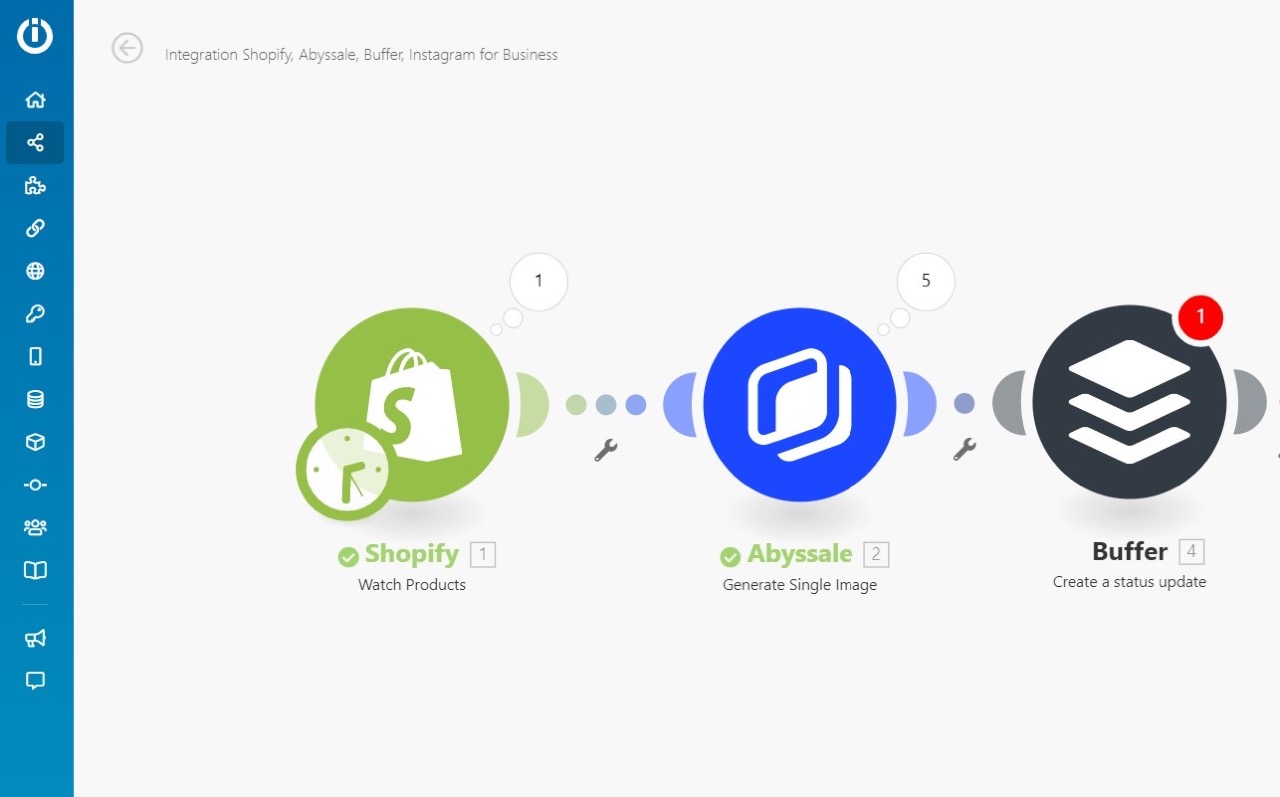
On Make, we'll create a new scenario in 3 modules, composed as such :
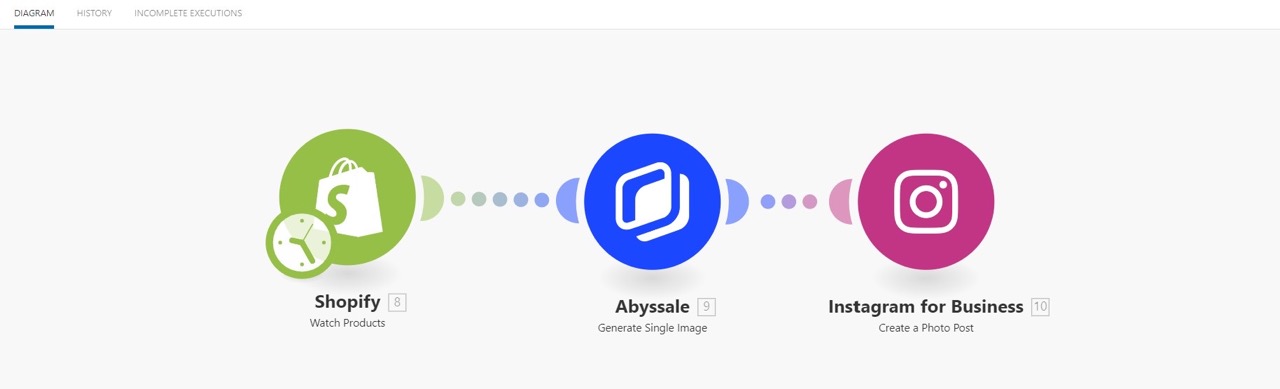
We'll start our scenario by creating create a “Watch products” Shopify module to inform Make that we want it to check every new product published on our website on “active” status.
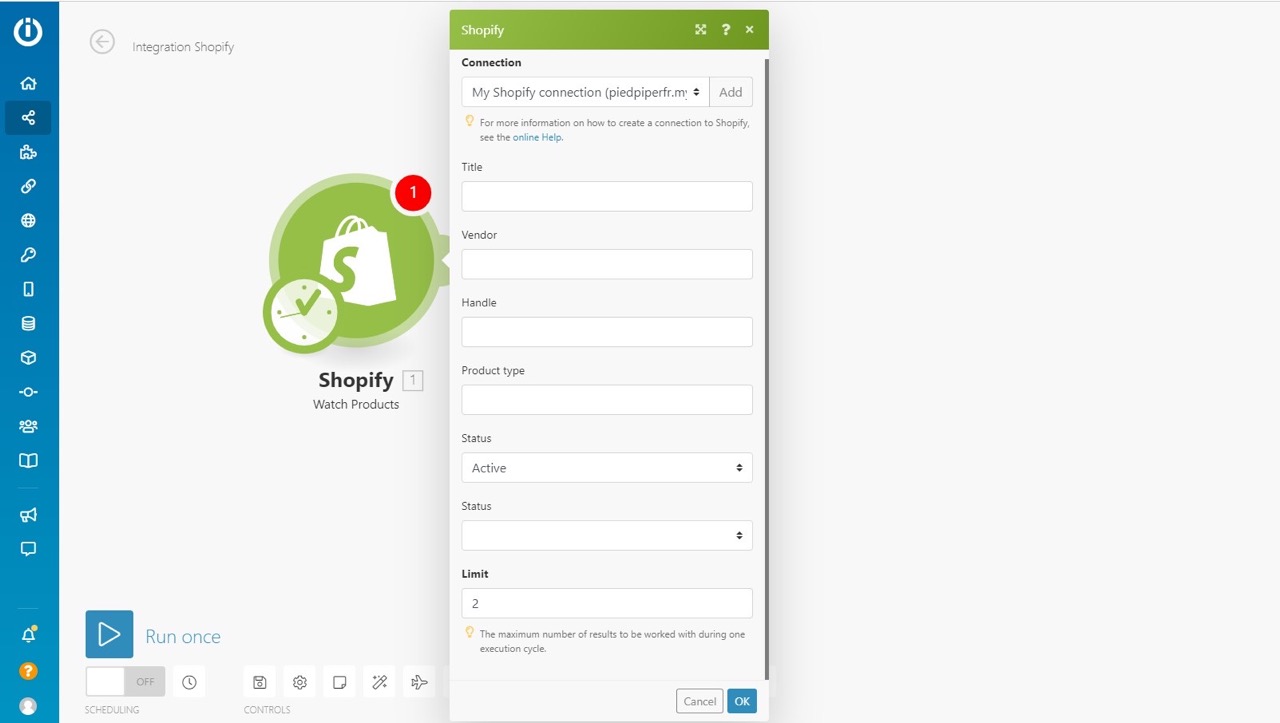
Don't worry, when wrapping up our scenario, we'll be able to tell Inetgromat when to look for those new products 😉
Next step : add a “ Generate single image” Abyssale module
We'll select our Abyssale template, then, it is time to match our Shopify products data with the layers of our template we'll need to edit the content of.
Then, let's make sure we've selected the right format (in our case Instagram post).
It should look something like this.
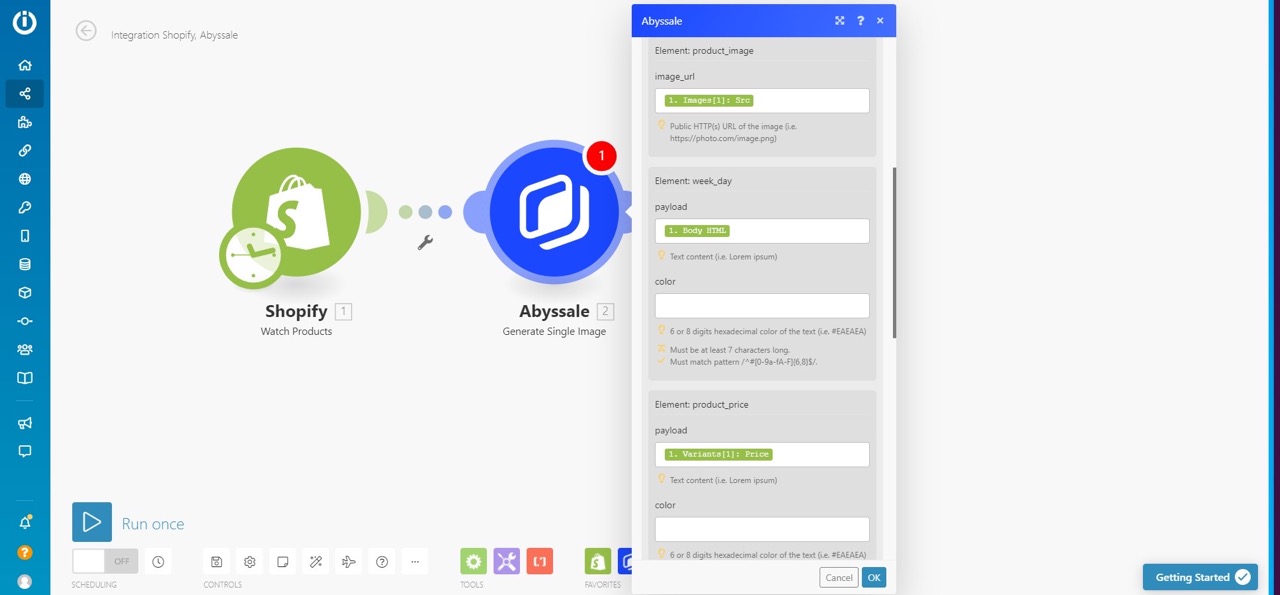
You can leave the layers you don't want to affect blank. They will be generated with the default content you've set during the creation of your template.
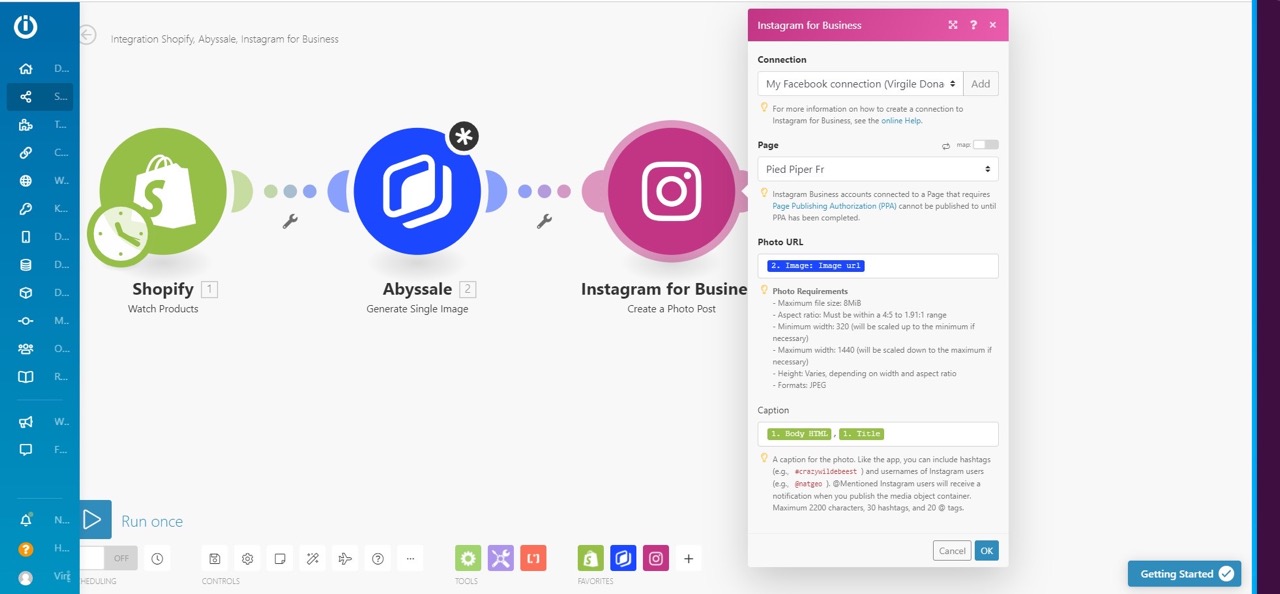
Our final step is to send all the available data to Instagram to build, and publish our post. To do that, we'll add a “Create photo post” Instagram module where we'll once again match our data with the fields we want to populate.
Now you just have to run a Test to get something like this
To schedule our posts we have 3 options, depending on your workflow, or simply what you want to do 😉
If you want to set up a recurring scheduling for this Shopify image generation automation, you can set your Make scenario"schedule settings" so that this operation is repeated every day/week/ month.

For example, in our case, we can run this scenario every Saturday, so that it publishes the menu of the next week every Saturday on our instagram.
For that click on the green clock next to your shopify module and select “Day of the week” then “Saturday” and the hour you want. But note : All you Instagram posts will be sent and published at the same time.
If you do want several images generated, but not published at the same time, you can always schedule your Instagram posts by using a social media scheduling solution. At Abyssale, we really like what the guys over at Buffer do so we'll take that example.
To schedule your posts you just have to replace the Instagram module with the Buffer module (or any social media scheduling tool). You'll then match the data collected with the Buffer fields in Make just like we've done with Instagram.
For setting up our date and time of scheduling we have 3 options: You either use Make's calendar to choose a specific time, you add the post to your Buffer queue to suit your current schedule, or you match Shopify time data with Buffer to set the scheduling date and time.
We have a third option at our disposal which is the most suitable one for this use case.
You can schedule your product availability directly on Shopify so that your Instagram post will be published right when your product goes live on your website. The only difference will be that you have to set the Make Shopify module to "Watch published products" and not "active products" because your product will indeed be active but not live on your website right away.
That's it for this tutorial! If you're a hardcore social media automation fan, maybe you'll also like to give a read to one of our articles on how to use Integromat and Google Sheets to automate image creation.
As always, if you have any questions or feedback please let us know!
Explore our guides and tutorials to unlock the full potential of Abyssale's spreadsheet feature for scaled content production.