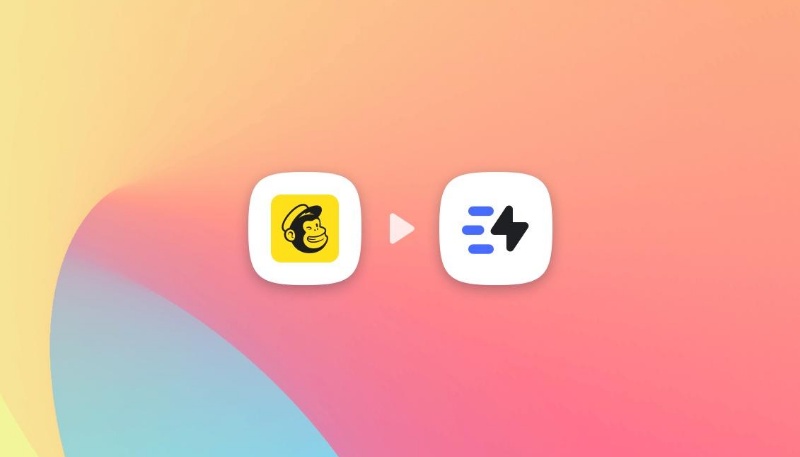
Send personalized images in Mailchimp emails
Hyper personalize your emailing campaigns using Mailchimp dynamic images! Add your merge tags to a simple dynamic image URL and let Abyssale do the rest.
A lot of companies are currently stepping up their game in terms of Linkedin outreach. Don’t get us wrong, it is fun to see how creative these companies can get. Especially in how they use their Linkedin prospection tools! If you’re getting starting with Linkedin outreach, personalized images can help you differentiate yourself and boost your reply rate. Although it seems like a time consuming task at first, we have just the right tools for you!
In this tutorial we’ll see how to automatically send personalized and clickable images in your Linkedin cold messages (open graph images).
We often use an example to illustrate the process and give you a better understanding of its applications. This time is no different :
We are a SaaS company working on the B2B market. We developed a solution to help accountants manage their billings in a smarter & more efficient way. This is why our main target are people working in accounting services. To promote our product, we’re launching a linkedIn outreach campaign in order to reach them in a more personalized way. To differentiate ourselves from the daily flow of direct messages our audience receives, we’ll add personalized images to our Linkedin cold messages. Our goal today is to find an automatic process to extract our contact’s information & send them those personalized Linkedin messages.
First things first, let’s design our personalized image template. Our goal here is to send a personalized image that will differentiate ourselves from the crowd. Keep in mind that this is a cold message, so it has to be short, clear and raise interest in a short amount of time. So we’ll focus on that when creating our template. Our proposition value has to be clear and we need to use personalization wisely to get our readers attention. Let’s get to it :
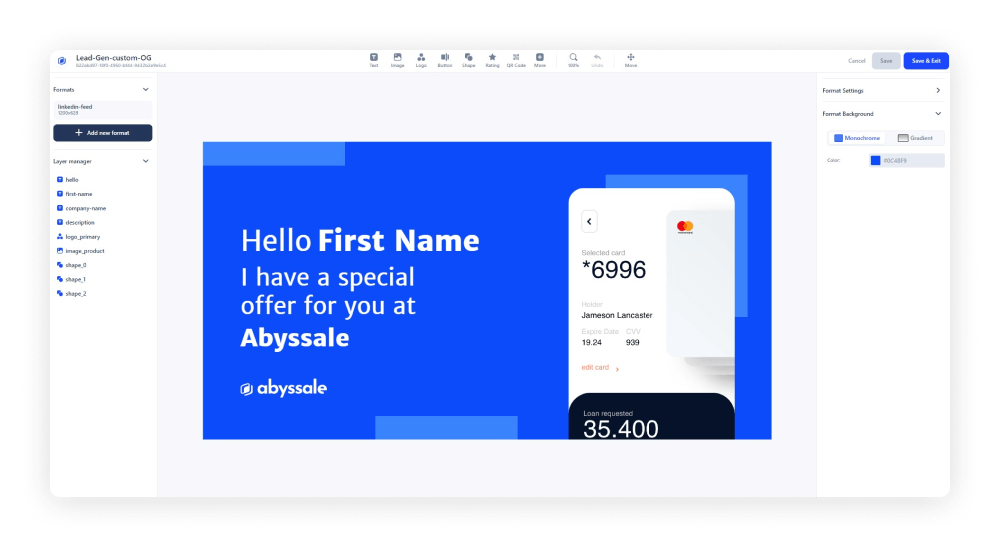
To make the rest of the process easier, it is important to clearly name the layers of your personalized image design. For us, it looks something like that :
All the other layers will not be changing during personalization. So our company-name, description, logo layer will stay the same and the others are just design elements.
But, if you want to personalize more layers you can. For example you can add your prospect company or their last name, you can change the image, really anything as long as it is data that you have in your posession.
Once you’re satisfied with your design click on the Save & Exit button.
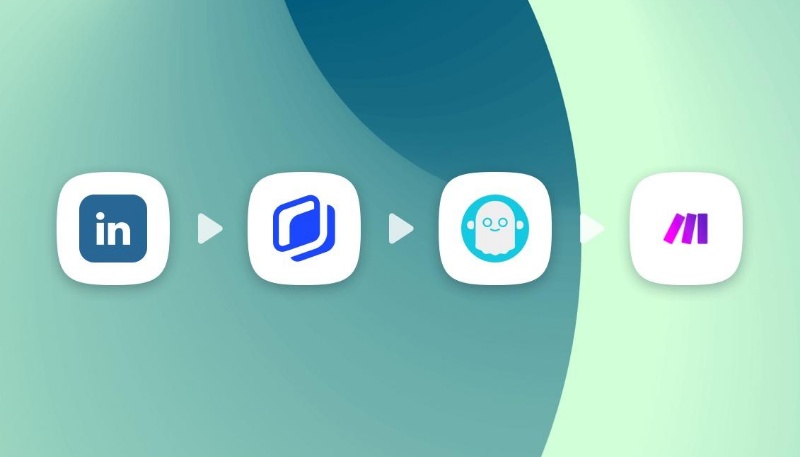
Now that we have our image, let’s get our listing ! To do so we’re using Phantombuster. It is a set of tools called phantoms that includes Linkedin Search export phantom. This phantom will allow us to extract a list of contacts from a Linkedin Search Result page.
Now in the “Behavior” section we have to set the number of results per search and per launch we want to extract.
Good to know : Be aware that it is preferable to run small searches, 10 by 10 for example several times a day than to run one big search. For example we set 30 results per search, 10 results per launch.
Back on Phantom Buster we launch the Search export and wait for it to be done.
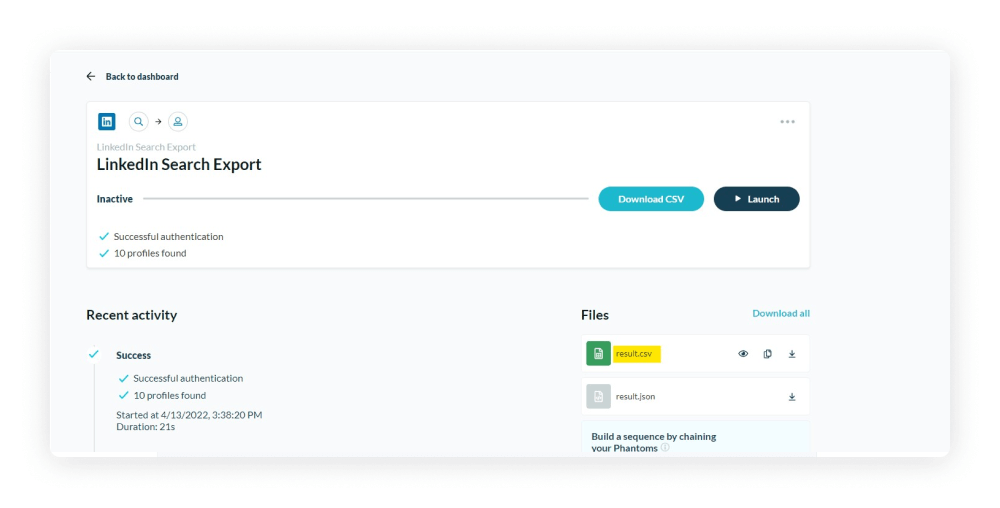
Then we download the results.csv file, and transfer it to a Google Sheet.
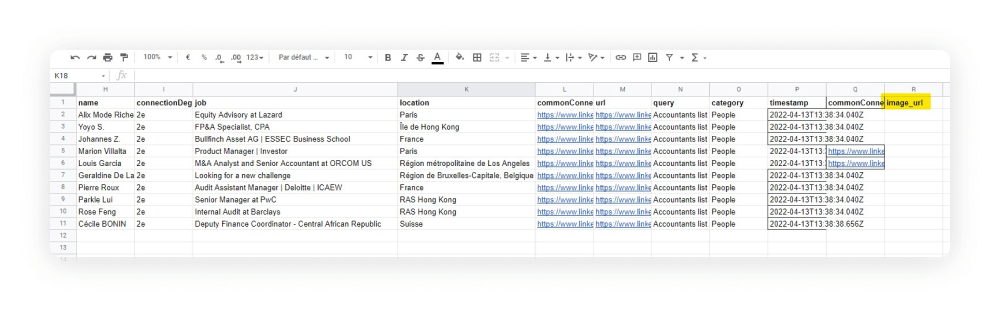
On our Google sheet , we verify that our data has been imported correctly and that we have all the columns we need. This Google sheet file will serve as the base for the creation of our linkedin personalized images as well as the sending of our messages.
So for that, we’ll add another column where Make will be able to input a the link of our personalized and clickable image during the automation.
Before leaving this document make sure to have your Sheet available in public mode. If not, go into the Sharing setting and make it publicly accessible.
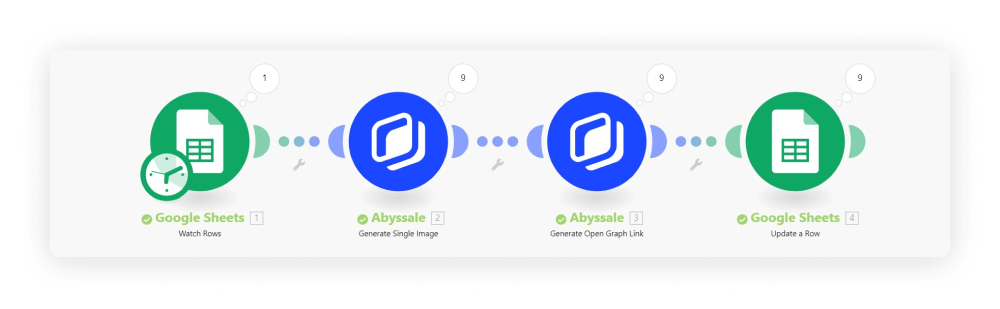
Now we’re about to begin the actual automation process. All we did before was preparation. To illustrate this step: It is as if we had to write a script of what should be done automatically.
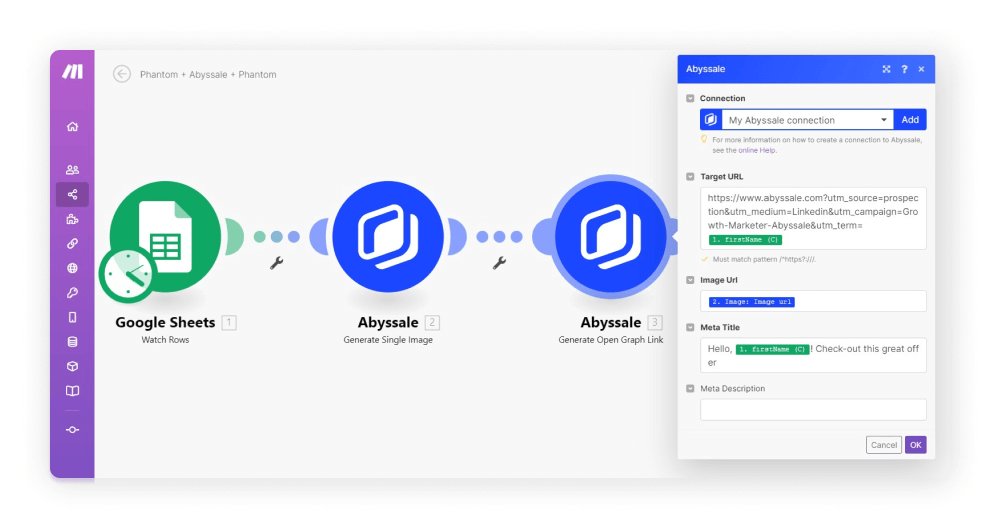
This scenario here will have 4 modules . GSheets - Abyssale - Abyssale - GSheets. And our automation could be described with follwing sentence : We want Make to watch our Sheet document and add an abyssale personalized image in the image_url column for each contact and then make this image clickable before inputing the final link back into google Sheets.
The instruction could be : “Look at the data I’ve just collected “

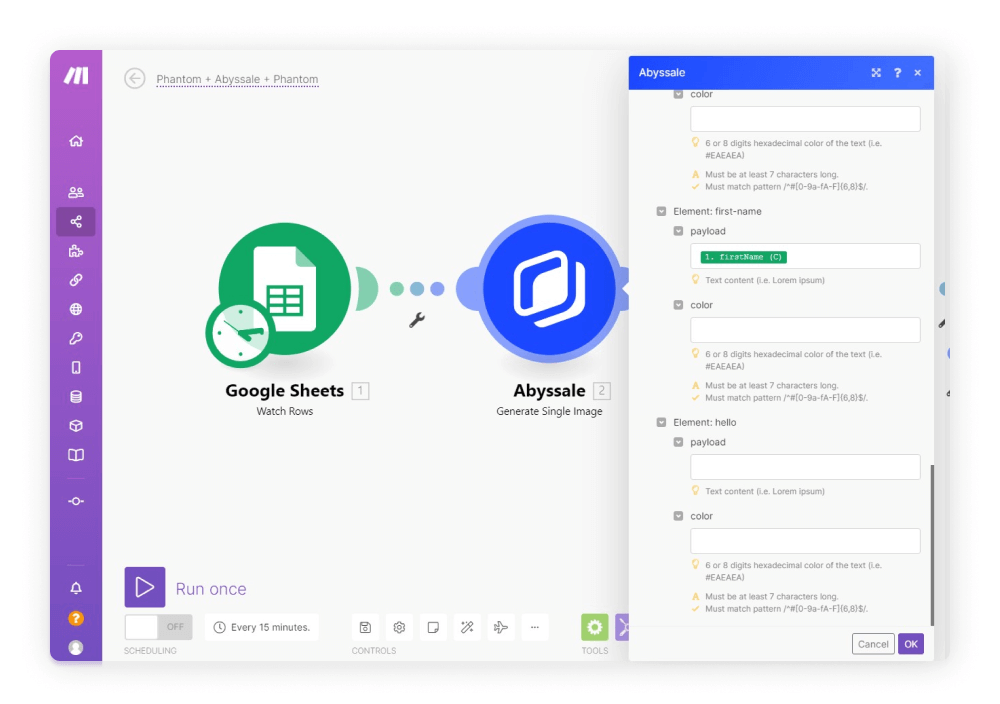
Here the step could be described as : Use the data you’ve just collected from Sheets to generate an image with Abyssale.
Here we want to personalize our image with our contact’s first name, so we’ll match our first-name layer with our GSheet firstName column.
Here the step could be described as : With the image you’ve just generated, create an open-graph link (clickable image).
Pro tip : For the target url field, instead of just inserting your link normally, you can create UTM tags in order to be able to track data on your link (which person clicked on it for example). Here is a link to help you create one : Create a trackable link
At the end of our link we can add the firstName column of our GSheet so that we’ll have the names of each contact that has clicked on our link in our website tracking tool.
Now the instruction for this module : Send the Open Graph image link you’ve created back to the right Google Sheets row.
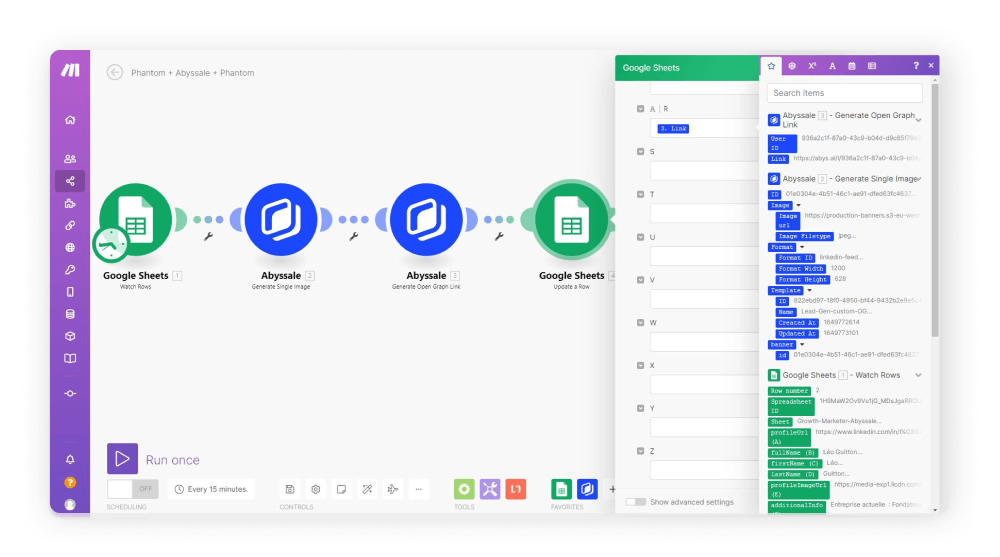
Now to make sure you’ve set-up your automation correctly, run your module once. Every module should appear in green at the end of it. Then go back to your Gsheet and you should see your last column filled with personalized images URLs.
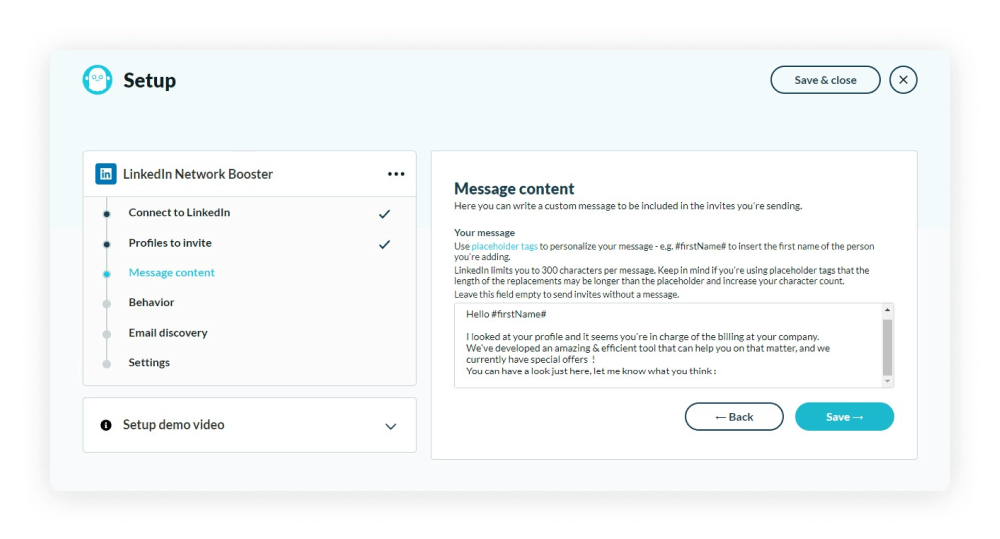
For this last step we’re back on Phantom buster and this time we’re using the LinkedIn Network Booster Phantom to send our Linkedin outreach messages!.
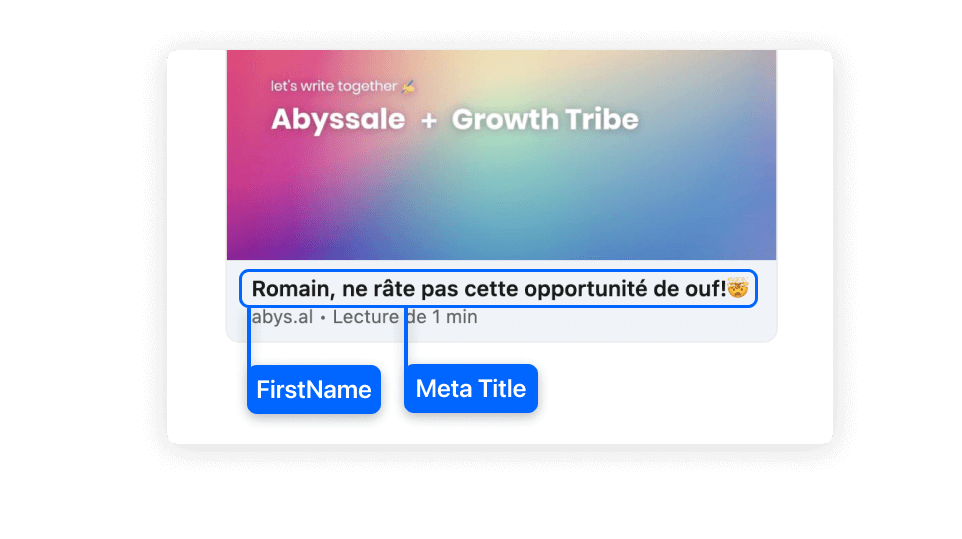
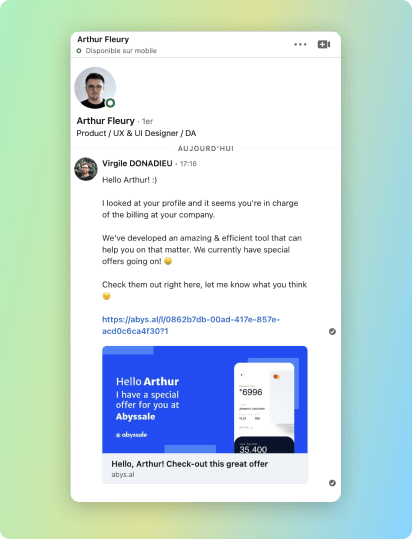
To show you the final result, here is one example of the invite we’ve send :
Congrats!!!! You're now ready to take your Linkedin outreach to the next level! Here at Abyssale, we've seen a 47% increase in reply rates when personnalized open graph images have been added to our messages. If we can do it, we can to! If you're not familiar with Phantom buster and maybe use a tool like Waalaxy, you can check-out our other article on how to send personalized images with Waalaxy.
Explore our guides and tutorials to unlock the full potential of Abyssale's spreadsheet feature for scaled content production.