Display Ads Best Practices
Discover the best practices for creating and running display ads. Learn how to make your display ads work better.
Remember the tutorial we did about automating image generation with Gsheet & Integromat? It is pretty much the same goal here. In this tutorial we want to automate image generation for social media, using an Abyssale Template & an Airtable table on Integromat.
This Airtable automation can be useful if you create the same type of content on a daily basis. For exemple if you have defined categories of social media posts and your content calendar always revolves on those types of posts.
This automation will help you:
For this tutorial we will use the following example :
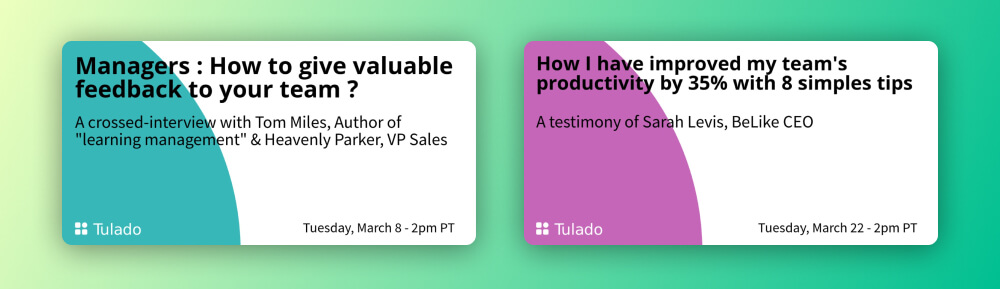
Tulado is a HR consulting firm that helps firms around recruitment, change management, formations and corporate culture challenges. Let’s say we are the community manager of Tulado and we want to invite people to attend our weekly Webinars. Our final goal is to have different visuals published each week :
In theory we should create a visual every week that presents the webinar subject, the guest time and hour of the event and share it on LinkedIn. We are going to show you how this task can be automated with :
As usual, create & design your template on Abyssale by keeping in mind that it should work for different content. Here we design our template with our first webinar of the month :

We chose the LinkedIn feed format & the LinkedIn square format in order to be able to create events on Linkedin and have a cover picture and create posts.
In terms of layers we have :
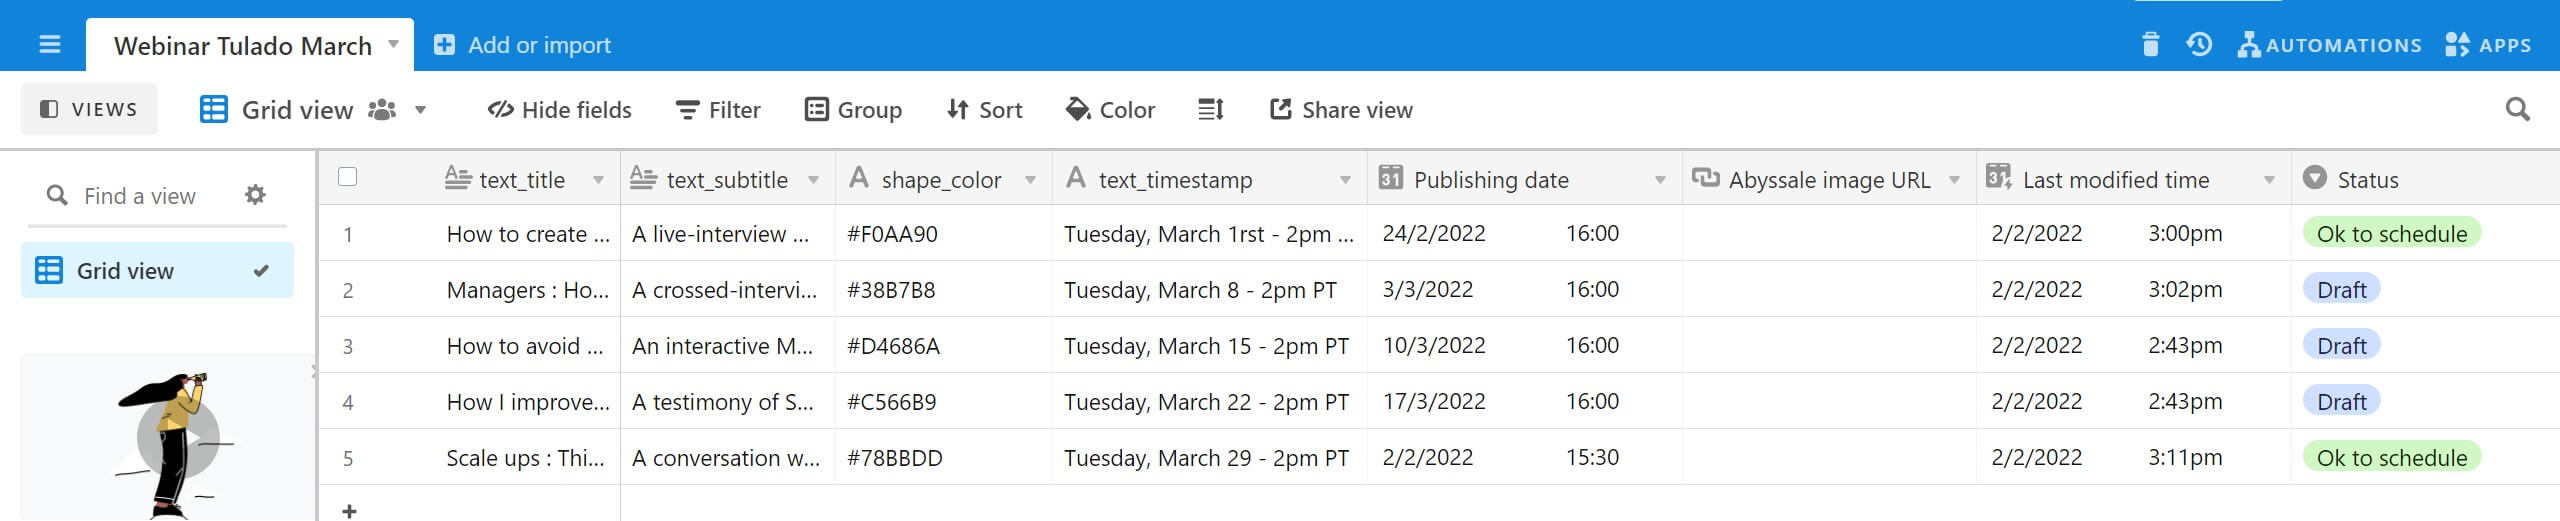
Now that we have created the template on Abyssale, it is time to define its variation in Airtable. Airtbale acts just like a spreadsheet, so the important thing is to define the column types.
For our example, we create one column for each layer that will change according to the different webinars, this is why we have a text_title, text_subtitle, text_timstamp and a shape_0 column. all of them are text column types. This will give the following table :
All the columns you will create depends on your layers and on the changing elements of you visuals, but there are also other columns that we will create for automation purposes :
Now, we have to connect the Abyssale template & our Airtable data with Make. So let's create a new 4 step scenario : Airtable (to define the variations of the visual) - Abyssale (to define the design thanks to the template) - HTTP (to resolve our image URL) - Buffer (to automate the weekly posting of these visuals on Linkedin). So the final scenario should have 4 modules in total and look like this :

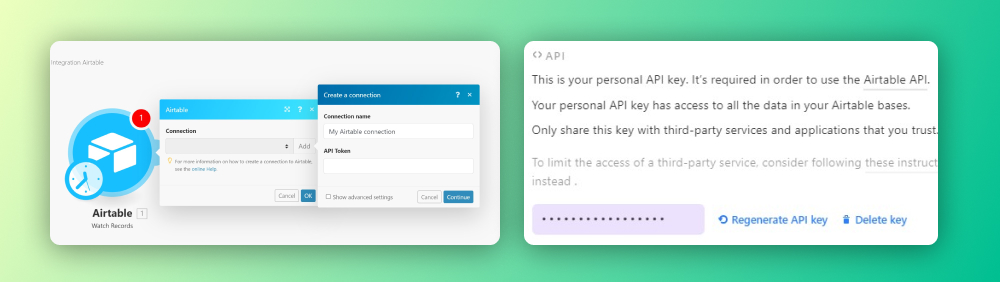
We create a new Airtable module and select “Watch Records”. If you haven’t connected your Airtable account to Make yet, you can do it by pasting your Airtable API Token here (Your Airtable API Token is on your Airtable account > API section):
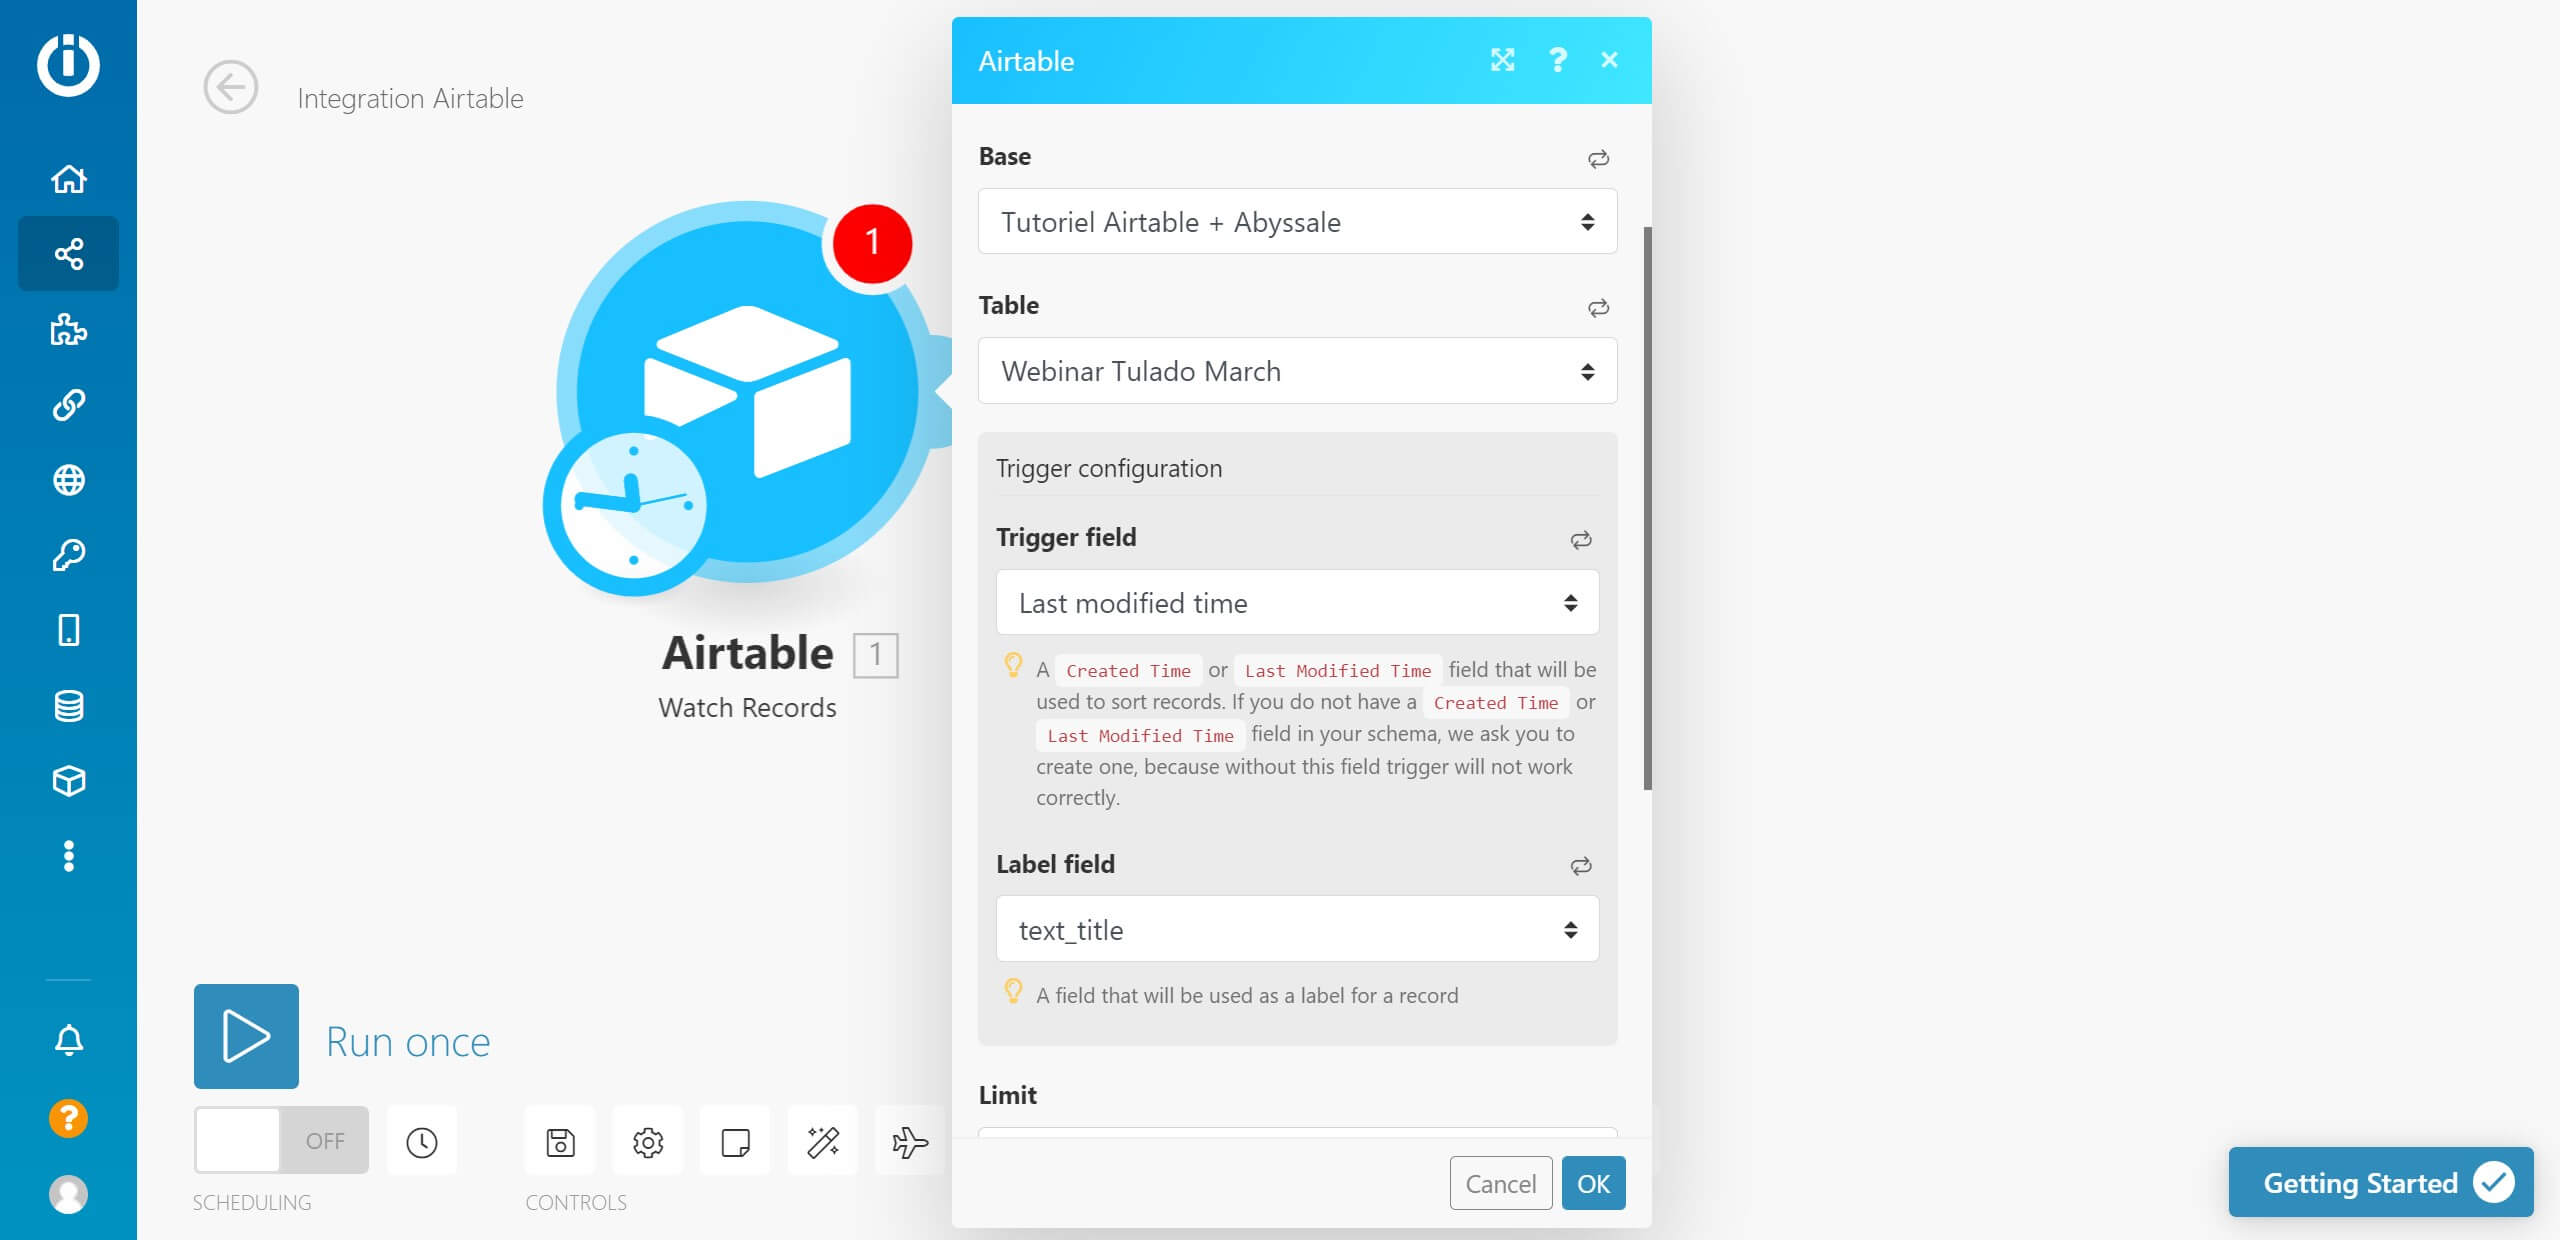
Once connected, you have to fill in some information to set-up your triggers.
To automate the auto image generation part of our Automation, we'll use the Generate single banner option of the Abyssale module. We select our template and match our layers with our Airtable columns. In our case this is easy as we named our columns the same as our layers.
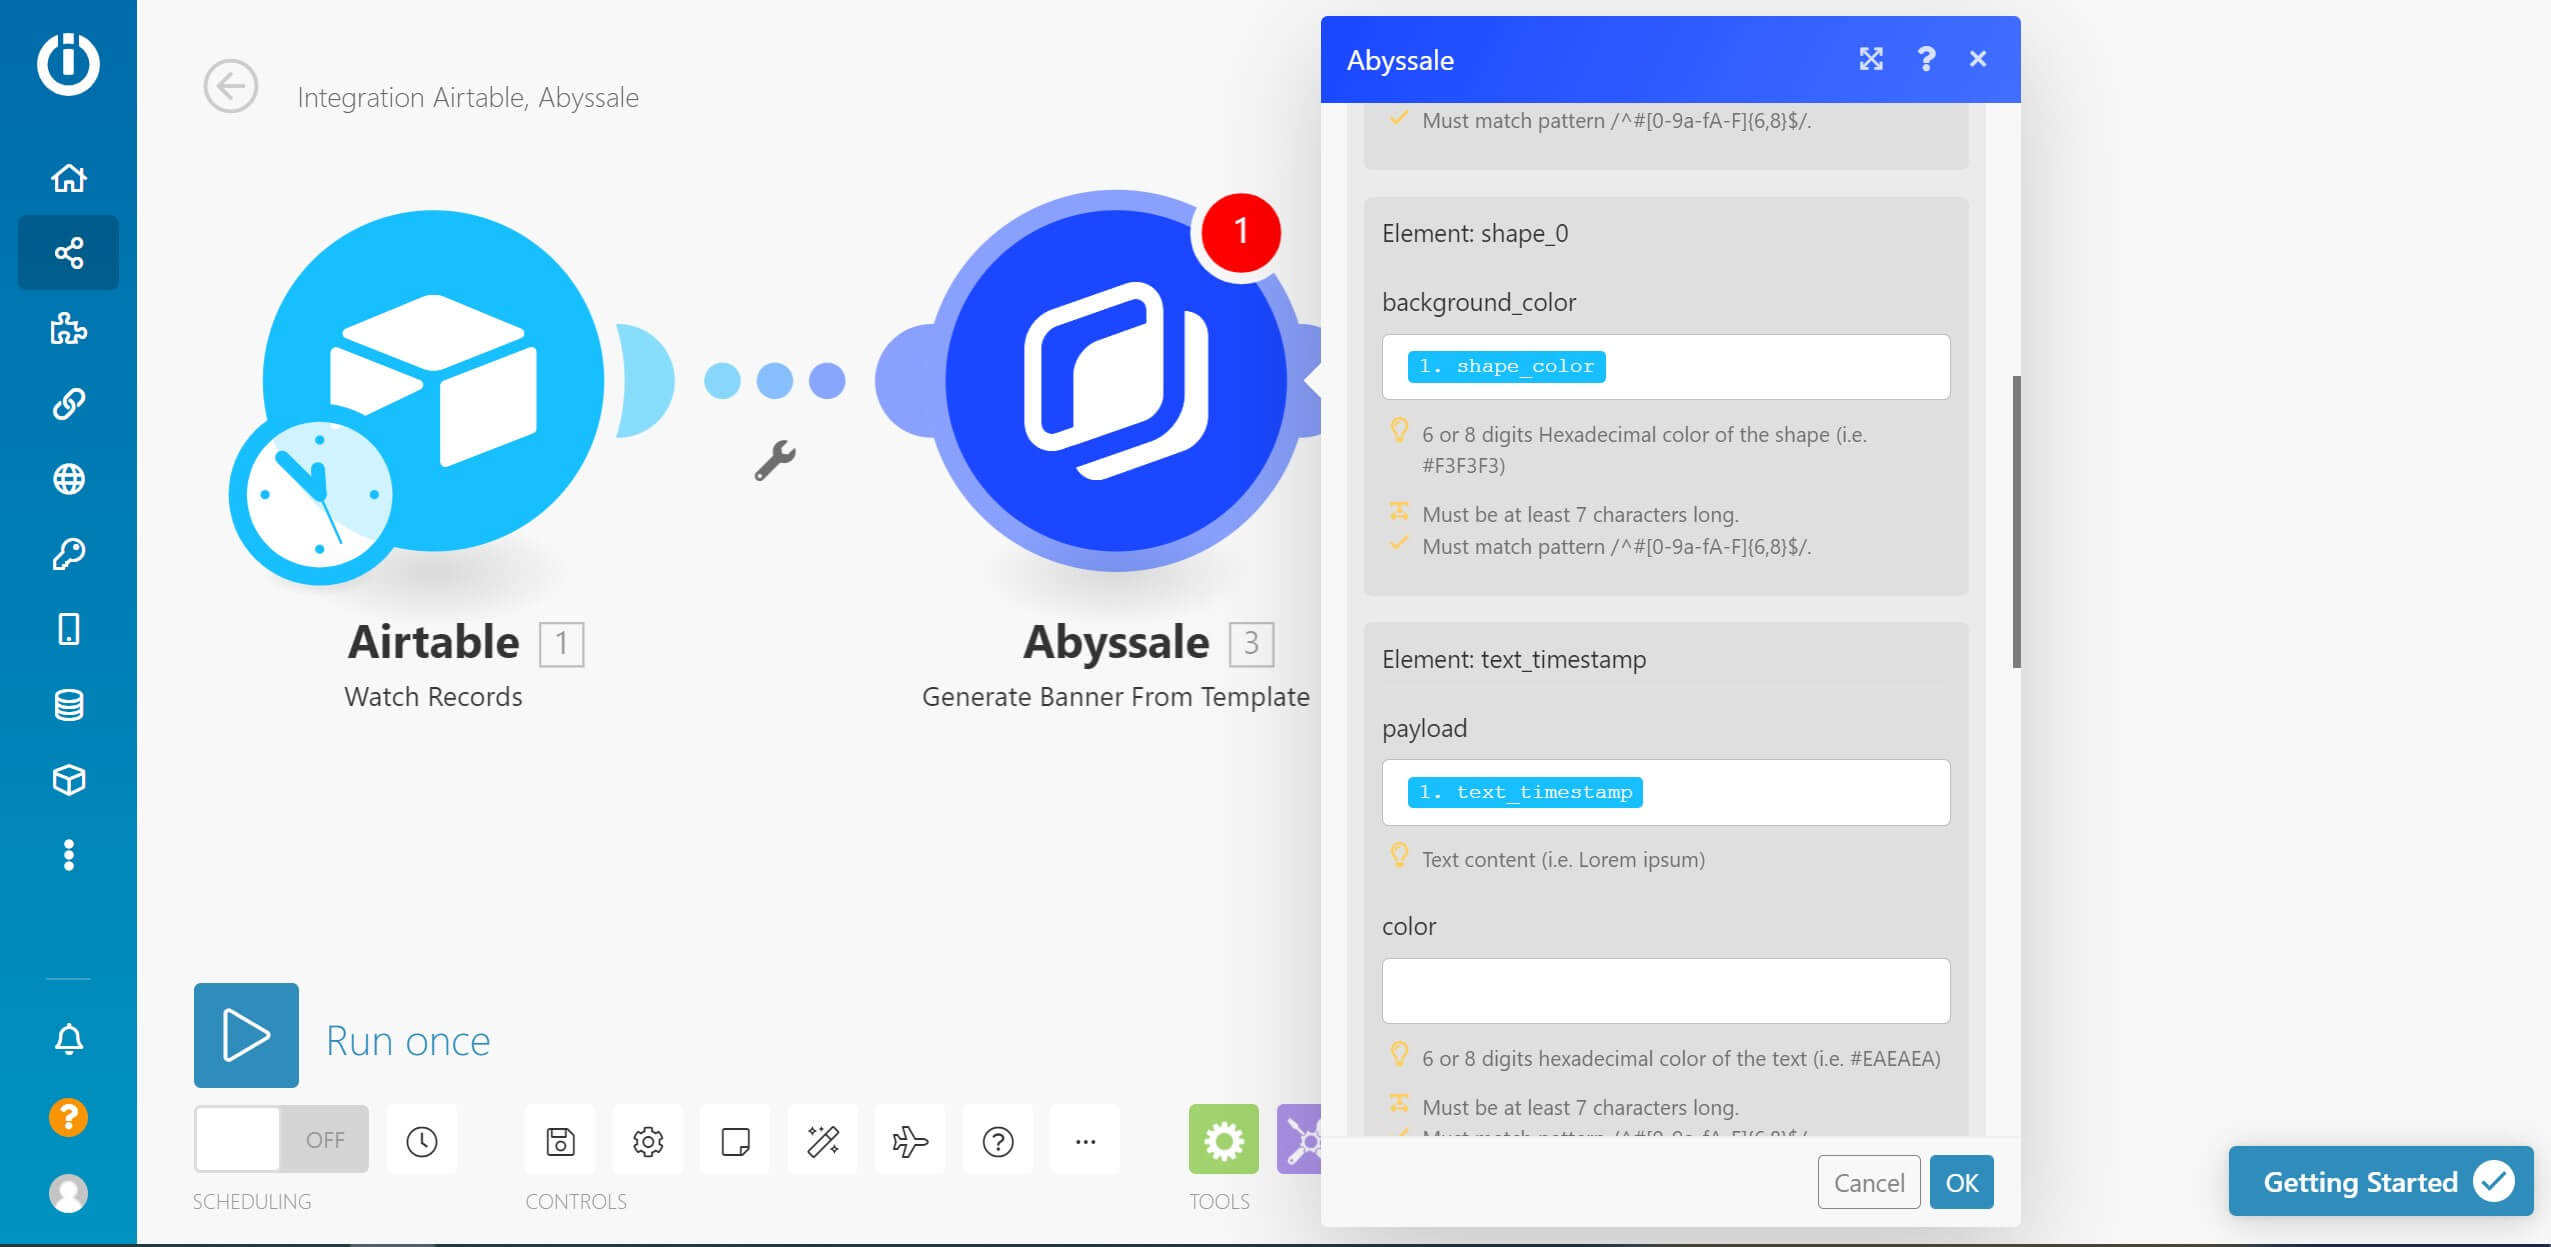
We need to match only the columns that will change the others are not mandatory. In our case :
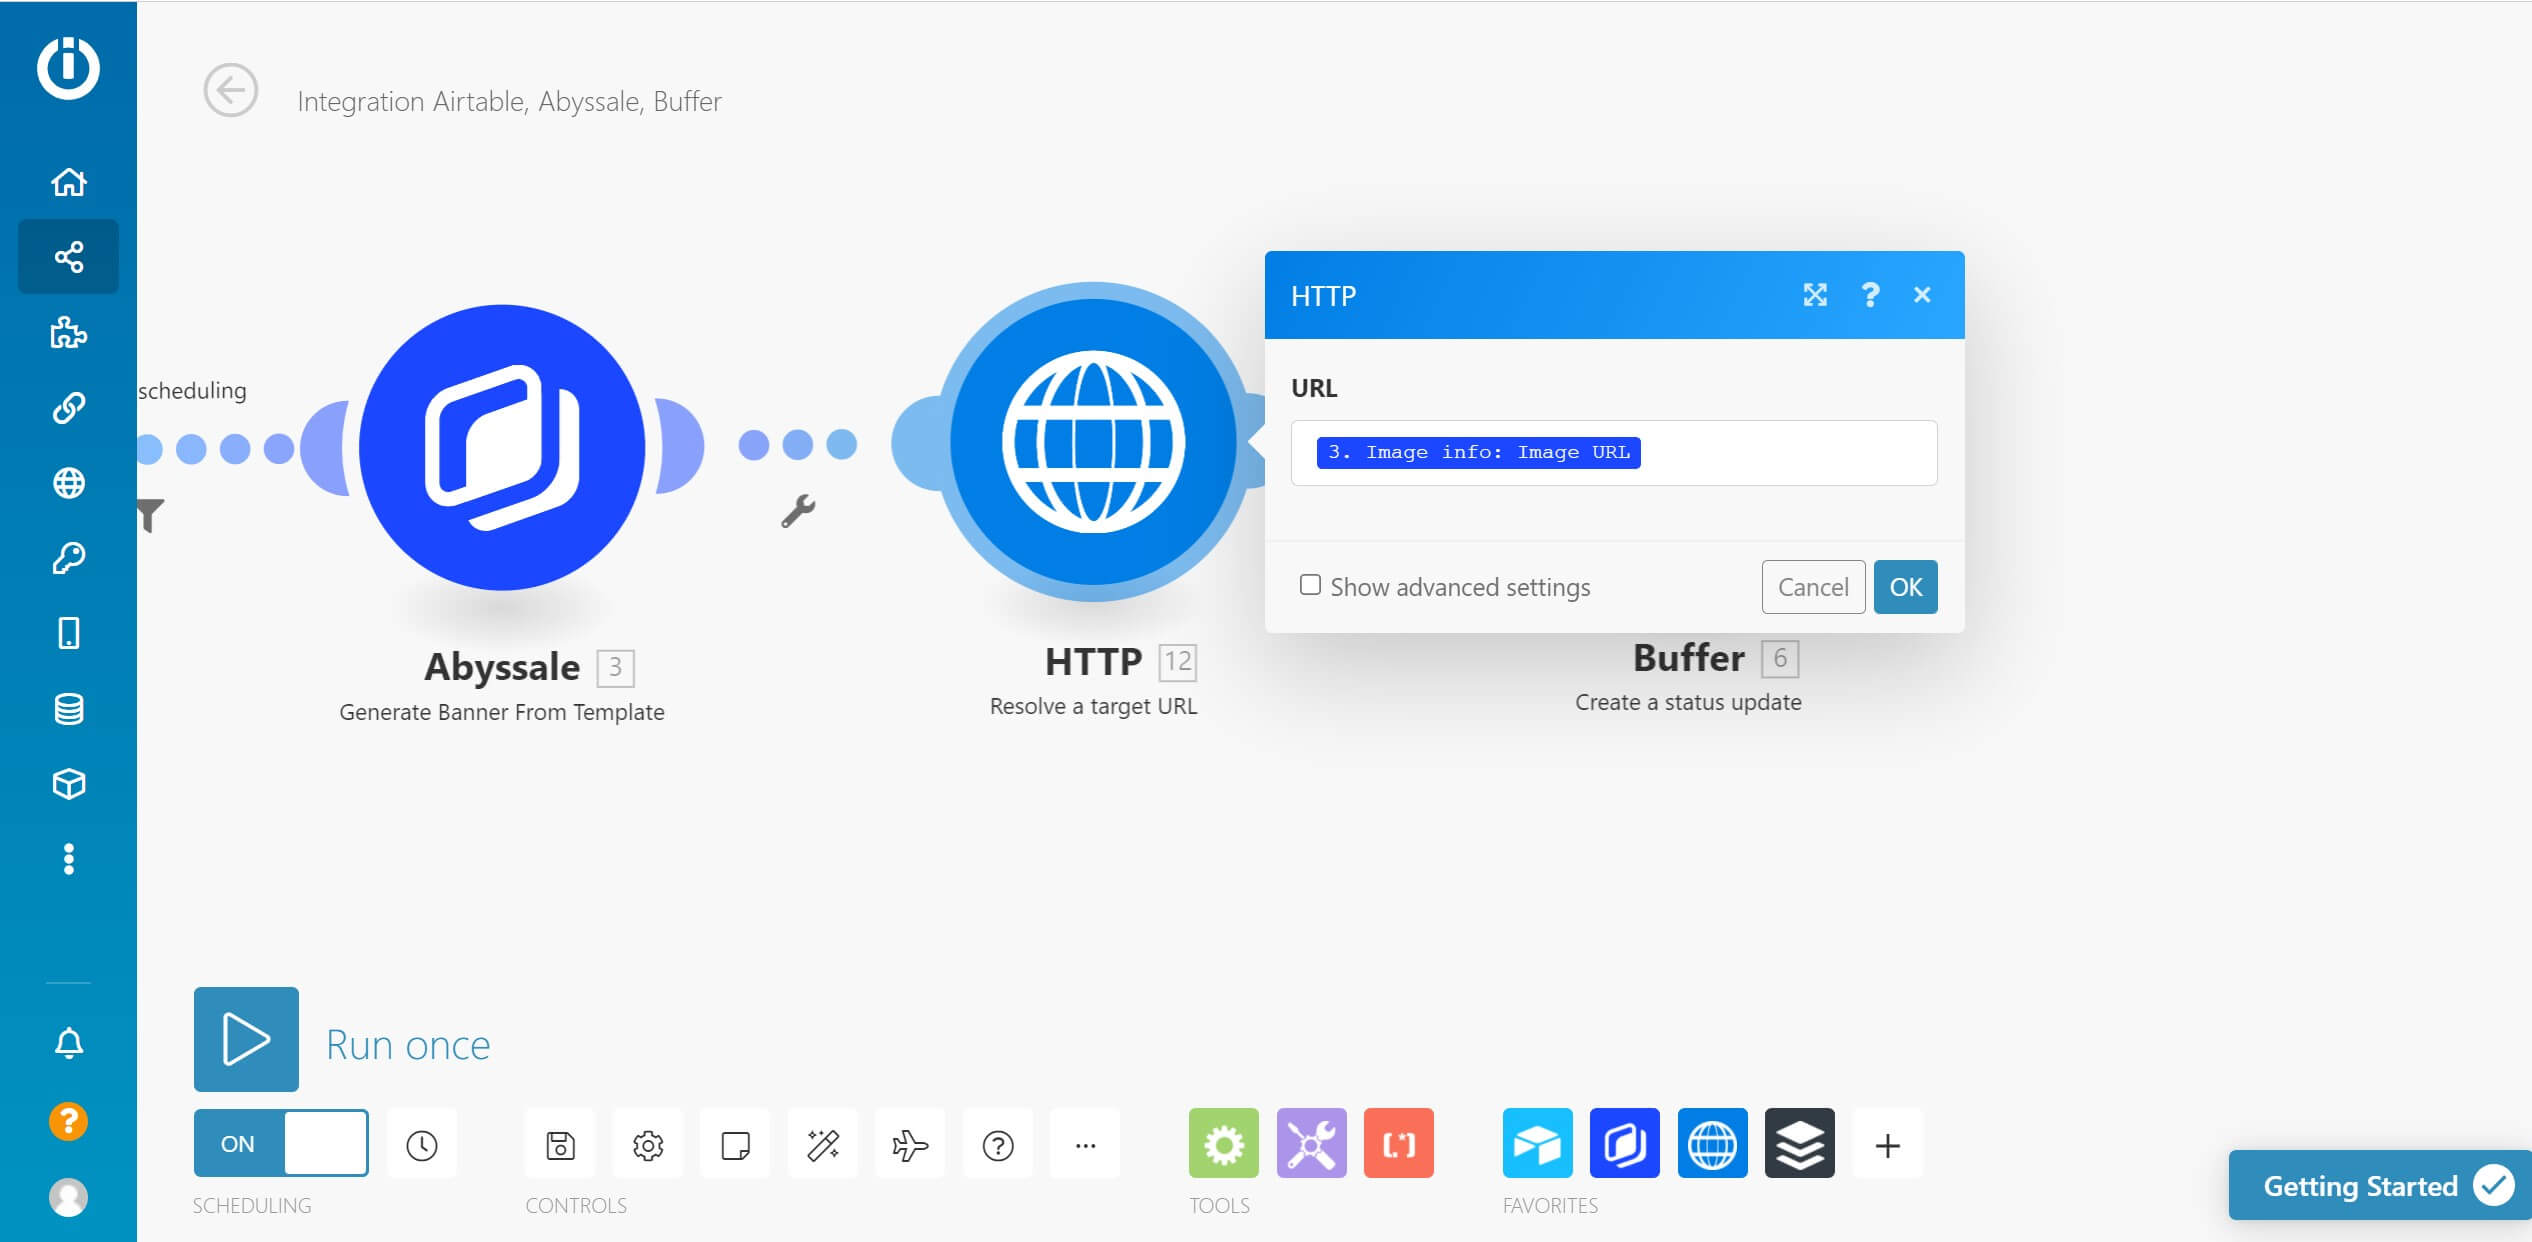
In order to make our Abyssale image usable for Buffer, we need to edit to resolve a redirection it includes, using the HTTP module. We then select “Resolve a target URL”, and grab our image URL from Abyssale.
Buffer is a social media scheduling tool with a great API. At Abyssale, it is our tool of choice for all of our social media automations. So the last module of our Airtable social media automation will be a Buffer* “Create a status update” module. This module will gather all the previously created, and generated data to build our social media post and publish or schedule it.
We'll connect our Buffer account and our Linkedin Page. We then choose the text that will be used as a caption for our post (we use our subtitle column) and our publication time. That’s where our “Publishing date” column comes in handy !
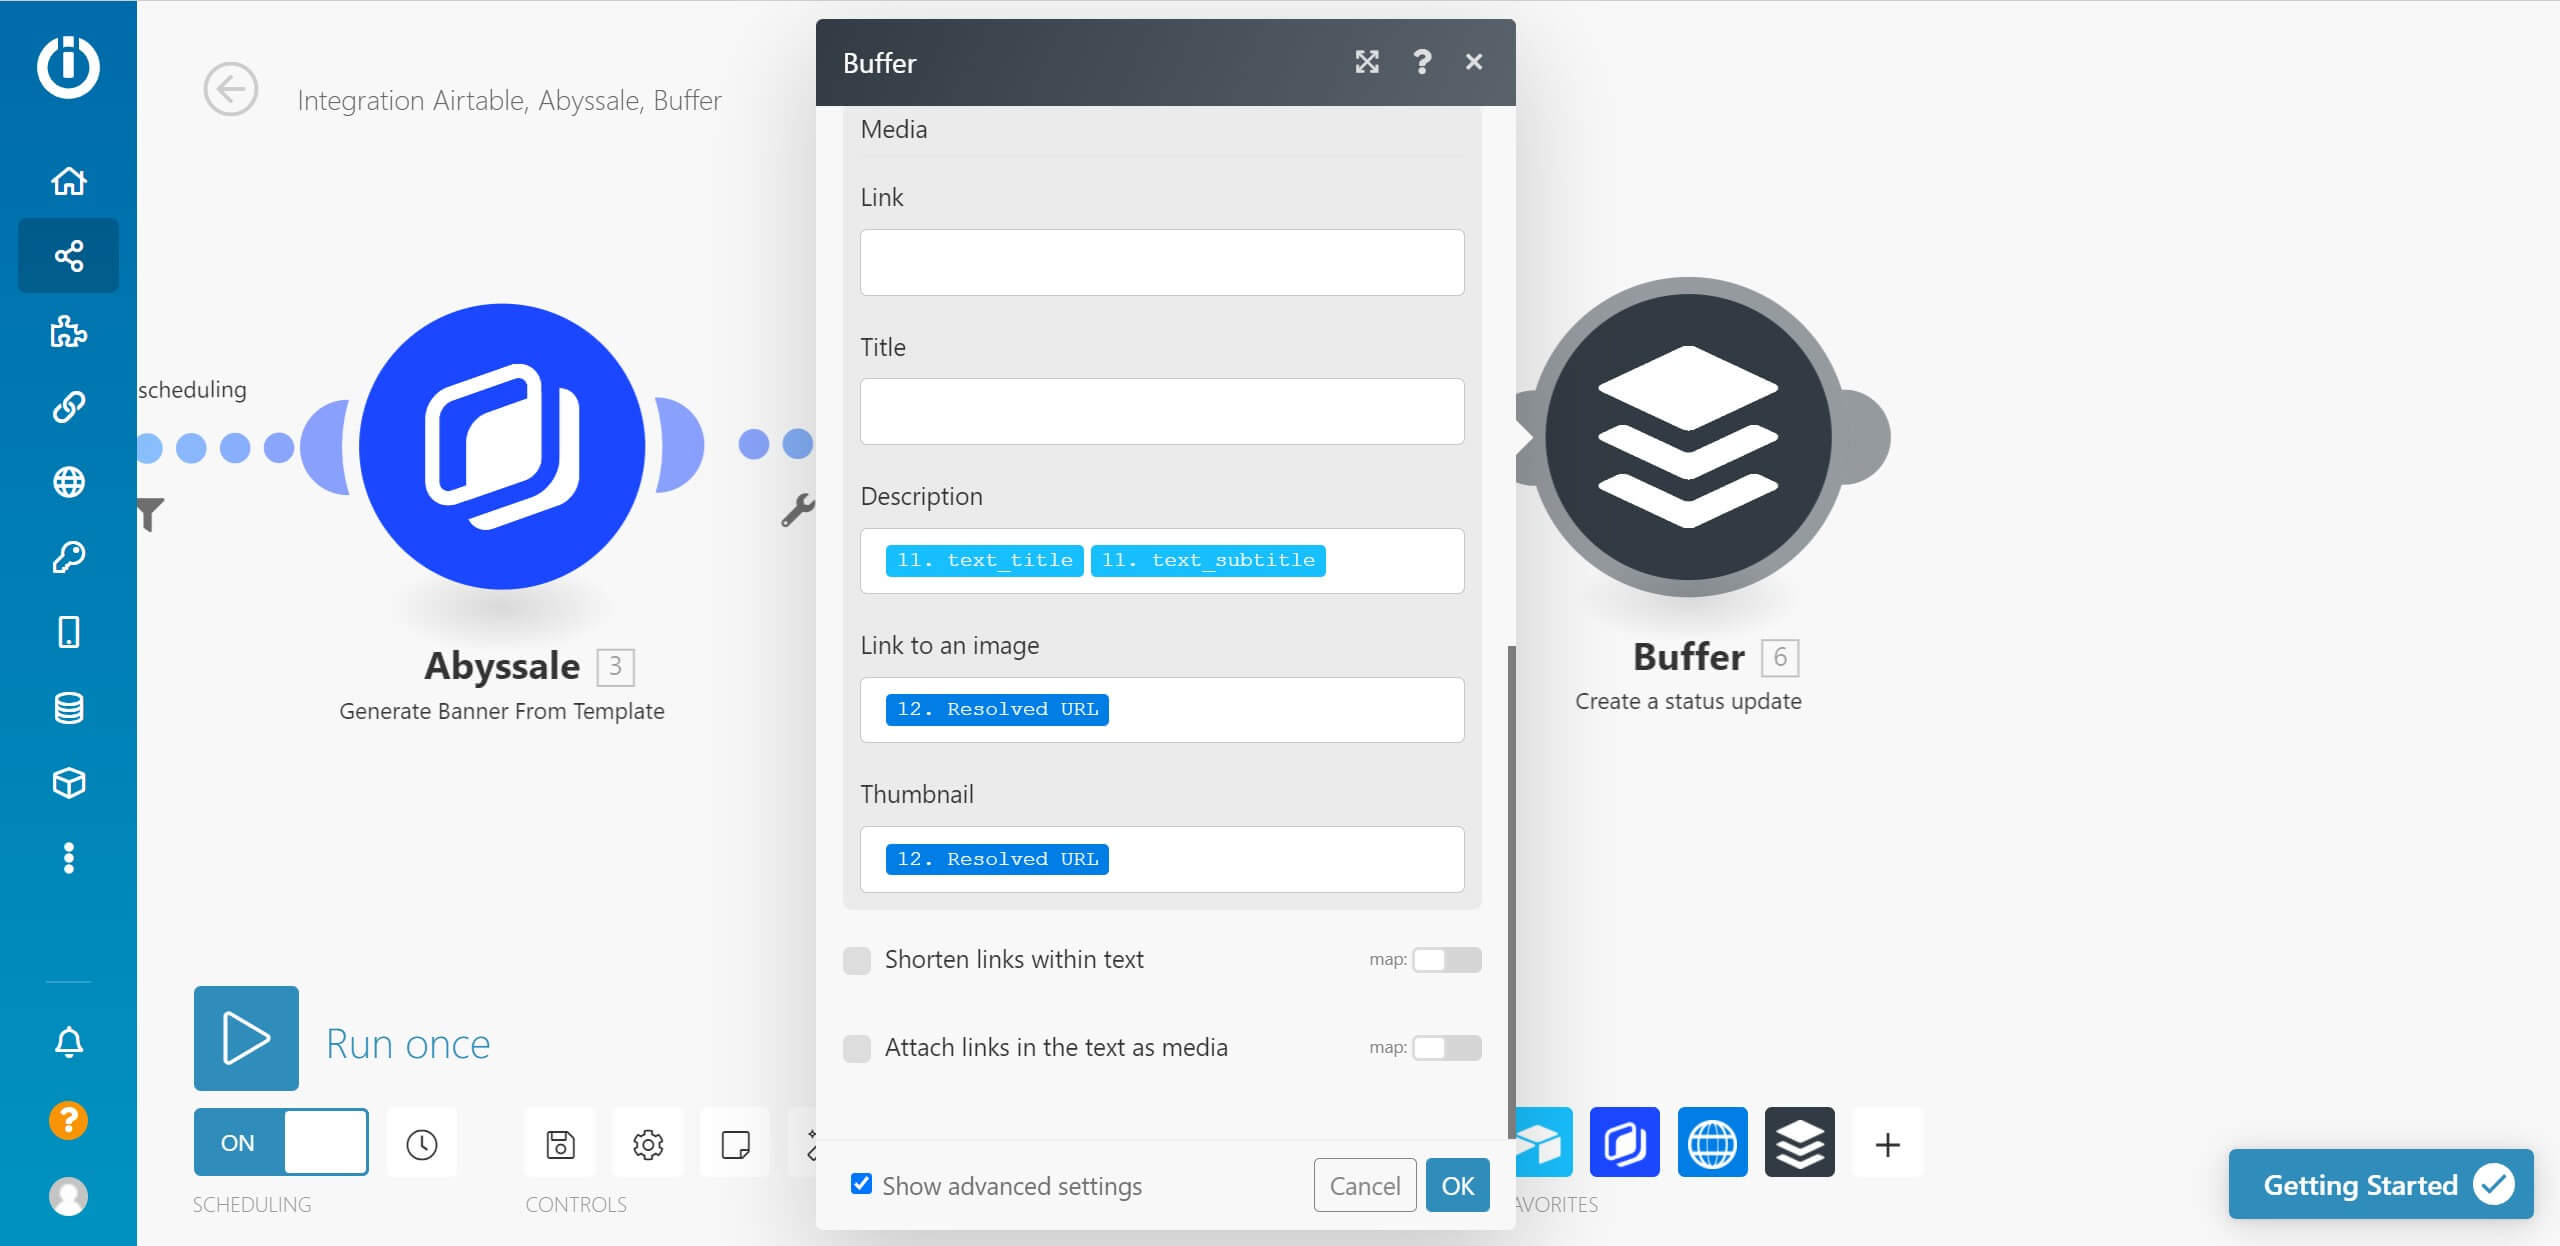
Finally it is time to include our visual in the buffer module. For that we click on Attach media to the template >Link to an image and there we grab our resolved URL from the HTTP module. Same thing for the Thumbnail. For the other fields, it depends on your needs, you can add a description and a title, or even a link!
💡: You can use any other social media scheduler that has a Make integration such as Hootsuite or Sprout
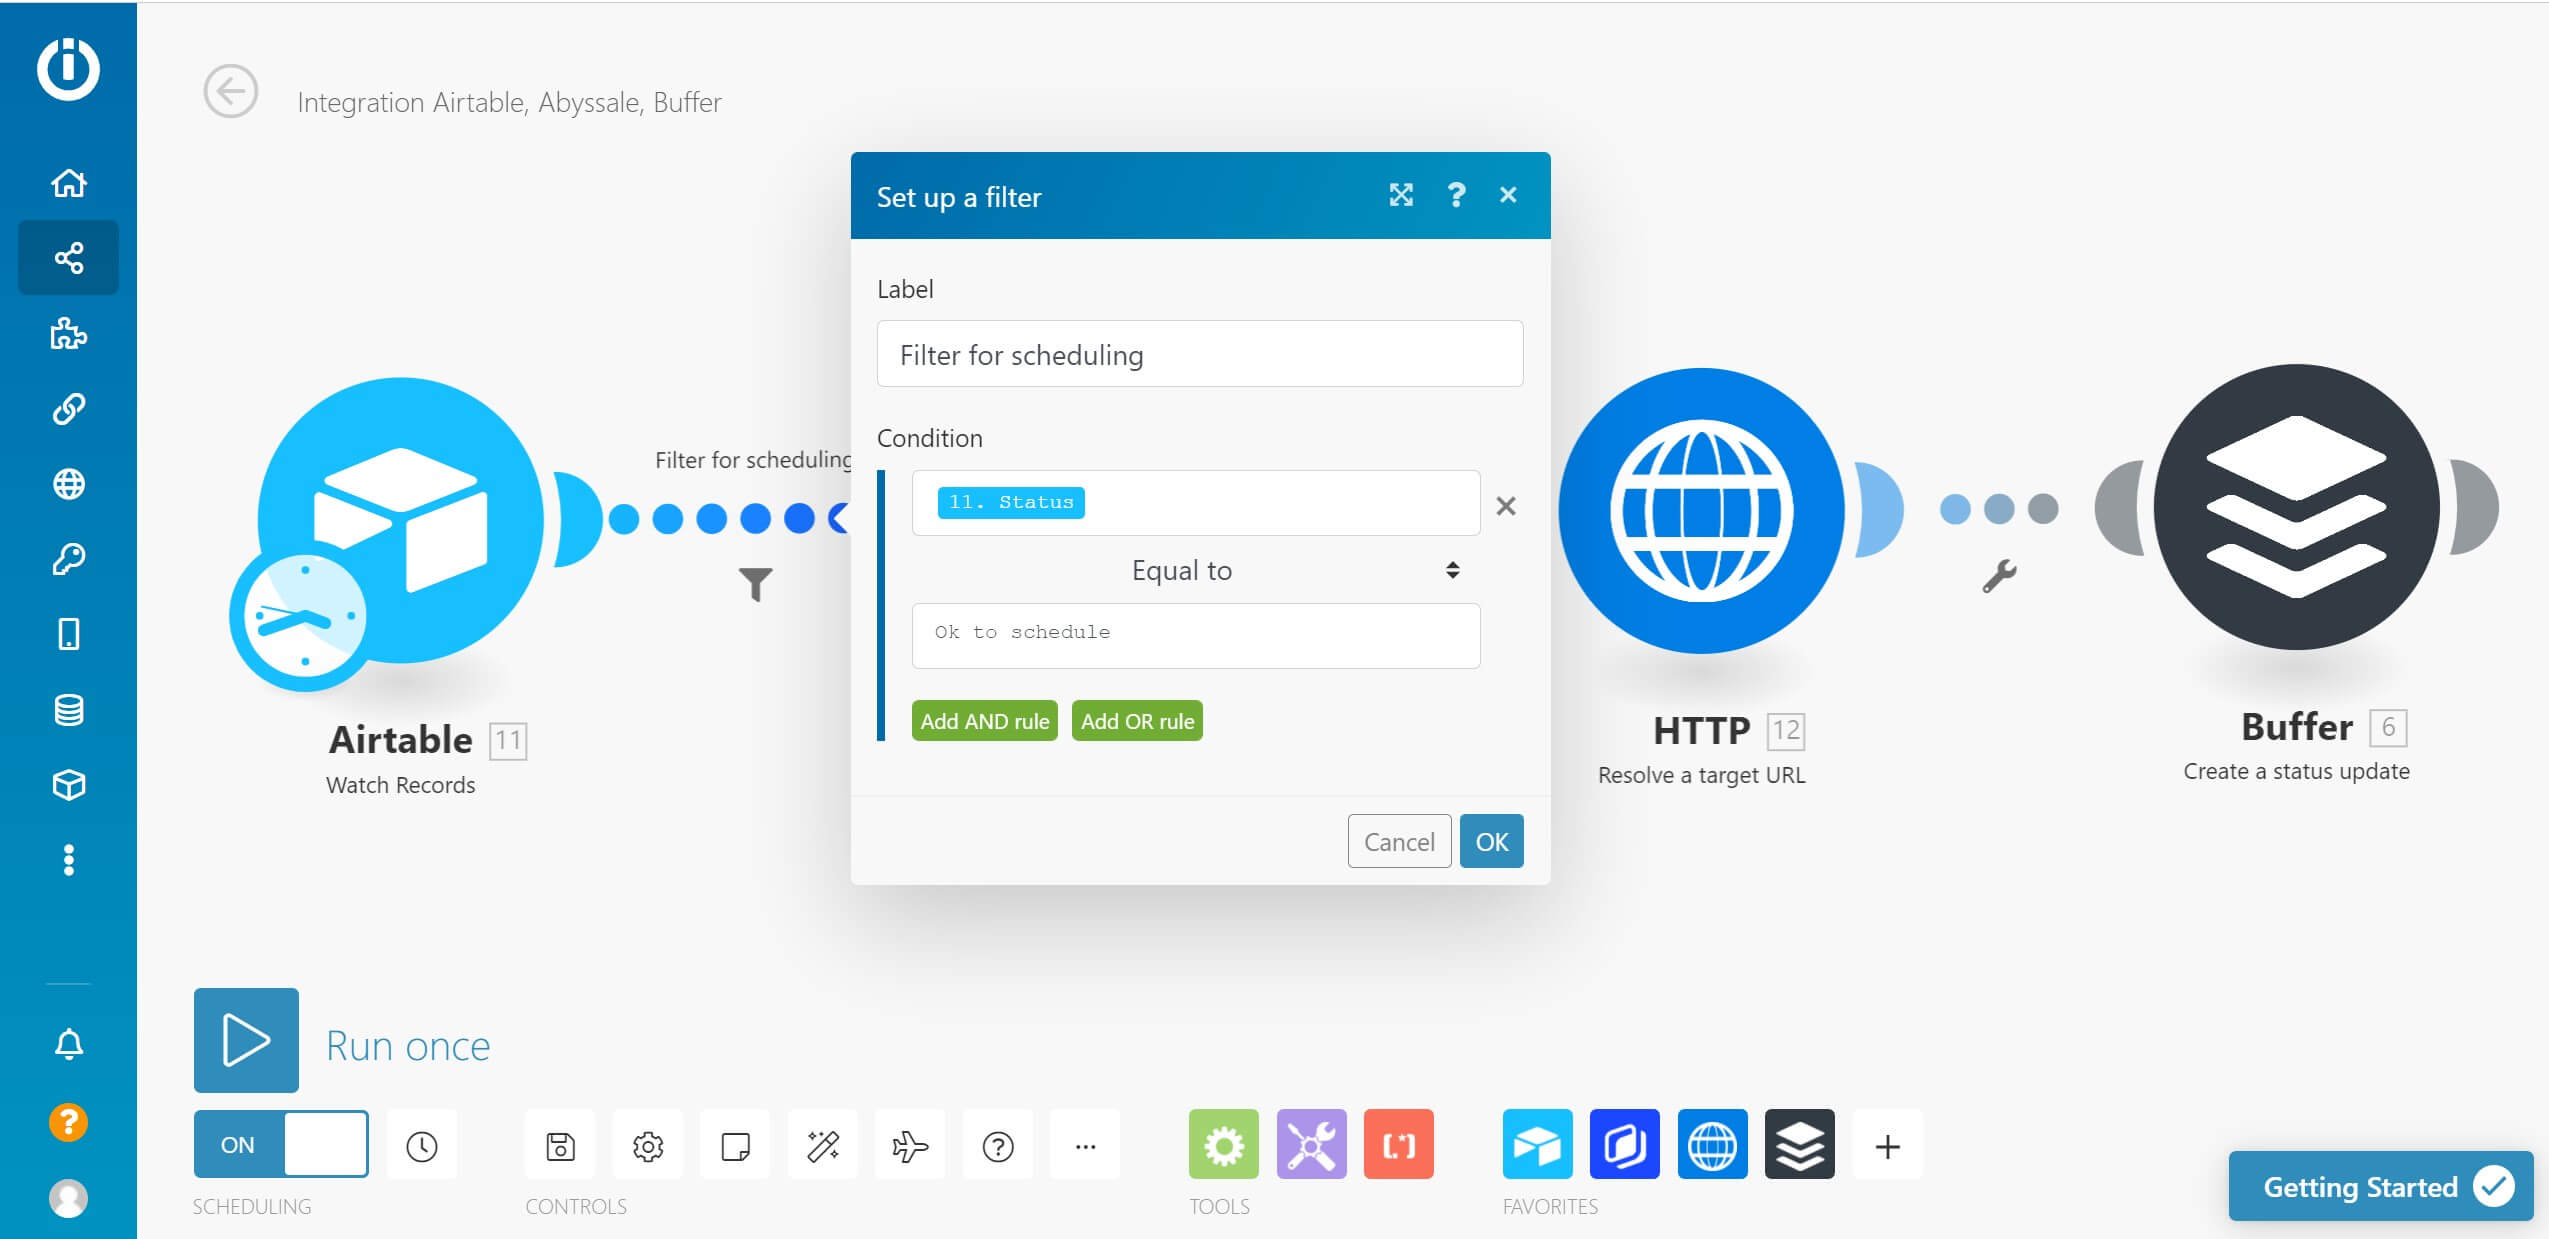
Now that we've created the main steps of our scenario we just have to adjust its settings. First, we'll add a filter between our Airtable module and our Abyssale module.
On the wrench icon we click on Set up a filter, name our filter and choose our Status column in the condition section. Basically, here, we'll tell Make to run this scenario only when the status of this column matches “Ok to schedule”. This is especially useful to prevent Make from fetching and process content data that is still in the creation phase.
Once this is done, we can Set up the scheduling of our Airtable automation. On the Airtable module there is a blue clock. When clicking on it you can schedule how often or when you want Make to check out your Airtable table and execute the necessary changes. (For us, it is going to be every Wednesday because we post on Thursdays).

Congratulations! Now you just have to switch on your scenario to make it effective. If all these steps are done correctly we should have several social media posts with an image generated by Abyssale and published by Buffer on LinkedIn.

Explore our guides and tutorials to unlock the full potential of Abyssale's spreadsheet feature for scaled content production.
.webp)
%2520(17).webp)