Send personalized images in Mailchimp emails
Hyper personalize your emailing campaigns using Mailchimp dynamic images! Add your merge tags to a simple dynamic image URL and let Abyssale do the rest.

In a recent article, we explained how to add subtitle to your videos with FFmpeg. We went from this video :
to this video:
Only, the subtitles aspect in this example is a default value.
In this tutorial, we'll explain step-by-step how to change the appearance of subtitles with FFmpeg. This includes font size, font, colors, etc.
In this tutorial, we won't go back over the steps required to add a subtitle to your video. For that, we refer you to our article how to add subtitles to your videos with FFmpeg before continuing your reading here.
To change the appearance of the characters, you'll need to rethink a few things. This includes the text file that's supposed to support the details of subtitle content, temporality and appearance.
Here's the text file that served as the database for subtitle information in the previous tutorial:
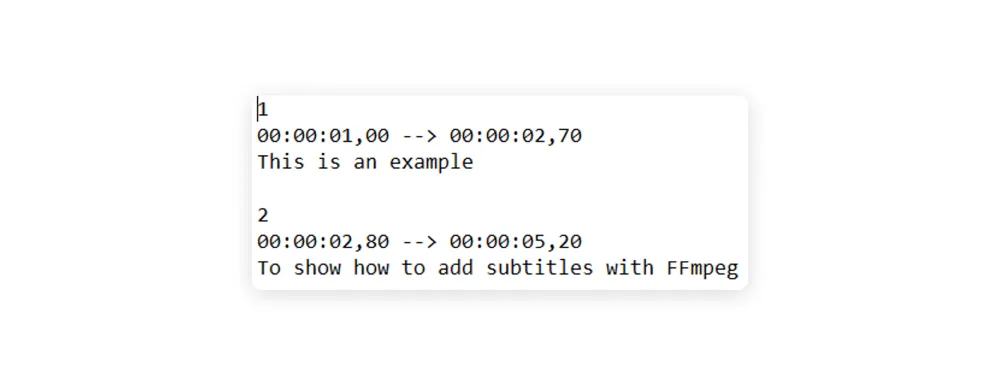
Details of the order of appearance, time of appearance and content of the subtitles are given. However, it doesn't specify any details about the appearance of the subtitles.
To change the appearance of subtitles, we'll modify this text file by adding new attributes.
To find the ARGB code for a color in HEX format, go to this color converter and simply add "&H" in front of the result to add it to your text file listing subtitle data.
Now that we know all the attributes that can be used to modify the appearance of subtitles with FFmpeg, we're going to determine which ones we want to play with to give our subtitles their final appearance:
(*) To choose the font, first make sure it's registered on your computer. Go to the folder where the fonts are stored. In the search bar of your Windows browser, type "C:\Windows\Fonts".
Once you've made your choices, go to the text file containing all the subtitle data. Then modify it so that it looks like our example:
[Script Info]
Title: Default Aegisub file
ScriptType: v4.00+
[V4+ Styles]
Format: Name, Fontname, Fontsize, PrimaryColour, SecondaryColour, OutlineColour, BackColour, Bold, Italic, Alignment
Style: Default,Britannic Bold,24,&H000000,&H00FFFF,&H00000000,&H99000000,-1,0,6
[Events]
Format: Layer, Start, End, Style, Name, MarginL, MarginR, MarginV, Effect, Text
Dialogue: 0,0:00:01.00,0:00:02.70,Default,,0,0,0,,This is an example.
Dialogue: 0,0:00:02.80,0:00:05.20,Default,,0,0,0,,To show how to add subtitles with FFmpeg.
Remember to modify the elements to suit your needs.
Once your text file is complete and you've saved it in the folder where the original video can be found, all that's left to do is open a command prompt. (Under Windows, click on "Windows "+"R". Search for "cmd" and press Enter).
In the command window, access the directory where your video file and subtitle text file are located using the "cd" command.In our case, we'll enter :
cd C:\Users\Utilisateur\Documents\Subtitles
Make sure to replace "User" with your real username.
Once you're in the directory containing the video and subtitle files, you can use the FFmpeg command to add subtitles to the video. Here's the command you can use:
ffmpeg -i YOUR_VIDEO.mp4 -vf "ass=YOUR_TEXT_FILE.txt" -c:a copy -c:v libx264 -crf 23 -preset veryfast NAME_OF_FILE_WITH_SUBTITLES.mp4
In our example, here's the codec we apply at the command prompt:
ffmpeg -i without_subtitles.mp4 -vf "ass=Subtitle_FFmpeg.txt" -c:a copy -c:v libx264 -crf 23 -preset veryfast with_coloured_subtitles.mp4
This is the result we get:
FFmpeg now gives you all the tools you need to create subtitles with the look and feel you want.
However, you may find it difficult to implement. In that case, why not use a video generation API such as Abyssale for a similar result without touching a single line of code and in just a few minutes?
Explore our guides and tutorials to unlock the full potential of Abyssale's spreadsheet feature for scaled content production.